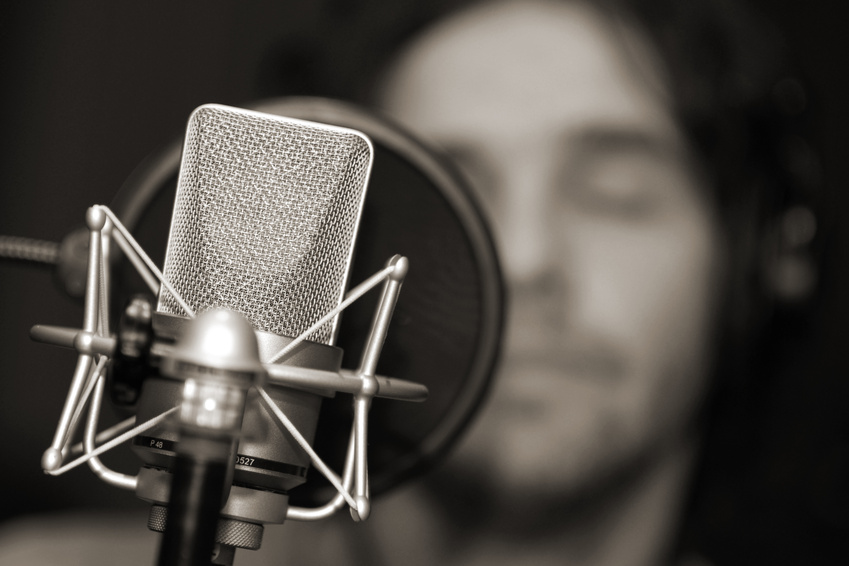
In this Chapter, we will focus on how to record better vocals in your home recording studio.
To record vocals at home, you’ll need a proper DAW or digital audio workstation, a couple of microphones, acoustic treatment and good recording techniques to get started.
Since vocals are going to form the main body of your song, it makes sense to spend time to perfect your recordings…
Let’s go through the recording process step by step…
Step 1: Choose the right dAW
Before you begin recording vocals, the first thing you need is a DAW or digital audio workstation software.
Getting the right DAW that you enjoy working with and learning to master is key to success!
Your DAW software will take the recordings and lay them out on a multi-track where you can edit, combine and process your music into a cohesive song.
As you will be spending most of your time on your DAW, you should definitely take your time to get the right DAW!
Some of the more popular options include: Apple Logic Pro, Avid Pro Tools, Ableton Live, FL Studio, Presonus Studio One, Steinberg Cubase and so on…
If you are a beginner deciding what DAW to use, I recommend these 3 DAWs:
- Pro Tools – for Windows users
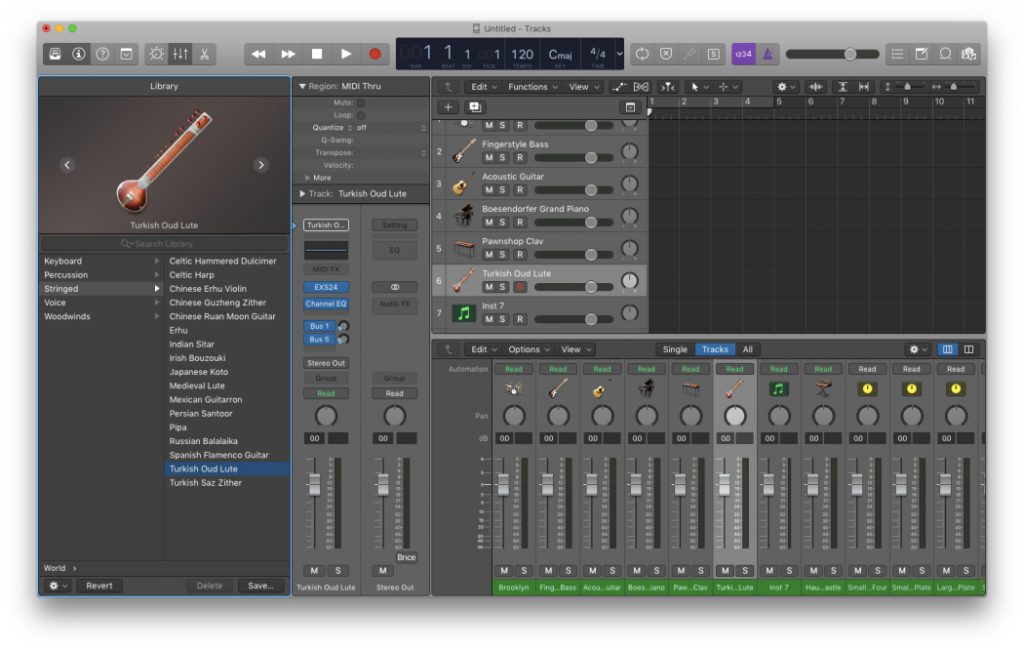
- Logic Pro – for Mac users
- Reaper – budget friendly with more customization options
Why these?
Because these are the two leading DAW software on the market…if you master them, you’ll learn how to use any other DAW out there…
In summary…
For Windows, I recommend going with Pro Tools. You will need an Avid interface or a USB dongle for Pro Tools – however, this is a really popular option with tonnes of tutorials on the net on how to use it.
Pro Tools is the most established DAW on the market at the moment, and is considered the industry leading DAW for professional recording.
For Apple Macbook, I recommend going for Apple Logic Pro. Because this software is made by Apple, you’ll always get automatic updates and will not have any compatibility issues. It’s also designed to be seamless and intuitive to use, which makes them a great choice for Mac users.

If you are looking for a more budget friendly option (that isn’t as expensive as Pro Tools) and has more customization options than other DAWs, go for Reaper. It is a popular DAW for EDM and pop music genres with a tonne of plugins supporting it.
To learn more about the best DAWs to use, check out this post:
Up next…
Step 2: choose your microphones
Apart from your actual vocals, the microphone is the most important recording instrument that plays a critical factor in how your recording will actually turn out.
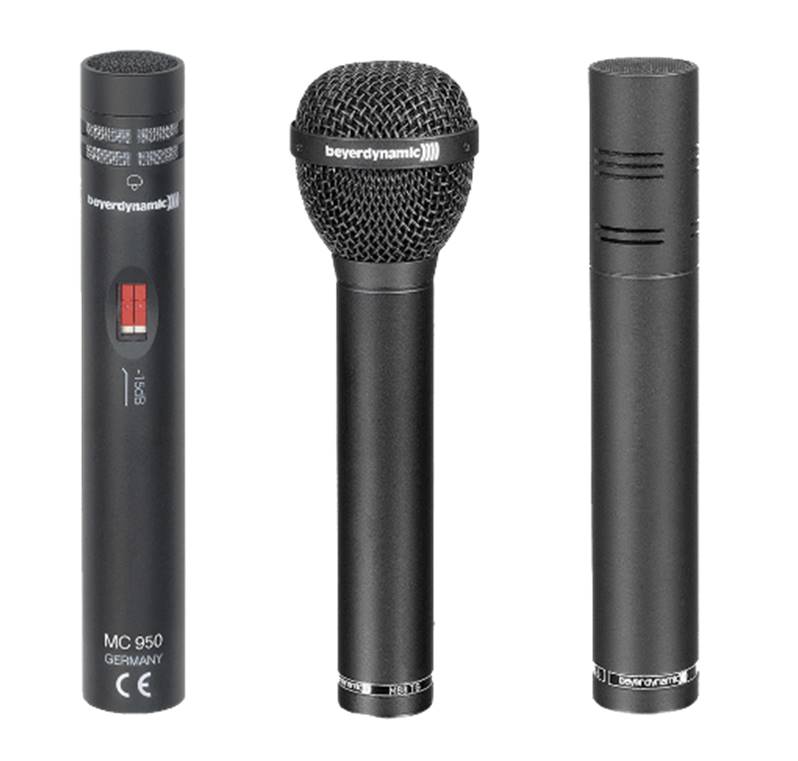
There are generally 3 types of mics that you will be using in your home studio:
- Dynamic mics – for aggressive vocals, screaming, etc.
- Large Diaphragm Condensers – for clean and focused vocals
- Small Diaphragm Condensers – for neutral sounding vocals
So when it comes to choosing mics, you’ll need to ask yourself what type of vocals you’ll be recording.
1. Dynamic Mics (For aggressive, loud vocals)
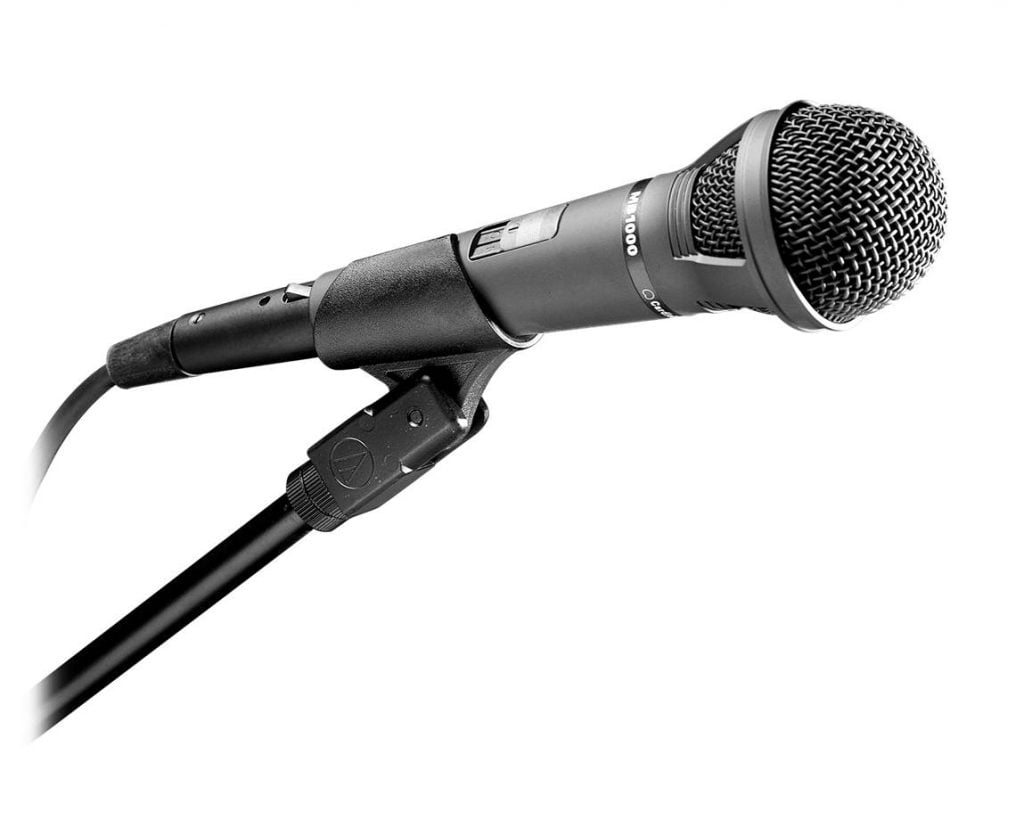
Dynamic mics tend to sound much warmer and more aggressive with less top-frequency response.
This works well if you are recording heavy metal screaming, rock, rap or anything else that sounds forceful and loud.
These type of mics can withstand the force of air pushed through them from your mouth, and are much more suited for aggressive, loud vocals without degrading the sound performance.
2. Large Diaphragm Condenser Mics (For clean and focused vocals)
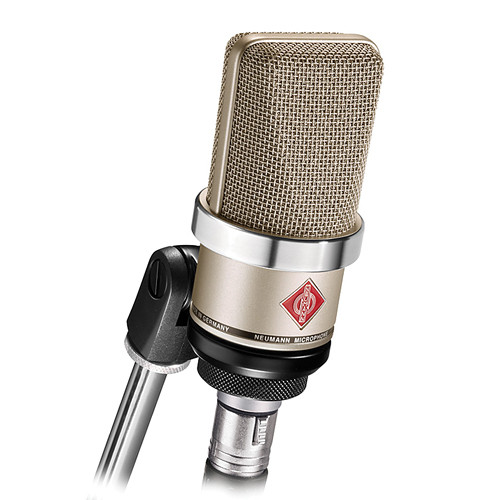
Large diaphragm condensers are designed to sound clean and focused.
They have a balanced frequency response and are more suited to capturing beautiful voices with subtle nuances.
These mics are also great at capturing the depth of your voice, allowing them to accentuate nuance and detail that you want your audience to hear.
Compared to a small diaphragm condenser mic, a large diaphragm condenser is more sensitive due to its larger diameter. They shape the sound in a more pleasing way, and make your vocals sound “larger than life” while maintaining a lush low-frequency response.
3. Small Diaphragm Condenser Mics (for neutral-sounding vocals)
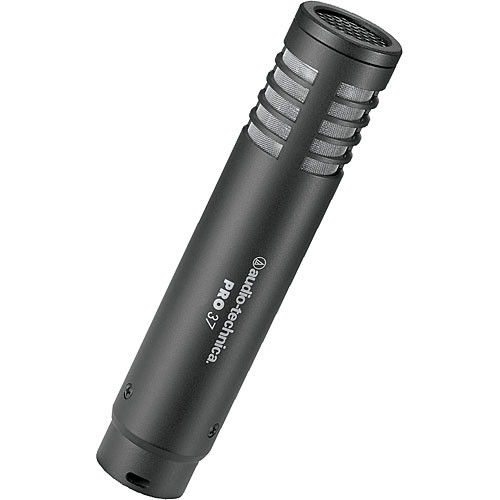
Small diaphragm condenser mics sound bright and airy with lower low-end response.
These type of mics are great if you want to capture pure and natural sound without added flavors.
They are great if you want to get a detailed sound image with neutral sound quality.
That said, small diaphragm mics are typically used for recording piano, acoustic guitar and stringed instruments due to their ability capture detail in the high-frequency range.
They don’t have the ability to make your vocals sound ‘engaging’ or ‘stand out’ – so they are better for just recording instruments rather than vocals.
Use a large diaphragm condenser if you want to put your vocals into the spotlight and make them sound more engaging!
For more on what microphones you should choose, check out this post:
Cardioid vs Omnidirectional Mic?
If you are recording vocals at home, go for a cardioid large diaphragm condenser microphone.
If you don’t know what a ‘cardioid’ microphone is…
Here’s why you should use them to record vocals:
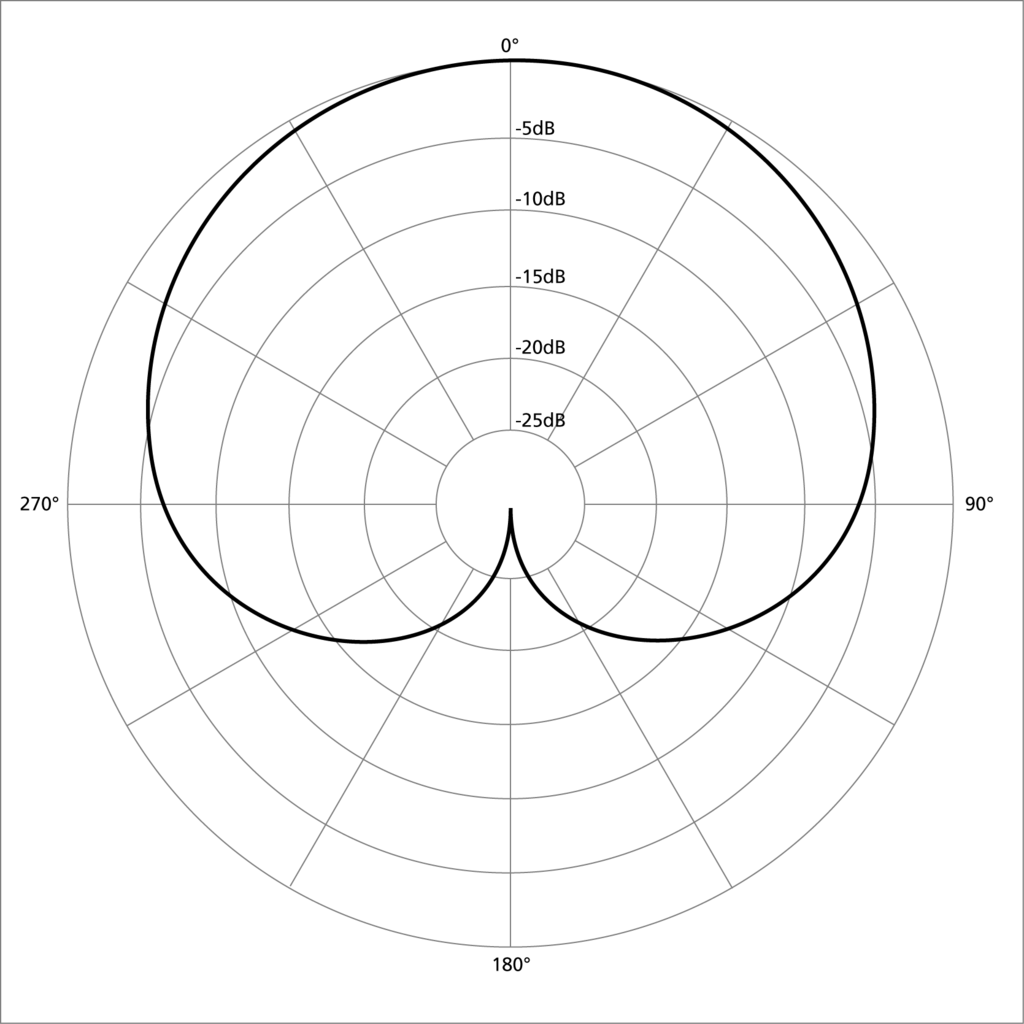
What is a cardioid microphone?
A cardioid mic has a directional polar/pick-up pattern. It is most sensitive to on-axis sounds (where the mic is pointing towards) and rejects sounds coming from the sides and the rear of the mic…
A cardioid mic works especially well for recording vocals at home because…
In every home studio, there will be reflective walls, ceilings and furniture which causes standing sound waves and echoes…
These reflections (indirect sound) will be captured in addition to your vocals, so you can hear room ambient noise and overlays in your actual recording.
Cardioid mics are the preferred option for vocals simply because they record less reflections and low-frequency pick-up due to their directional polar pattern.
In other words, they record the vocals coming from the front and reject reflective off-axis sounds coming from the walls and ceilings, making your vocals sound much clearer.
Here are 2 LDC mics that I recommend:
- AKG Pro C214 – Designed for home musicians, the AKG Pro C214 is a large diaphragm condenser mic with a cardioid polar pattern for accurate vocal pick-up and wide dynamic range
- Samson C01 – A very good budget option featuring a cardioid pickup pattern with excellent off-axis rejection for cleaner vocals
What about omnidirectional mics?
Omnidirectional mics are probably the worst kind of mics you can get for home recording because they are sensitive in a 360 degree polar pattern, picking up virtually ALL sounds and reflections in your room.

That said, omnidirectional mics do have some advantages if you are recording inside a ‘dead’ sounding room or a vocal booth, such as:
- Less tonal variations if the singer changes positions while singing
- A more ‘open’ and ‘natural’ sound signature than a cardioid mic
- Omnidirectional mics don’t have much of a ‘bass-boost’ when recording close up (or known as the ‘proximity effect’), so the song quality doesn’t change if the singer gets closer to the mic
Generally speaking, most home musicians won’t have a fully treated room or a dedicated vocal booth, so the next best option is cardioid large condenser mic (or a hyper-cardioid mic if available).
If you are using a cardioid mic, you should place acoustic treatment behind the vocalist head as this is the area that will affect the sound the most.
Test, test, test…
Having said that….
There’s no such thing as the ‘perfect’ mic…
You’ll have to experiment around with various mics (and mics with different polar patterns and small/large diaphragms) to see what works best for you.
The best thing you can do to improve the sound quality is to match the microphone to the vocalist to get the best tonal quality and sound performance for that particular voice.
This means you will have to keeping testing and testing till you find the right mic that delivers the right type of sound…a task that is easier said than done.
Up next…
Step 3: Resolving Microphone Issues
When you start recording at home, you will have to take care of several issues that may adversely affect the quality of your vocal recordings.
Here are the most common issues recording vocals:
- Reverb and comb filtering
- Plosive sounds
- Sibilance
- Proximity Effect
- Foot Noise
- Poor Room Acoustics
1. Reverb and Comb Filtering
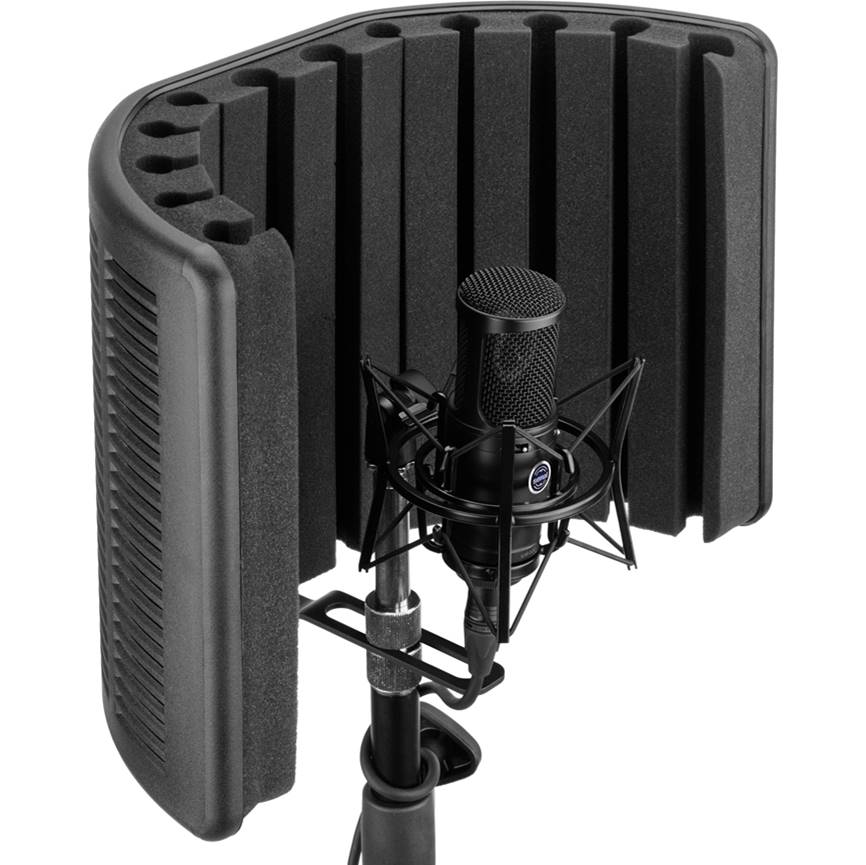
If you don’t have budget for acoustic treatment, one of the most effective options to eliminate reflections is simply to get a reflection filter.
The reflection filter is essentially an acoustic panel that attaches to your microphone stand and surrounds the back of your mic
These filters will not only block out any reflections from the surrounding walls, but also eliminate the creation of reflections from your singing position.
For beginner home studios, a reflection filter is one of the MOST effective acoustic treatment techniques without having to splurge on acoustic panels and bass traps…
Next…
2. Plosive Sounds
Try speaking the following phrase into the mic…
“Peter Piper picked a peck of pickled peppers. A peck of pickled peppers Peter Piper picked”.
You’ll notice that the ‘P’ words produce a P-s burst of air. These type of sounds are called ‘plosives’ and can sound really annoying as they are picked up easily by condenser mics.
These plosive sounds also occur with Ps, Ts and Ks when recording vocals and can sound like a kick drum…
To eliminate these plosive sounds from your recording, we use a pop filter.
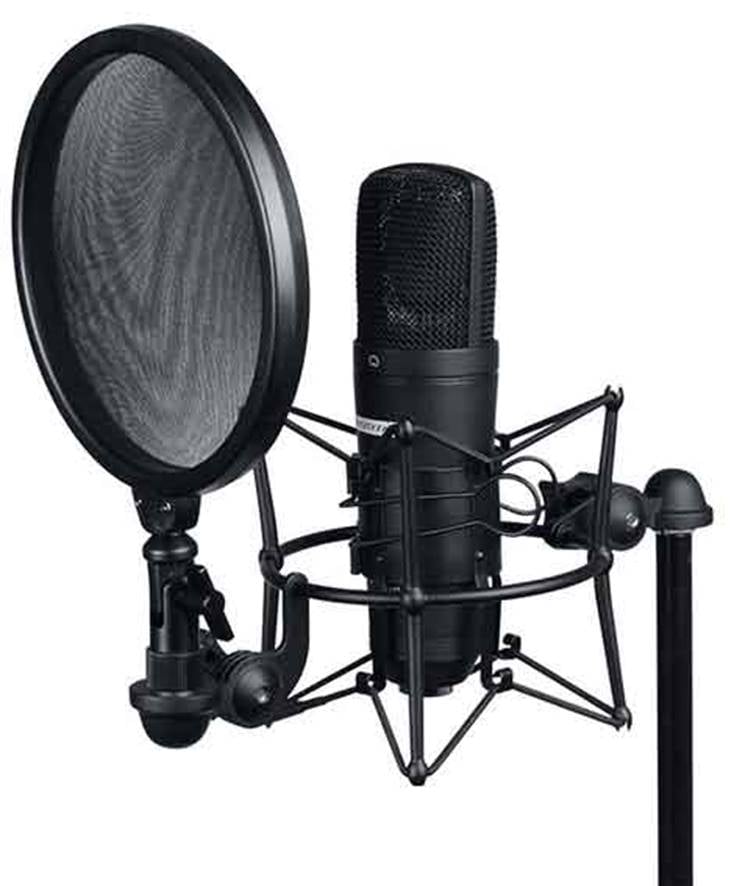
A pop filter is essentially a noise protection filter (usually made of nylon) which can eliminate popping sounds caused by fast-moving air on the microphone. They can also help to keep your condenser mic from being exposed to moisture.
One advantage about using a pop filter is that they can keep the same distance between your mouth and the microphone during recording sessions, so you get consistent sound.
If you are using a handheld mic in your home studio, these type of mics should already come with an integrated pop filter to reduce plosives.
Next…
3. Sibilance
Another consonant we have to deal with are ‘s’ sounds…
Try saying “Sally sells seashells by the seashore” into the microphone…
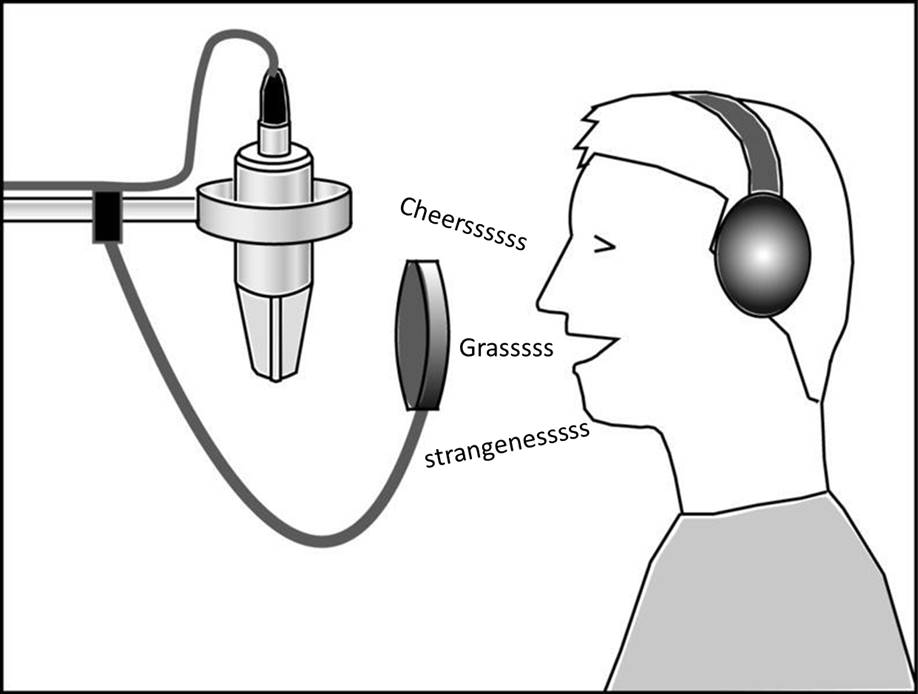
If you listen to the recording, you might notice a large amount of sibilance – which is the overproduction of high frequency hiss at the beginning of an “s” sound.
This hissing sound is actually the natural way we pronounce words starting with ‘s’, but too much of this can cause your recordings to sound distracting.
You have 3 ways to deal with this:
- The ‘simple’ method: distancing yourself from the mic
- The ‘EQ’ method – reducing high frequencies
- The ‘DAW’ method: de-essing
1. Distancing yourself from the mic
The fastest and easiest method to reduce sibilance is to stand away from the microphone. The ideal position is usually around 8 inches away…
Since the sounds with sibilance occurs are produced when blowing air out of your mouth, the distance will affect the impact of that moving air.
For even more reduction, consider using a pop filter hallway in between the microphone and the flow of air.
2. EQ-ing
The first option within your DAW is to adjust the EQ settings. By reducing the frequencies in the 5K to 10K range, you can reduce the amount of sibilance in your recordings.
That being said, a reduction in volume at this range may inevitably harm the rest of your recording…
A more sophisticated approach would be…
3. De-essing
De-essing is simply the process of reducing sibilance in recorded vocal tracks using software or a DAW plugin…
The good news is that every major DAW now comes with at least a de-esser plugin, including Pro Tools.
By compressing that frequency range, this leaves the rest of the recording intact while reducing the amount of sibilance present in the recording.
De-essers can be placed either before the main vocal compressor to reduce the high frequencies before compression or placed later in a chain. You can generally position a de-esser plugin anywhere within the plugin chain as long as you get transparent recording results.
That said, sometimes this approach doesn’t yield the best results and you might need a dedicated de-essing plugin for your recordings.
Some good ones include Sound Theory Gullfoss and Oeksound soothe.
Next…
4. Proximity effect
If you are using a directional cardioid mic, you might have noticed a slight boost in low-frequencies during recording…
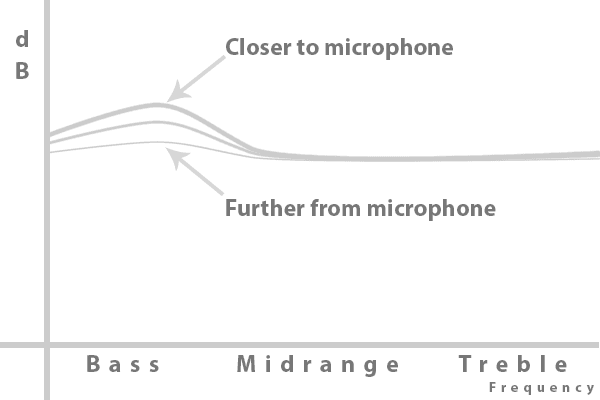
This is known as the proximity effect.
The proximity effect occurs when low-frequencies are boosted in a recording due to the closeness of the mic. Essentially, the closer the mic is to the source, the more exaggerated the bass frequencies.
Sometimes this may be a good thing – if you are recording bass or rhythm guitar, the proximity effect can give you a full and well-rounded sound.
If you are looking to get an accurate representation of a sound, especially vocals, ideally you’d want to cut out the low-end frequencies.
This is especially true if you are recording vocals or a violin – sudden exaggerated lows will not be desired.
There are 3 ways to address this:
- Get a pop filter – often this method works by adding a filter layer between the mic and the vocalist to remove bass pick-up
- Increase distance to mic – by increasing the distance away from the mic, we reduce the proximity effect
- Use omnidirectional mics – these mics don’t pick up proximity effect, but will record everything around you in the room. For these reason, you shouldn’t be using omnidirectional mics to record vocals.
Next…
5. Foot noise
One of the things to look out for when recording at home is foot noise…
Foot noise can occur depending on the type of flooring you have…
If you move a lot around your microphone workstation during recording sessions, your microphones might inevitably pick up these low-end rumbles.
You certainly don’t want to include any of that in your audio recording!
To solve this problem, we need to add a microphone shock mount.
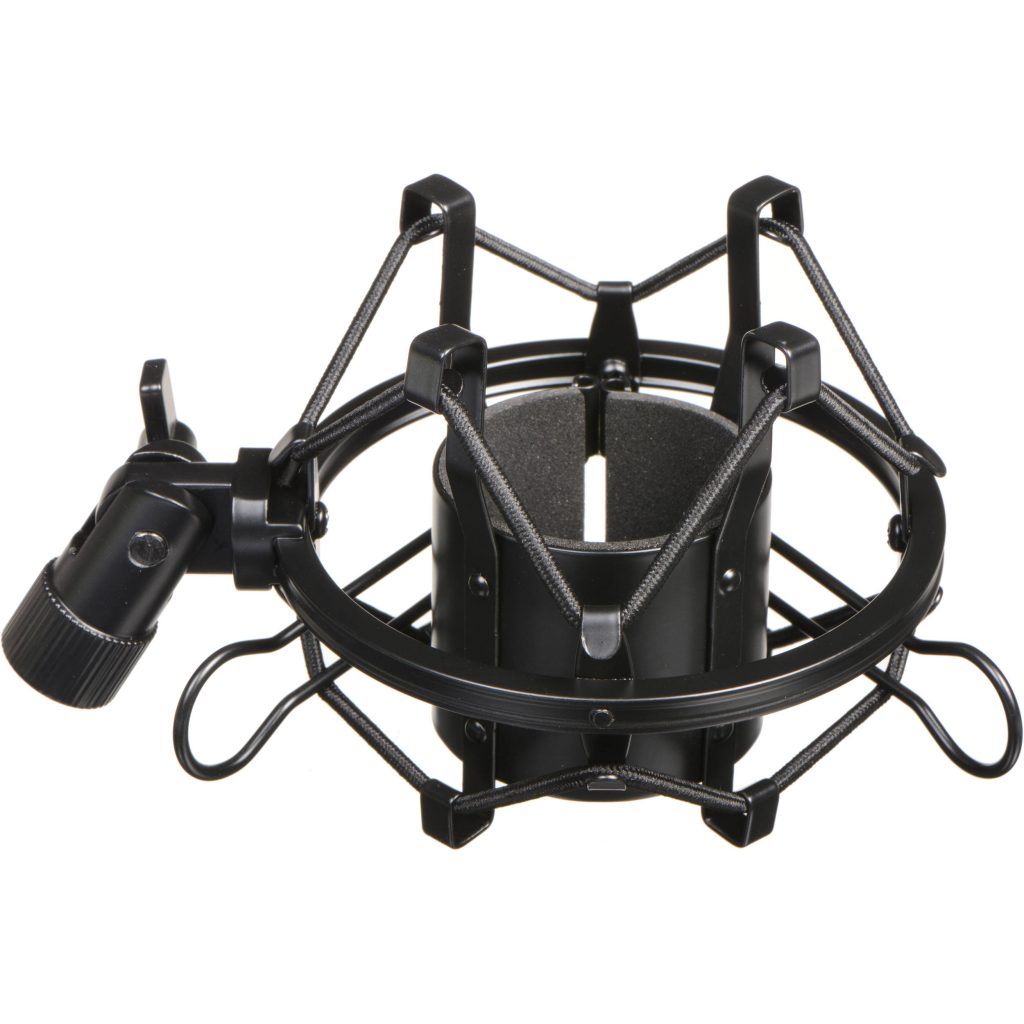
A shock mount is built in such a way that the microphone is ‘shielded’ from contact sounds by keeping it suspended from the mic stand.
All you have to do is mount the shock mount onto the mic stand and place the microphone inside the shock mount and fasten the mic.
That said, shock mounts are not universally designed to accommodate all microphone models. You need to find a shock mount that works best with a particular mic model or series.
Next…
6. Poor room acoustics
Whether you are using omnidirectional, cardioid or super-cardioid mics, all of them have three-dimensional ‘pick-up’ polarity patterns.
This means that your mic will inevitably pick up surrounding noise and reflections from your walls and ceilings…
Even if you are room is quiet and there is no surrounding noise, there will be sound waves that bounce off the walls back to the microphone, so you’ll get the sound of your room overlaid with your direct vocals.
While you might try to edit out these surrounding noises later on, your recording software won’t be able to hide all the details caused by room reflections.
To resolve most of these issues, you’ll need to apply acoustic treatment to your home studio.
To learn more on that, check out this post:
Up next…
Step 4: Microphone placement
When recording vocals, where you place the microphone inside your room will influence the sound quality…
Some things to consider
When thinking about where you should place the microphone in your room, bear in mind that:
- The back of a cardioid mic is the least sensitive to sound – if there are any reflective surfaces in the room that emits sound or reflects background noise, point the mic in the opposite direction
- Bass frequencies build-up at the corners of the room – pointing the mic in that direction will likely pick up low frequencies
- Mics should be placed away from reflective surfaces, and close to absorbent ones
Here are some general guidelines…
1. Position the microphone as far away from walls and surfaces
By doing this, you can avoid capturing any standing waves or early reflections that may be captured by your mic.
If you are recording inside a vocal booth, apply as much dampening material to the walls and sides to prevent any echoes or reflections.
One trick to minimize reflections (if you don’t have the budget for acoustic treatment) is to hang blankets behind the vocalist – you can get those cheap blankets as a decent sound absorbent material.
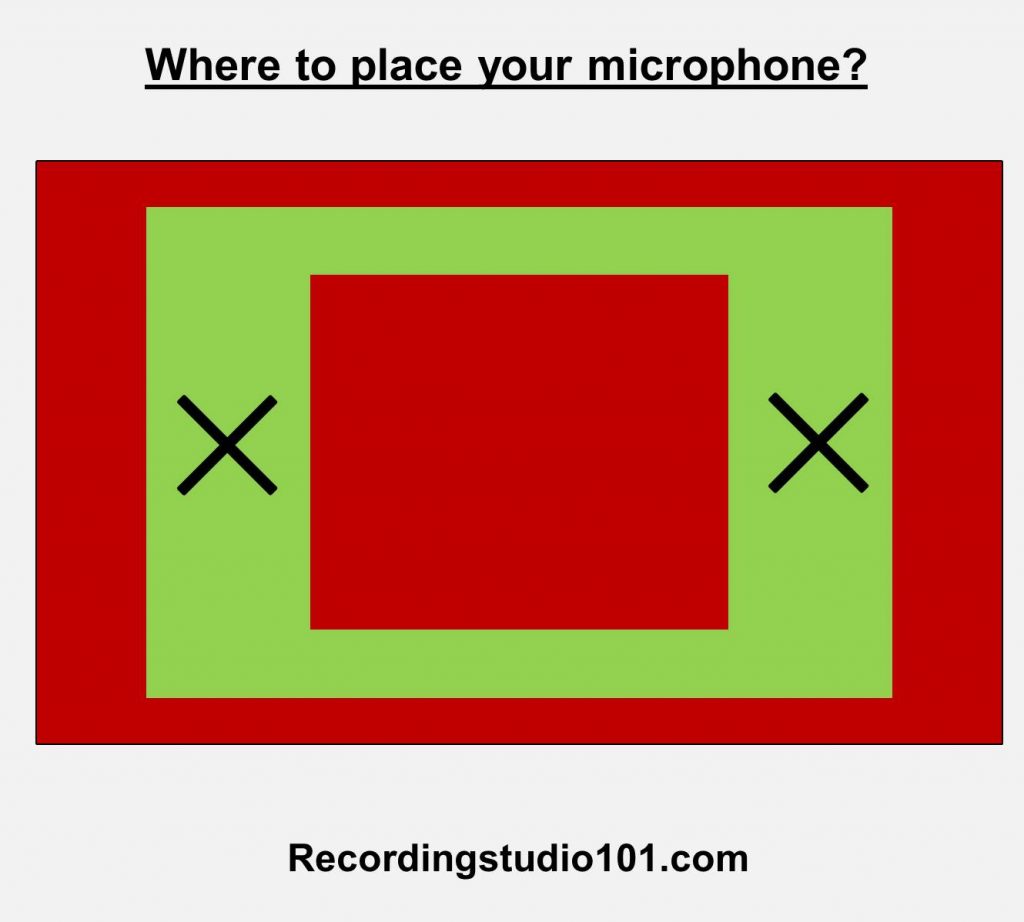
2. Don’t position your mic in the center of the room
The center of the room is where the build-up of standing waves and reflections tend to accumulate.
- Try to position your mic away from the center of the room
- Try not to place it near the wall or at the corners
See the diagram below as an example (where ‘x’ marks the spot where you should ideally place your microphone):
Up next…
Step 5: Microphone techniques
By taking advantage of the proximity effect and mic polar patterns, you can record better vocals by adjusting the axis direction and distance between yourself and the mic.
Here are some common microphone techniques that you can use to improve vocal recordings.
1. Frontal Close Placement
This is the most common method for recording vocals is the direct on axis close proximity placement technique.
The microphone is positioned about 4 inches from the mouth directly on axis, or angled slightly upwards depending on the proximity warmth boost that you want.
In effect, the microphone is positioned right “in front of your face”…
This has a number of advantages, such as:
- Intimate sound
- Good articulation of consonants
- Leading sound with proximity warmth
Some disadvantages of this technique include:
- Plosive sounds (popping sounds)
- Sibilance noise (you may need to do de-essing)
- Lack of depth and natural tone
If you are using the frontal close placement method or close miking, a pop filter is always recommended.
2. Frontal Loose Placement
In a frontal loose placement, the microphone is placed loosely in front of the mouth.
By doing this, you can preserve the natural room tone and get a good balance between the voice and the room with a nice reverberant quality.
The difficulty is that this technique doesn’t work at all with super-cardioid microphones due to their highly directional polar pattern…
If you have a microphone with smooth off-axis response, this placement technique can produce acoustic effects that can add natural depth and narration to parts of the song where you don’t want the artist to sound “in your face”.
Advantages of this technique:
- Less plosive sounds and sibilance
- Less low-frequency pick-up (less proximity effect)
- Natural room timbre
Disadvantages
- Requires off-axis mic pickup
- Doesn’t work with hyper-cardioid mics
3. Top Head Placement
Sometimes the frontal close or frontal loose placement doesn’t produce the desired result…
In a top-head placement, the microphone is positioned from the nasal area up, making it look “high on the head”. The direct axis of the microphone should be pointed at the nasal cavity just below the eyebrow.
If you microphone has very clear off-axis response, you may discover new audio patterns that improve the overall quality of your recording.
Advantages:
- Less proximity effect, sibilance
- Captures room tonality and nuance
Disadvantages
- Can make your recordings sound distant if employed incorrectly
- Requires a mic with extremely clear off-axis response
4.Lower Chest Placement
The lower chest placement, or diaphragmatic placement, is done by pointing the microphone at the chest cavity.
To do this, place the mic around 12 inches away from the mouth around the center of the chest cavity. You can try to angle the microphone upwards 45 degrees while rehearsing.
This position yields natural diaphragmatic warmth that sounds different from the “in your face” song that most sound engineers produce.
One key advantage about this placement is that it effectively reduces ‘p’ and ‘s’ sounds, so if your vocalist has very strong plosives or sounds very nasal, consider using this method to reduce consonant pickups.
And that’s it!