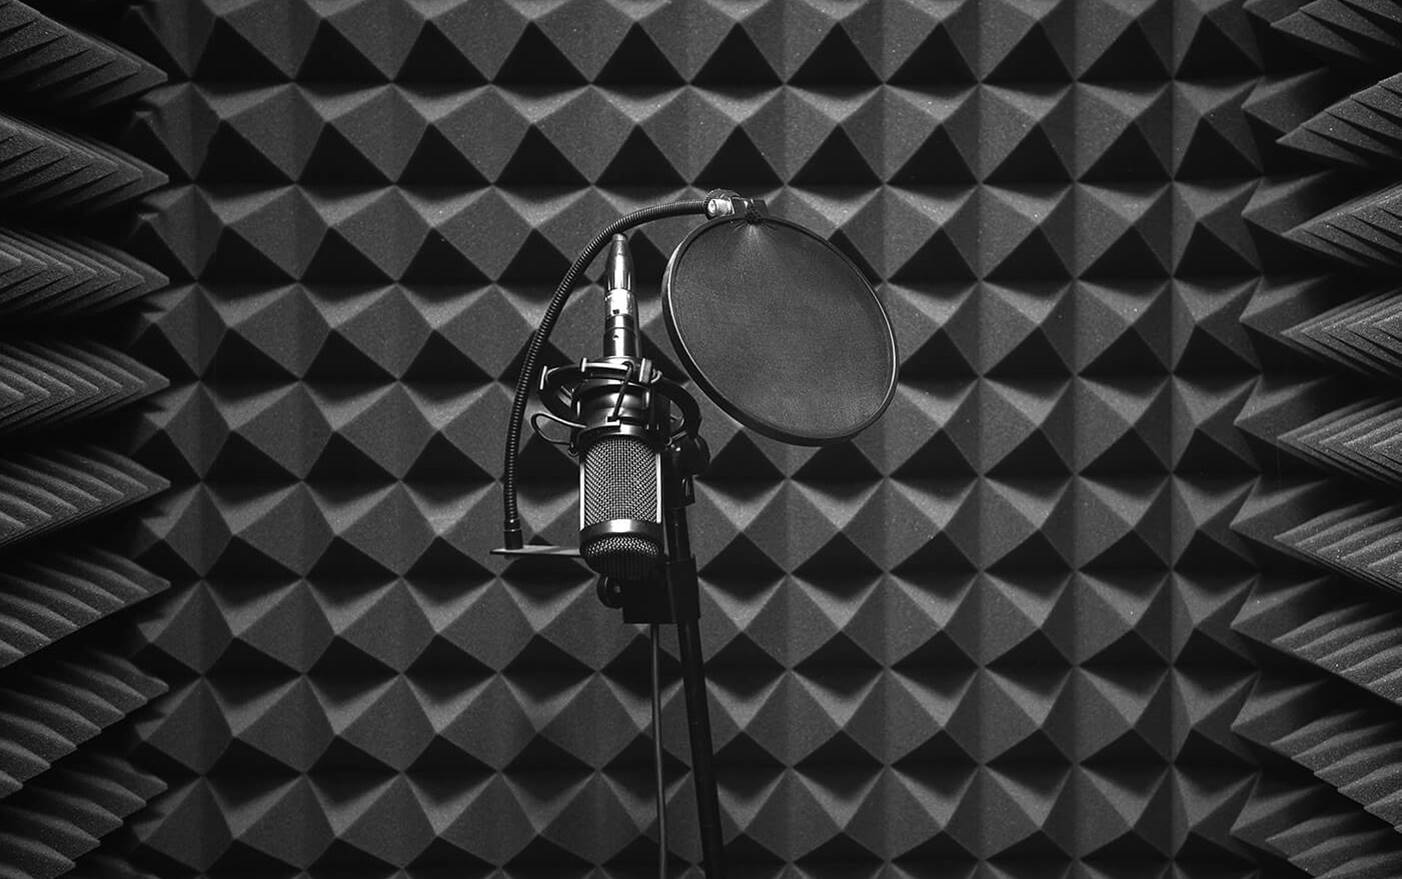
In this Chapter, we are going to take a look at the steps to soundproof your room for recordings and music production.
Soundproofing is by far one of the most complex and costly things you can do, and honestly not many musicians will have the time and budget to do this.
However when done correctly, soundproofing can help to keep background sounds from accidently being recorded and prevent your neighbours from going crazy.
What is soundproofing?
Soundproofing essentially keeps outside noises from entering your room and preventing inside sounds from leaving your room.
By soundproofing your room, you can:
- Block outside noises from messing with your audio recordings
- Prevent inside sounds from disturbing your neighbours
When a room is perfectly soundproofed, outside noises such as footsteps, voices and weather are blocked from entering your room, and inside noises from your instruments do not leak outside.
With that said, beginners often confuse ‘soundproofing’ with ‘acoustic treatment’. Here is the key difference…
Soundproofing vs Acoustic Treatment
The difference between soundproofing and acoustic treatment is:
- Soundproofing involves making your room quieter by blocking external noise (i.e., by creating double walls and sealing air gaps)
- Acoustic treatment involves treating sound reflections and bass to make your recordings sound better. (i.e., through a combination of absorption and diffusion by applying acoustic panels, bass traps and diffusers in the room)
When we talk about soundproofing, we mean keeping sounds from getting into or out of a room. This is not an easy thing to do, and can be fairly expensive and labour intensive depending on your room setup.
Soundproofing often involves structural changes to your room by adding mass and damping the sound around the walls and ceilings. Often times this will mean building a thicker wall or applying wall padding.
Acoustic treatment, by contrast, deals with how sound reacts within a certain room. You don’t want sound waves bouncing back and forth between parallel walls around the room because this can mess up your audio recordings.
Applying acoustic treatment to your room involves the use of acoustic panels, bass traps and diffusers to absorb and diffuse sound.
Now the big question…
Should you soundproof your room?
Since soundproofing your room often involves structural changes to your walls and ceilings, it’s not something that a home recordist will generally deal with unless they plan on renovating their room from scratch.
Most beginners think that soundproofing a room essentially means plastering the room with acoustic panels or bass traps. Unfortunately, these are misguided conceptions that won’t work to keep external noises from entering your room.
How would plastering your room with acoustic panels keep the sound from a truck passing by from entering the room?
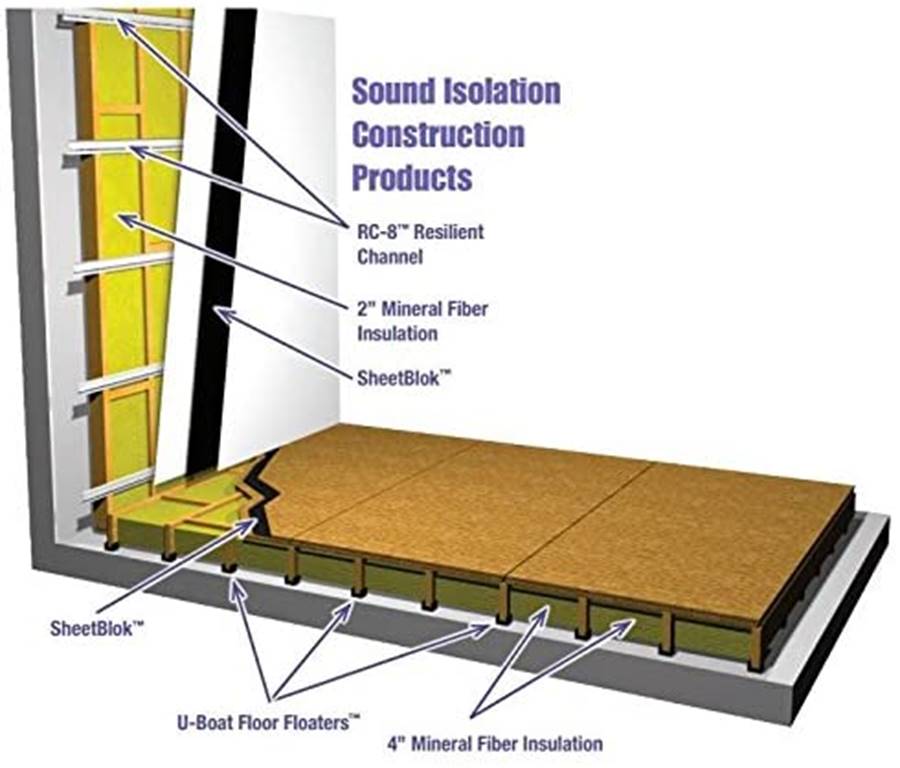
The reality is that soundproofing a room is going to require extensive renovations such as installing double walls, floating floors an decoupling structures. This involves adding rigid fiberglass insulation and sheetblock, isolating the CPU and AC units, and much more…
As a professional, it is a must to record in a quiet, noiseless room.
However, if you are recording solo in your bedroom, it might be a good idea to skip this altogether or just record at a time when there is least outside noises (such as footsteps, cars, pets).
One good alternative to soundproofing entire room is to record in the basement. Basement studios generally have an advantage due to the fact that the entire room is entombed in the earth, which helps to prevent noise from entering through the walls.
That said, basement studios still suffer from sounds leaking through the ceiling from the rooms above.
However, if you need to quieten the external noise leaking into your room, there are a couple of ways to soundproof your entire room.
The 4 Steps to soundproof your room
There are 4 main ways to soundproof your room, which include:
- Adding Dense Mass
- Damping Vibrations
- Decoupling
- Closing air gaps
Note that you shouldn’t leave out any of the above steps – there is no such thing as a “half soundproofed room” – a room is either soundproof or it is not!
Let’s go through each step one by one…
Step 1: Adding Dense Mass
Generally speaking, the thicker the wall, the less sound passes through it…
This is because sound requires more energy to pass through thicker and denser walls, such as concrete or hard flooring.
One common method to prevent sound from entering the room is to add dense mass to the existing walls, ceilings and floors to make them thicker…
There are two things that you can apply to the walls, ceilings and floors to reduce external noise:
- Mass loaded vinyl (MLV) a.k.a sheetblock
- Fiberglass core panels (for example, the Owens Corning 703 panels)
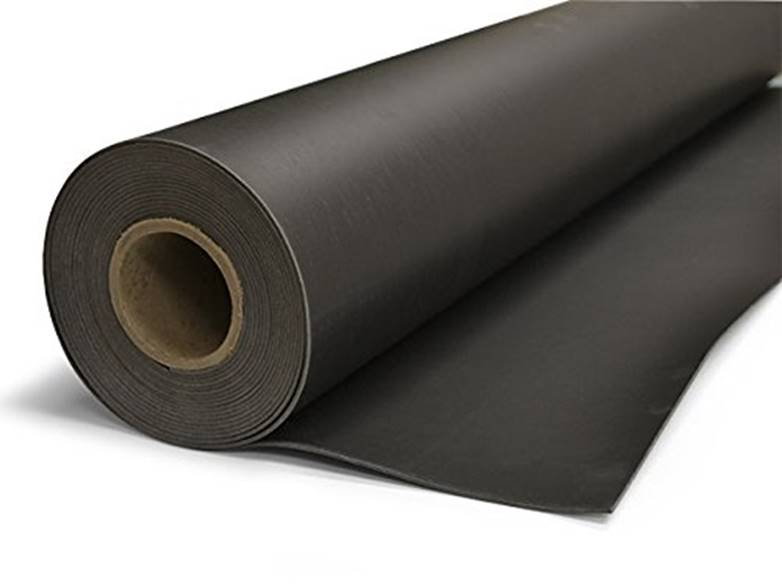
Mass loaded vinyl or sheetblock can be applied directly to the walls of your room. This type of dense material is made specifically for noise reduction and can reduce up to 30dB of sound when applied correctly.
MLV usually comes in four-foot rolls which can be put on the walls to reduce the transmission of sound through these surfaces.
The main culprit here is the bass. While it is fairy easy to eliminate high-frequency sounds, bass can still travel through walls (even thicker concrete walls).
You don’t want bass to pass through the walls or vibrate on the walls which can create a ‘thumping’ effect during audio recordings.
The other effective alternative to MLV is rigid fiberglass.
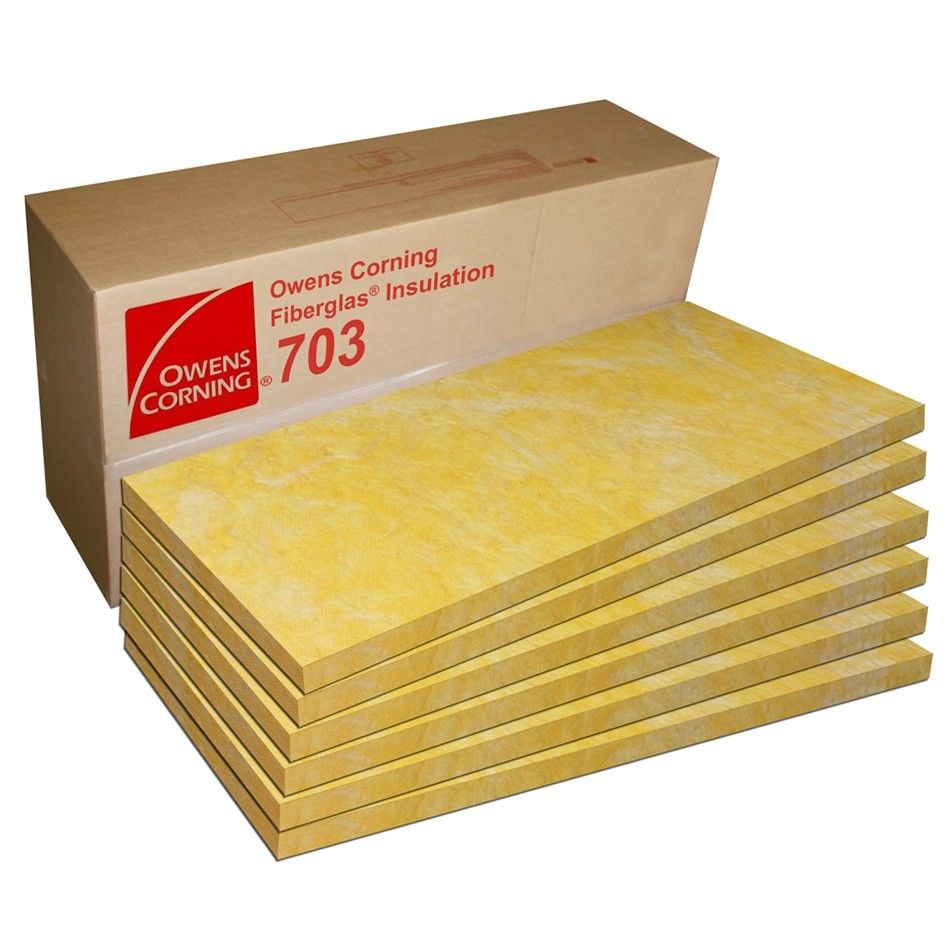
Rigid fiberglass is useful if you need help with reducing bass transmission and external vibrations, although cost-wise these are more expensive than MLV.
If you have a large room with space to sacrifice, the most effective option is to add another layer of drywall and Sheetblock spaced away from the existing wall to create an air gap (essentially a second wall in conjunction with your existing wall). This is creates an impressive sound isolating effect and can effectively block out external noises including bass.
That said, you might require professional help to build a second wall – effectively building a room within a room.
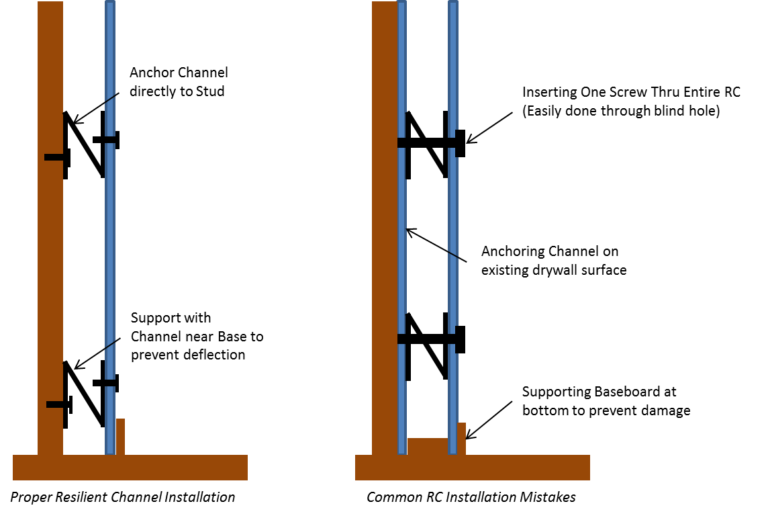
One final point: soundproofing your ceiling can be a more difficult task than walls and floors. Hanging drywall on the walls is tough enough, and can be even more so on the entire ceiling.
In theory, you can create a separate MLV layer and hang that from your ceiling using the Auralex RC8 Resilient Channels.
A more practical option, depending on your situation, is to apply a layer of MLV to the floor above your ceiling instead to reduce top-vibrations.
Up next…
Step 2: Damping Vibrations
No matter how much sheetblock or rigid fiberglass you add to your walls and floors, there will still be bass vibrations that leak through along the frame of the room or along the drywall.
The bass can also creep into your microphone recordings, which is why we use shock-mounts to suspend your microphone in the air to reduce bass pickup.
The best way to prevent bass from traveling through the walls of the room is to use a damping compound when building the frames of the walls and the drywall.
Currently, Green Glue is an effective option not only to hold material together but to dissipate lower bass vibrations.

There are two ways to use Green Glue:
- Applying it in between your drywall and the wooden or concrete frame
- Applying it between two pieces of drywall and treating them as one
Although you can use Green Glue for the drywalls, it can also be used with MDF or plywood to prevent bass transmission.
This allows you to easily create a DIY sound barrier for your studio that can be added to any area of your room including the walls and ceilings.
A visual illustration:
The goal here is essentially to reduce as much vibrations as possible with damping, but there is another method to reduce vibrations from reaching your walls and microphone…
Up next…
Step 3: Decoupling
When two structures touch, we may use dampening glue to suck up the vibrations. However, the better approach is to make these structures not touch at all.
Decoupling is simply the process of doing this – by isolating your wall surfaces and equipment from the outer boundaries of your room to reduce sound transmission.
This is done either by introducing air gaps or applying isolation padding (such as dense rubber) in between structures. The material absorbs the vibrations and blocks the transfer of sound.
Some common methods to decouple structures include:
- Building double walls
- Creating a floating floor
- Separating structural layers
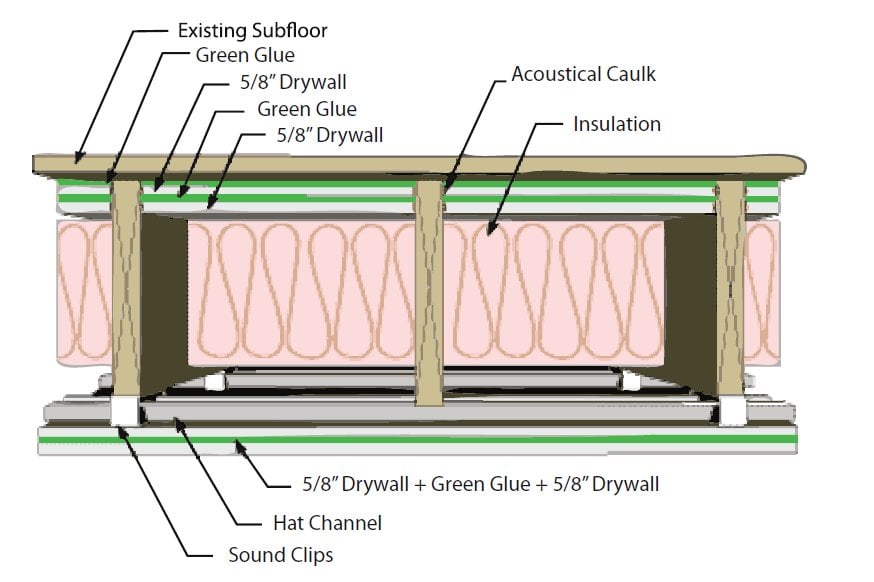
Building double walls
A double wall is essentially creating two walls with an air gap in between them to block sound (i.e., what you want to achieve is a room in a room).
This separation can be done through the use of resilient channels and resilient sound clips to create a “floating” wall or ceiling.
For example…
From inside the room, we can also use these resilient channels and sound clips to create a second floating wall that “floats” off the first wall. This can be drywall or a layer of fiberglass sandwiched in between two pieces of drywall.
The idea of a double wall is that the secondary wall is separated by a layer of air from the primary wall, which greatly reduces vibrations and restrictions the transfer of sound from outer walls into your room.
You can also apply another layer of sheetblock to the outer wall to improve the density of the wall and the overall soundproofing.
Creating a floating wall
The same idea of a double wall applies to a floating floor as well…
Since the floor gives off more vibrations than any other surface, you can build a floating floor using rubber isolators such as Auralex U-Boat Floor Floaters.
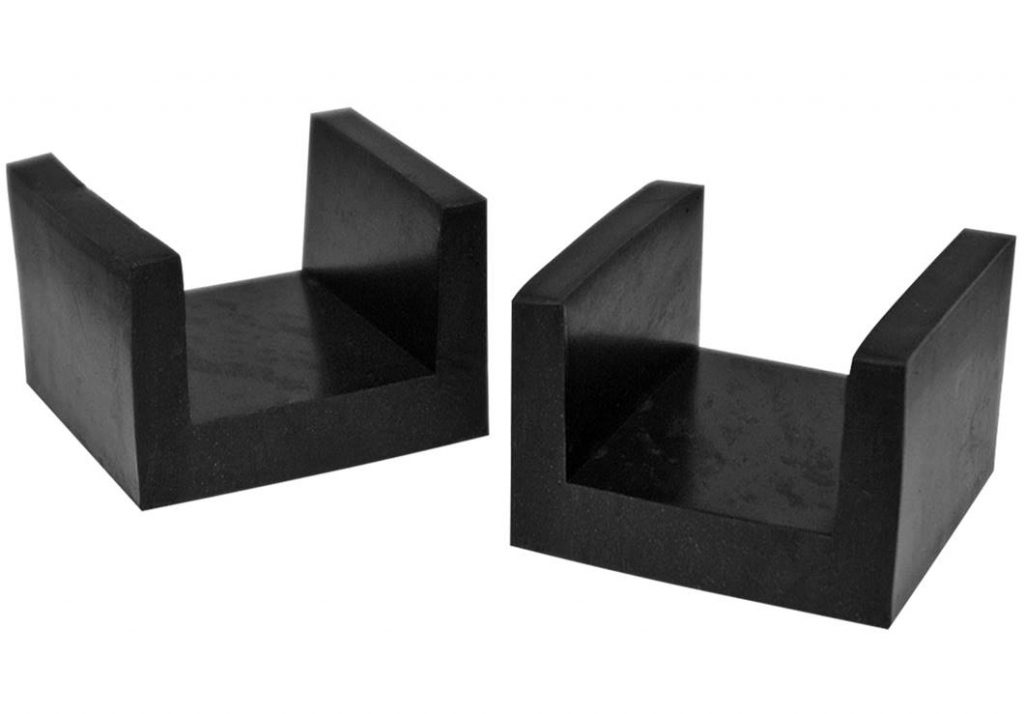
This allows you to build another floor on top of your primary floor to create an air gap that minimizes sound transmission.
For best effects, combine the U-Boat Floor Floaters with acoustic caulk like Green Glue and mass-loaded vinyl sheetblock. This helps to isolate any type of resonance that develops on the floor surface and prevents accidental pickup by the mic.
Here is a typical example of how this looks like:
Up next…
Step 4: Closing Air Gaps
The final part of soundproofing your room is to close any air gaps in your room that might act as a passageway for sound to travel through.
These “air gaps” might undermine your soundproofing by letting in external noise.
Common areas include:
- Wooden windows
- Pipes
- Air-conditioning vents
- Door frames
The three common methods to plug these air gaps are:
- Sealing the gaps with foam gaskets – these seal up air gaps in your window and doors
- Installing a door sweep – this is usually a piece of rubber that fills the gap underneath your door to prevent noise from coming in
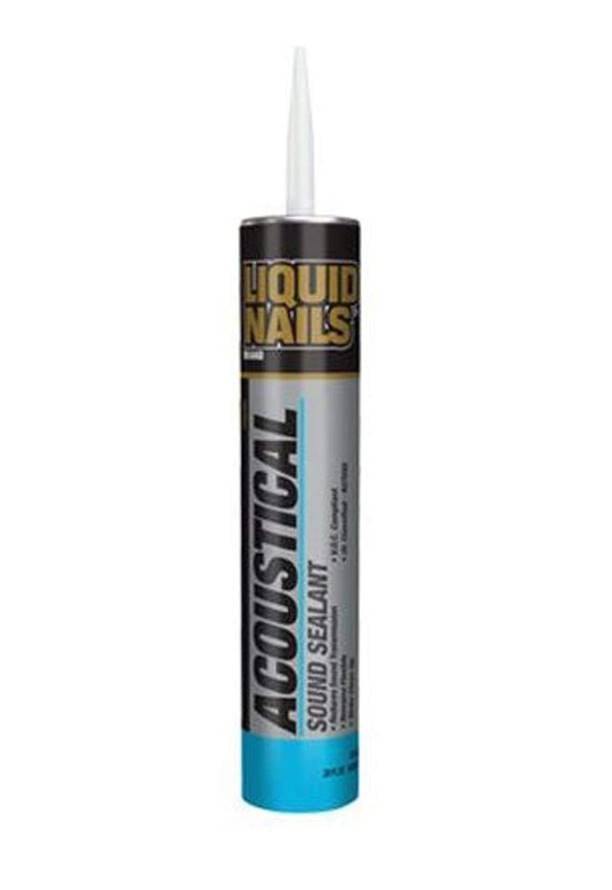
- Acoustical Caulk – this can be used to seal up cracks in your room or any small holes
Acoustical caulk is designed to remain soft and flexible, so no gaps will open up over time. This is not the same material as the glue, but performs the same task of dissipating vibrations.
You have two good options here:
You might also consider plugging any gaps in your room and look out for areas that you might not have considered before, and seal them with appropriately-sized foam gaskets.
If you are soundproofing your room, then you would definitely want to apply acoustic treatment as well. This helps you to reduce standing waves, reflections and bass that may interfere with your recordings and craft out a more natural sound signature.
For more on acoustic treatment, check out this post:
Dealing with other sources of noise
Apart from the walls, ceilings and floors, sound can also emanate from equipment within the room, such as:
- Computer fan noise
- Air Conditioner noise
- Window noise
1. Computer fan noises
Computer fan noise is one of the biggest culprits of noise production inside the room, so the first order of business is to minimize or completely eliminate the noise coming from the fan that might be picked up by the microphone.
Some computers have louder fans and hard drives, and these noises can become a nuisance when you are listening to quieter tracks or if you are recording with a microphone in the room.
While Pro studios solve this issue by keeping all the noisy equipment in a separate room, this isn’t always possible for the home recordist doing everything in a single room (or bedroom).
To reduce fan noise, you basically have four options:
- Upgrade the fans in your machine to reduce noise
- Place the computer far away from your microphone
- Place the computer inside a designed enclosure (for example, Acoustiproducts and Custom Consoles)
- Use multiple rooms
These are your options. Generally the easier method is simply to place your computer away from your recording equipment and point the microphone away from the computer.
While this might work if you are recording solo, it may be a problem if you are recording with the whole band inside the room.
In that case, consider using a cardioid microphone to reduce the amount of surrounding pickup while doing your recordings.
Ideally, you would want to use some kind of absorptive material around your computer fan to absorb the high-frequency sound coming from the fan. If you choose this method, be sure not to allow your computer to overheat as the acoustic material may block the flow of air.
Using a dedicated isolation box which you can place your computer in is also a good option, and it works in a similar way as a reflection filter for a microphone. The only thing to consider here is the amount of ventilation to prevent your computer from overheating.
For this purpose, a wooden cabinet or some sort of enclosure with proper ventilation and space for your cables can be a good choice.
Depending on your situation, you might want to consider using multiple rooms to keep computer noise far away from your mics.
This can be as simple as using a cable extender that allows you to extend cables to a different room and use a wireless DAW remote, but in practice controlling your computer in a separate room can get quite difficult…
Your best option is to experiment around and see what works best for you.
2. Air Conditioner Noise
This is a big one, and is by far one of the most unpredictable sources of noise.
The noise from your A/C has the potential to ruin your best takes, and this is a problem that you need to deal with.
Of course, the simplest option is simply to turn off the A/C during recording sessions, but this can make long recording sessions quite unbearable, especially if you have a few people in your room at any one time.
There are three ways that you can use to deal with your A/C, including:
- For Window ACs, make sure the window is air-tight (consider double pane windows if your AC gets pretty loud)
- Remove the air vents – these may be shaking when the unit turns on, and you don’t necessarily need them
- HVAC enclosures – these are essentially sound dampeners built around your AC unit to absorb the sound of the flow of air
You can build these HVAC enclosures using plywood and acoustic foam. The HVAC enclosure can replace the segment of your ductwork closest to the vent.
These can also be built around window A/C units and portable A/C units as well, depending on your situation.
3. Window Noise
Your room will likely have windows. To reduce the amount of external noise coming through via your window, consider installing double pane windows to stop sound transmission.
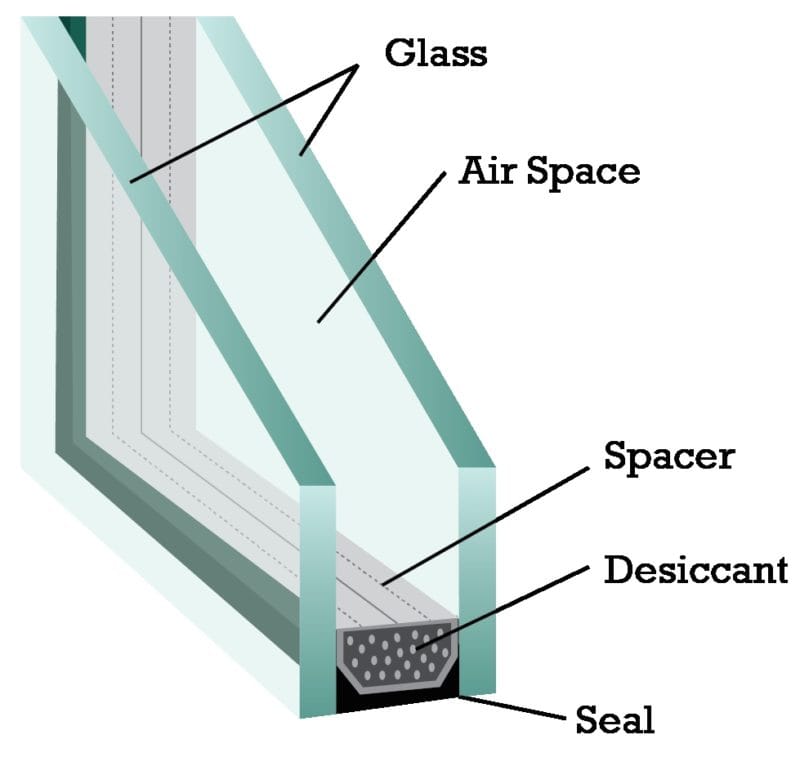
Because double pane windows have an air gap in between, this reduces the amount of bass and external sounds coming into the room.
The downside to installing double pane windows is that these type of materials will reflect high frequencies back at you…
To minimize the high-frequencies reflecting off these surfaces, consider adding acoustic curtains over them to fix the reflections.
Other considerations for sound isolation
Apart from the floor, walls and ceiling of your room, there are numerous other things to consider to improve the sonic isolation within your room.
Some of these include:
- Using an acoustic sealant to seal the wall/floor intersections and electrical outlets
- Use double-pane, laminated glass windows to reduce external sound transmission
- Use sound-rated doors (one way is to have two doors back-to-back separated by a smaller space)
- Use doors with more solid mass (for example, solid-core doors)
- Upgrading to the quietest HVAC system available
As you can see from the above, the task of completely soundproofing your room isn’t something that can be done overnight.
The only true way to soundproof your room is to literally create a room within a room, with acoustic decoupling and double walls/ceiling/flooring.
A word of caution before you do this…
Soundproofing your room is definitely not something that you can do halfway and then give up – there isn’t such a thing as a partially soundproof room – so if you choose to embark on soundproofing your room, consider if you really need it in the first place and have the necessary budget and resources.
Often times this improves complex renovations to create the double wall/ceiling and floating floor, and very often these changes take time to complete and are expensive.
Avoid noise reduction plugins!
While there are some noise reduction plugins claim to offer to reduce noise in the mix, this is often bad mixing advice and is usually undoable.
Noise reduction plugins are no substitute to actually recording good sound…
This is because noise reduction plugins may degrade the sound of your entire recording, causing the audio quality to suffer.
The better strategy is to eliminate these background noises during the ACTUAL recording session and not AFTER the recording is completed.
By applying the methods discussed above, you can effectively soundproof your room and prevent external noise from coming in.
And that’s it!