In this chapter we will cover the basics of acoustic treatment and how to treat your home studio for recording and mixing.
It’s not an understatement that majority of recording issues are caused by poor acoustic treatment.
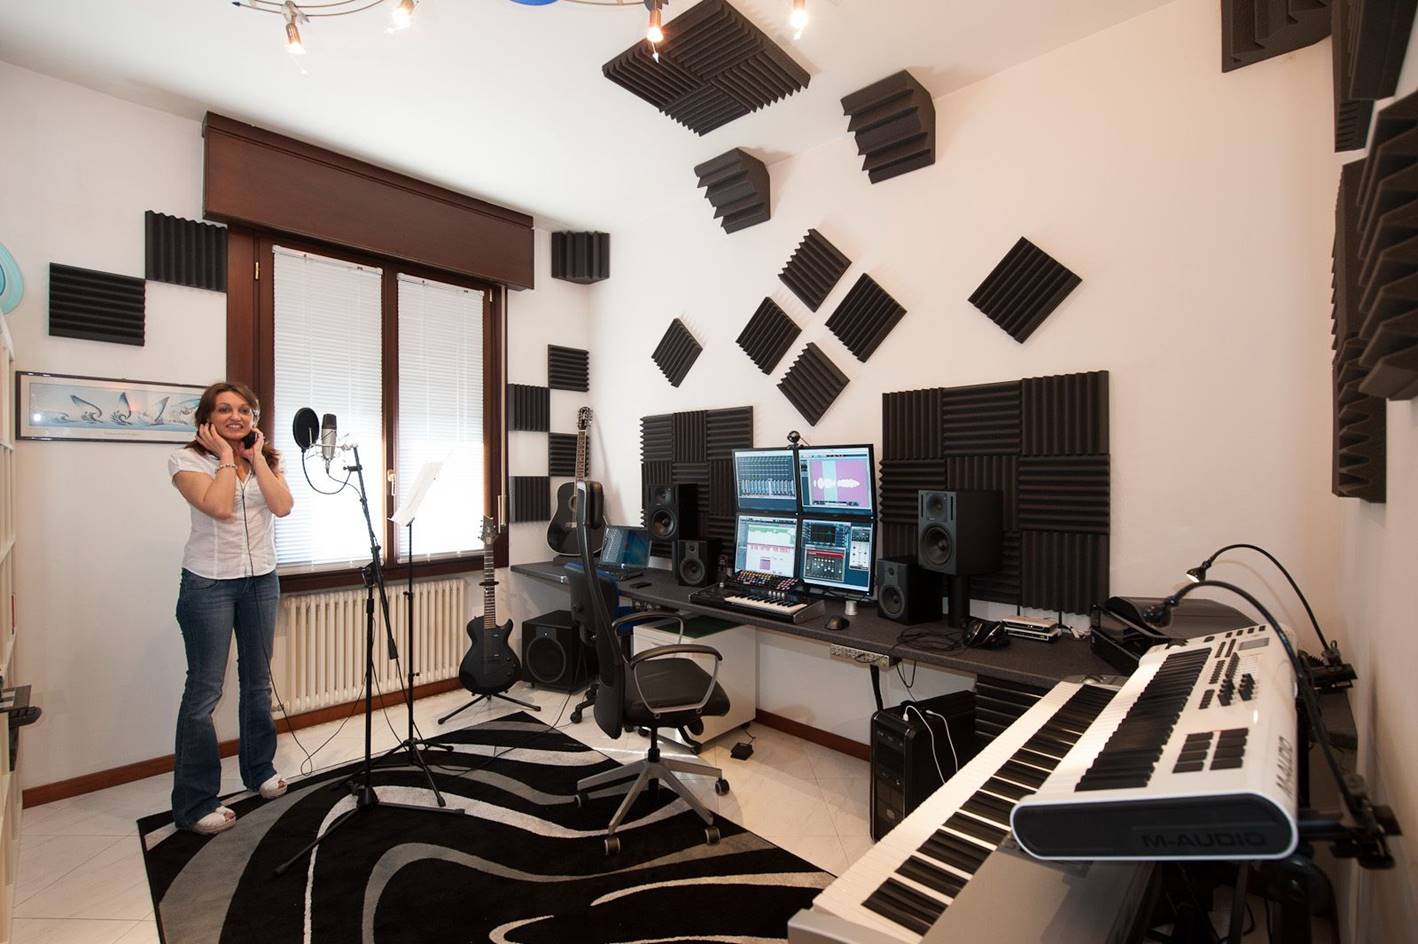
Most rooms in your home aren’t designed for music listening – let alone studio recording – so you are probably going to experience acoustic issues when recording / mixing music at home.
What is acoustic treatment?
Acoustic treatment deals with the way we perceive sound inside a room. The ultimate goal of every studio recording room is the make the sound as acoustically neutral and accurate as possible.
Because of the way sound travels through your room and bounces off reflective surfaces, it dilutes the recording quality by producing flutter echoes and early reflections.
By applying acoustic treatment, we minimize these flutter echoes and standing waves to get as neutral as possible an accurate representation of the sound.
This will help you make better mixing and recording decisions during music production.
Acoustic Treatment 101
Before we get into the details of treating your room acoustics, we need to cover two basic concepts:
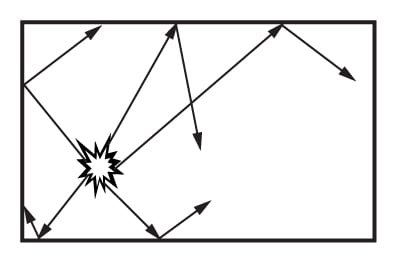
1. How does sound travel in a room?
There are two types of sound in a room:
- Direct sound (i.e., sound that reaches your ears directly from the source)
- Reflected (indirect sound) (i.e., sound that bounces off the walls, floors and ceilings before reaching your ears)

Since direct sound travels directly from the source to your ears, the frequency balance is unaffected and you can hear direct sounds clearly.
By contrast, reflected sounds bounce off walls and ceilings of your room and may be amplified or diminished depending on how they overlap. This interferes with how sound is perceived inside your room and may affect how you perceive your audio recording in a control or live room setting.
Whether you are mixing or doing live recordings, we need to deal with early reflections and echoes inside the room.
You might be wondering…
2. What influences room acoustics?
The shape and dimensions of your room will have a HUGE impact of how sound is perceived inside.
This is because room dimensions directly affect how sound is reflected and dispersed…
In smaller rooms, the sound waves bounce back and forth walls that are close to each other and overlap with each other, causing interference with how sound is perceived. These soundwaves can amplify or diminish frequency ranges depending on how they overlap, and can cause flutter echoes and early reflections.
Parallel walls are also the number one culprit of early reflections and standing waves – the absolute worst shape for a studio recording room is the perfect cube.
All of these early reflections will affect the way we perceive sound in the room…to what extend they do will depend on your room dimensions.
The goal here is to treat these reflection points on your walls to minimize reflections.
In other words, you want to make your room sound acoustically as NEUTRAL as possible so that you can make better recording and mixing decisions.
How to treat room acoustics
Acoustic treatment is applied using a combination of absorption and diffusion.
The idea is to create a reflection-free zone at your mixing position by eliminating most early reflections and echoes. For live rooms, you want to create a room that sounds acoustically natural by reducing unwanted reflections.

There are two things that we use for absorption: bass traps and acoustic panels.
Step 1: Bass Traps
The main problem with any home recording studio is low-frequency build-up. These low-end frequencies have a longer decay time and are much harder to absorb than high-frequencies, making your room audio mix sound ‘muddy’ and diluted.
Untreated rooms suffer from overlapping low-frequency standing waves that do not provide an accurate representation of the sound. This can really mess with your monitoring experience and result in poor mixing decisions.
We treat these low-frequency sounds with bass traps.
When we talk about bass traps, we are talking about high-density sound absorbing material using a combination of fiberglass, rock wool and acoustic foam. These type of materials have a high-density core to absorb the energy from low-frequency sound waves.
Do NOT confuse bass traps with acoustic panels / acoustic foam! Foam is basically useless against bass – don’t fall for all the marketing about acoustic foam.
For bass traps, here are some good options:
- Auralex LENPUR LENRD Bass Traps
- ATS Acoustics Corner Bass Trap
- Primacoustic Cumulus Broadband Corner Trap
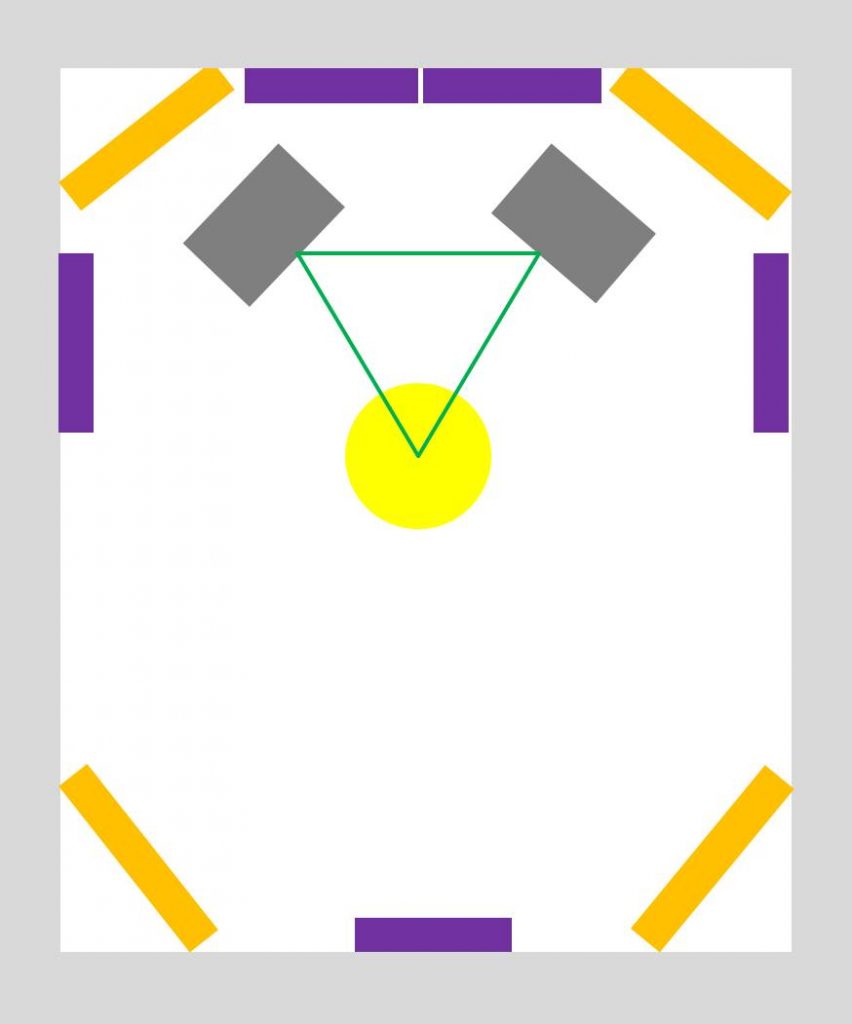
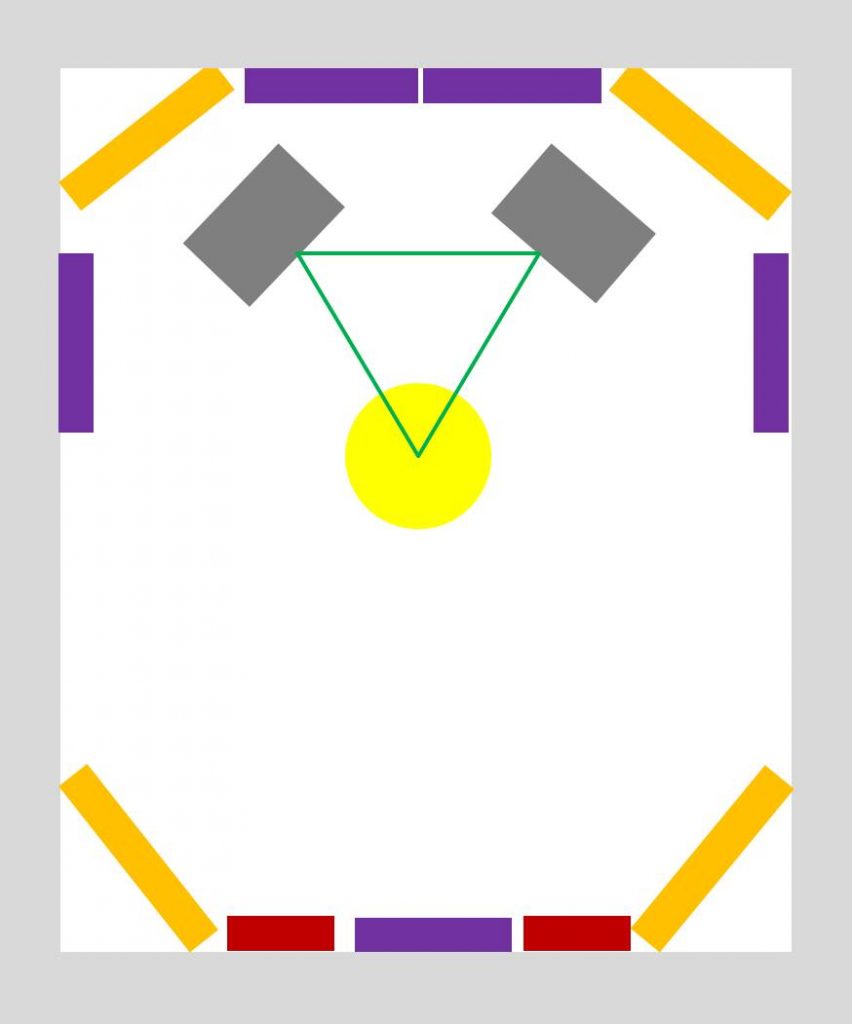
Where should you place bass traps?
Bass traps should be placed at reflection points in your room. Very often these reflection points are the 4 corners of each room where bass tends to accumulate.
For example…
By placing bass traps at these four corners, you can improve bass absorption BUT cannot completely eliminate these frequencies, as they have a longer decay time.
Ideally, you’d want to treat the key corners of your room (including BOTH the top and bottom corners) like this:
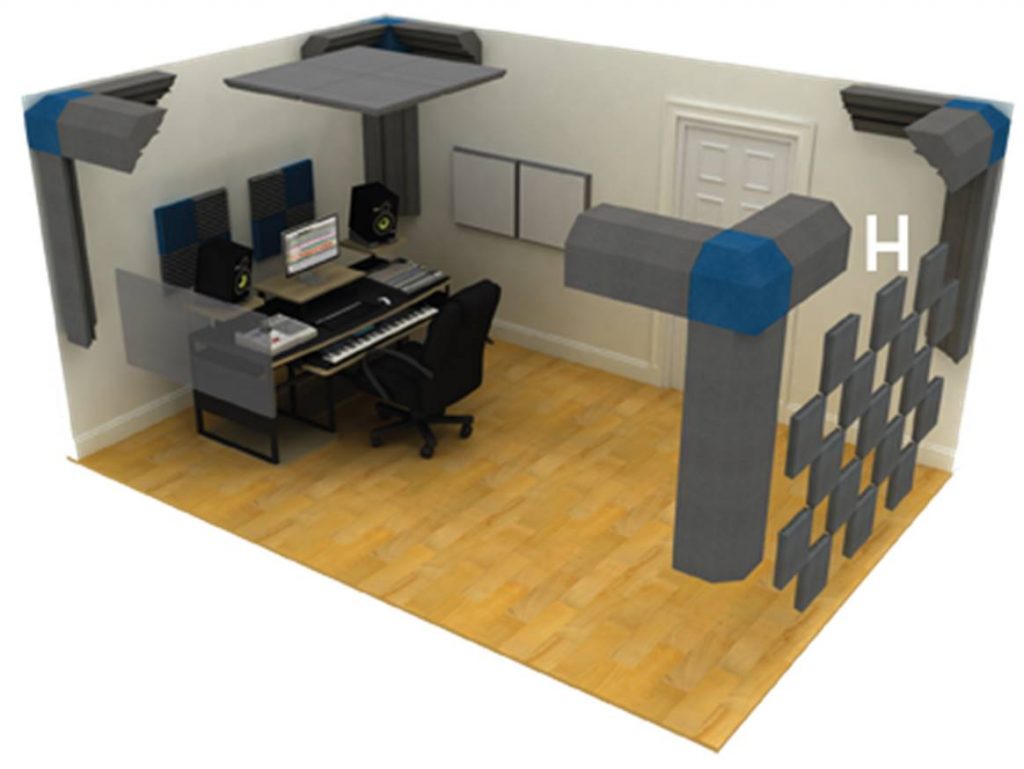
If you are tight on budget, considering treating your room for low-end bass before adding acoustic panels.
Next…
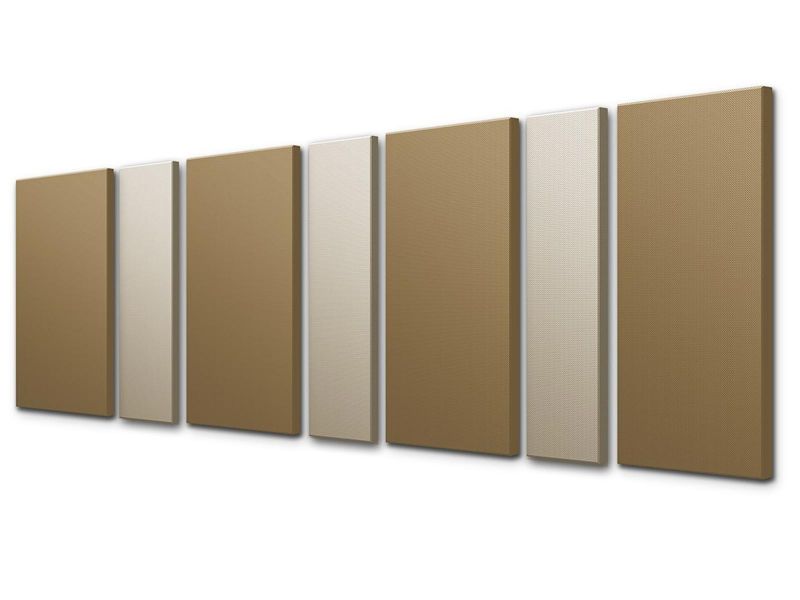
Step 2: Acoustic panels
Acoustic panels are used to ONLY eliminate standing waves and high-frequency sounds.
That’s about it!
Remember, acoustic panels are only effective against high-frequency sounds; they do NOT have any effect on the low-end frequencies at all.
You should use acoustic panels to absorb early high-frequency reflections from your studio speakers.
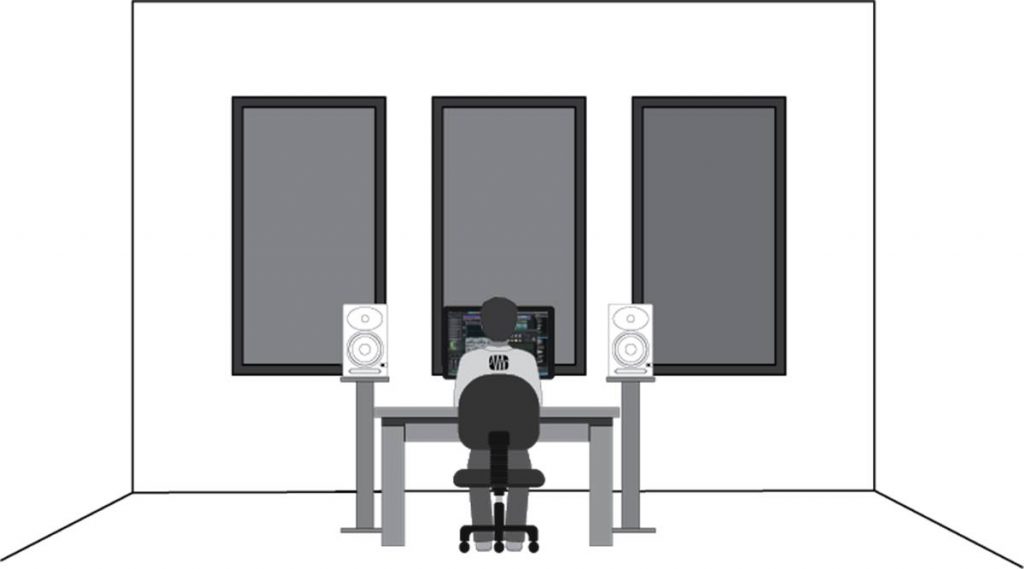
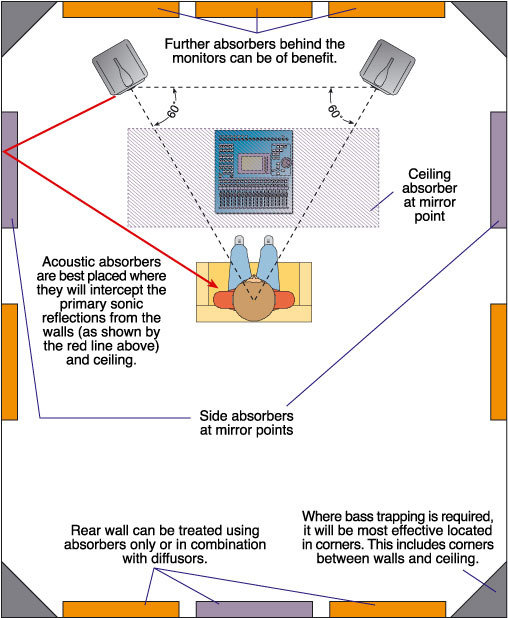
Where should you place acoustic panels?
Start by placing the acoustic panels behind your studio desk. You should aim to cover at least 30% of the wall behind your studio.
Acoustic panels can also be added to the sides of the room to absorb early reflections. Some absorption at the rear end can be used to reduce late reflections.
For example…
This area behind your speakers is particularly important – two additional absorbers should also be placed on the sidewalls to the left and right of your listening position.
Ideally you would want to create a “dead-end” listening zone where you can hear your music recordings clearly in an acoustically neutral environment.
Here are the acoustic panels that I recommend:
With that said…
One common problem with acoustic panels is that you might also end up with a “dead” sounding room, or an awkward sounding room with no highs but muddy low-end frequencies.
To alleviate some of the problems with a “dead” sounding room, you may need to add diffusers to the room to add natural sound dispersion.
Next…
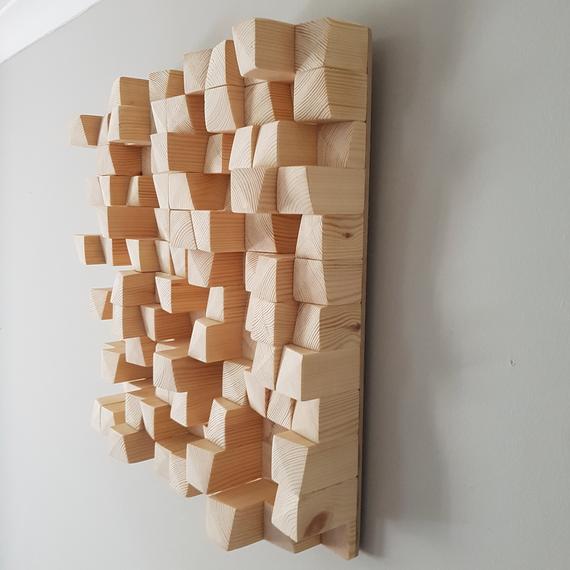
Step 3: Acoustic Diffusers
What happens if you add too many absorbers in your room? You’ll end up with a dead sounding room.
To preserve some of the room’s natural acoustics, we add diffusers to disperse the sound.
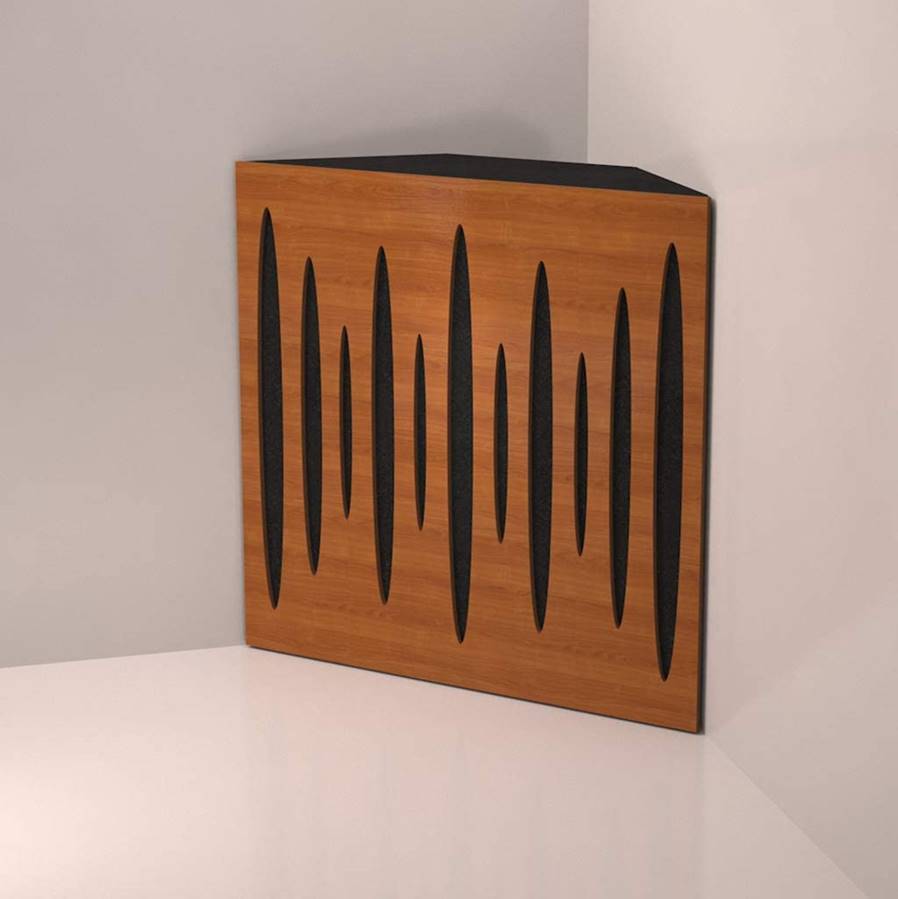
Diffusers are usually made of thick wood material with irregular shaped patterns.
For example…
Bare walls tend to produce flutter echoes which affect sound quality, so you should diffuse the sound by adding diffusers to rear walls.
Diffusers are commonly used to:
- Scatter sound reflections by dissipating them
- Maintain a spacious and natural tone
- Add an airy musical quality to your room
Where should you place diffusers?
Diffusers are best used on a rear wall at a distance of at least 10 feet from your listening position. Typically, you want to place them at certain spots along the wall with some absorptive panels on the opposite wall.
For example…
Generally diffusers are used a bit more in “live” or “recording rooms” (in a two-room setup) to create a room with a natural, even-sounding decay. This is why you’ll often see acoustic structures hanging from the ceilings or walls in a music theater.
For a more natural sounding diffusion, you should go for something made from wood material to give a natural dispersion.
I recommend these acoustic diffusers:
Another substitute option for diffusers are bookshelves. You can place bookshelves along the sides and at the rear wall. The books should be arranged in a disordered manner to form a jagged surface.
You could also place your guitars on the wall – anything is better than a bare wall!
With that said, most musicians agree that absorption takes priority over diffusion. If you are looking to spend money on treating your room, absorbing frequencies – especially low-end ones – are the most important consideration.
Common FAQs
1. Live room vs Control room
In a professional recording studio setting, a live room (where you do recordings) is a separate room from the control room (where you mix and edit recordings).
The key difference between a live room and a control room is that a live room is built to preserve the natural acoustics of the room to add a sense of airiness and spaciousness to the sound, while a control room is designed to sound acoustically neutral.
For live rooms, this usually involves adding diffusers at the rear end to disperse sound reflections and preserve the natural tone of the room, and alternate absorptive panels on opposing walls.
For control rooms, the key goal is to create an acoustically neutral sounding room as possible so that you can make better mixing decisions. This means that they are built to absorb as much early reflections and low-end frequencies as possible for you to hear your recordings clearly.
But for most musicians who record at home, you may not have two separate rooms to do both.
Some of you might ask…
2. Can I have the control room and live room in the same room?
There is a strategy to do this, called the “Live End Dead End” strategy, which I cover below.
Most musicians think that they should divide the room into a separate live room and control / mixing room (two-room setup). That being said, it is just better to leave the room as it is – it’s much better to have one large room that sounds acoustically good rather than two small rooms that require more acoustic treatment.
With advances in DAW technology and unlimited tracks, it is possible to put everything on its own track and adjust the balances later. In practice, home musicians rarely have enough isolation to get accurate balance and neutral sound, even with a dividing wall in between both rooms.
So the bottom line is, do not convert your single room into two rooms unless you know what you are doing.
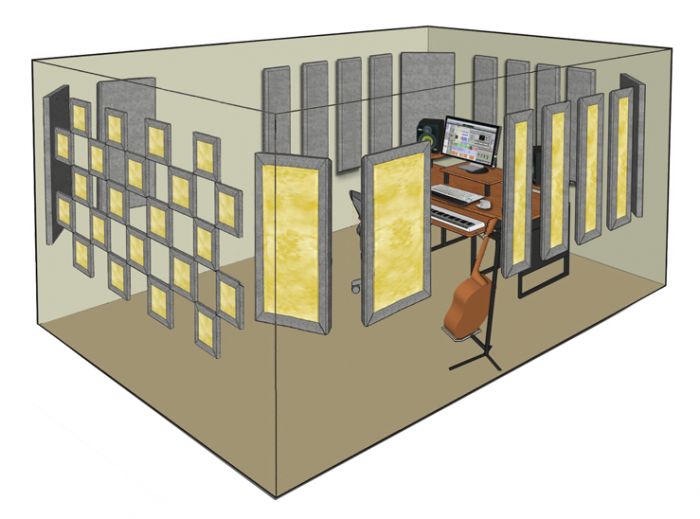
The “Live End Dead End” Strategy
In order to mitigate the ‘dead’ room issues with absorption, one solution is to adopt the ‘live end dead end’ (LEDE) approach. This approach allows home studios to retain acoustic ‘liveliness’ in the rear end of the room.
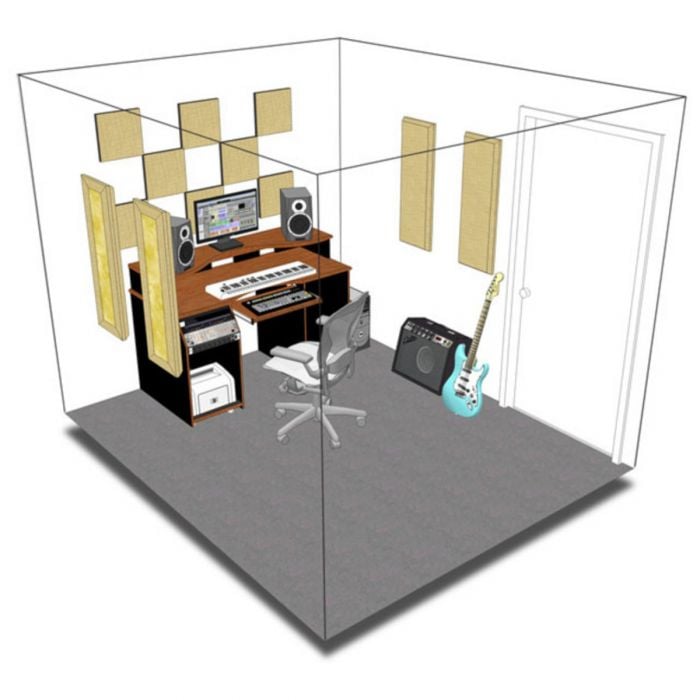
The “Dead” End
The “dead end” is the area where you would be doing your mixing and listening. The wall behind your studio monitors is the “dead-end” and should be treated with acoustic panels.
This part of the room should be acoustically neutral as possible, so you should cover at least 30% of your dead end wall with broadband absorbers.
If possible, add absorbers to the ceiling above your listening position as well.
The “Live” End
The “Live” end of your room is where you would be doing most of your live recordings.
For most home studios, this is usually the rear end of the room where you can add a combination of acoustic panels and diffusers to get this part of the room sounding airy and acoustically natural.
For example…
The key advantage to a LEDE setup is flexibility – while you won’t get the reverb of a pro studio, you’ll preserve room ambience and get a natural musical quality to the sound.
You can also make your studio recordings ‘dry’ or ‘airy’ depending on your needs:
- If you want the vocals to sound dry, you can record vocals with your mic at the dead end zone.
- If you need your instruments to have a more spacious and airy feel, you can record them at the ‘live’ end zone of your room.
A visual illustration:
For most musicians with only one recording studio room, the LEDE approach is the most flexible and the preferred approach of combining a mixing and live room into one.
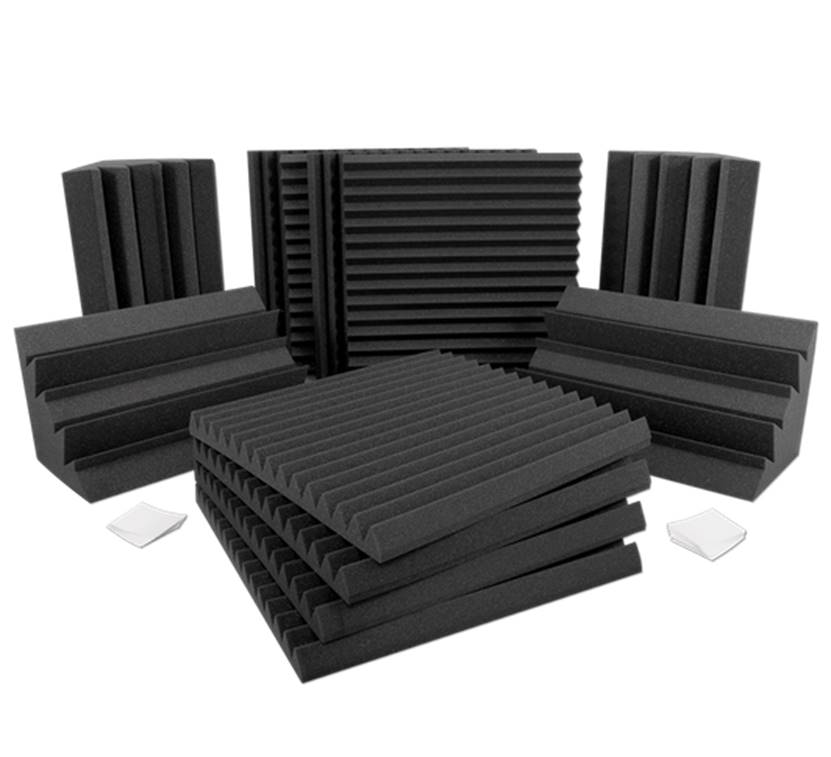
Acoustic Treatment Kits
As you can see, a LOT of work goes into getting the right equipment for sound treatment.
This is why acoustic treatment kits can simplify the entire process by combining all that you need to treat your room.
These are essentially complete recording studio in box solutions, and come with acoustic panels and diffusers for a LEDE room design concept.
Here are some acoustic treatment kits that I recommend:
Primacoustic and Auralex are some of the most well-known brands in the industry.
The Primacoustic London 8 Room kit is designed as a complete recording studio in a box solution, and comes with 12 panels for rooms up to 100 square feet in size.
They come with 12 high-performance fabric covered acoustic panels for dampening and absorbing early reflections, and are great for classic live-end, dead-end (LEDE) room setups.
The panels are made from high-density 6lb per cubic foot fiberglass, meaning that they provide much BETTER absorption than low-cost foam alternatives.
Although they aren’t cheap, this kit is VERY effective for toning down reflections in your room to provide a neutral listening experience.
If you room suffers from poor acoustics, I highly recommend getting the London 8 Room kit.
Designed to provide effective dampening, the Auralex Acoustics D36-DST kit provides just the right amount of treatment for small studios.
This kit comes with a total of 36 acoustic panels and ez-stick pro mounting tabs for easy installation. The acoustic panels can cover an entire 36 square feet of bare walls, although you would have to purchase additional bass traps with this setup.
The Auralex acoustic panels are good for absorbing mid/high frequency reflections to control room ambience, and can also alleviate flutter echoes and slap backs.
This kit is great if you need enough panels to block first reflection distortion from the sides and ceiling; they can help to restore the natural sound of your instruments without multipath distortion.
Budget options for acoustic treatment
For some of us musicians, having acoustic panels and bass traps can be an expensive luxury…especially if you are just starting out.
If you don’t have the budget for acoustic panels, I’d still highly recommend adding bass-traps to the four corners of your room.
This is because low-frequencies have a longer decay time and are the main culprits for distorted sound.
Otherwise, it is possible to use household items for absorption and your furniture for diffusion, which I will explain below.
1. The Mattress
The mattress can be a relatively good mid-high frequency absorber. Choose a thick mattress (not the thin type of mattress) with good layer of cloth surface.
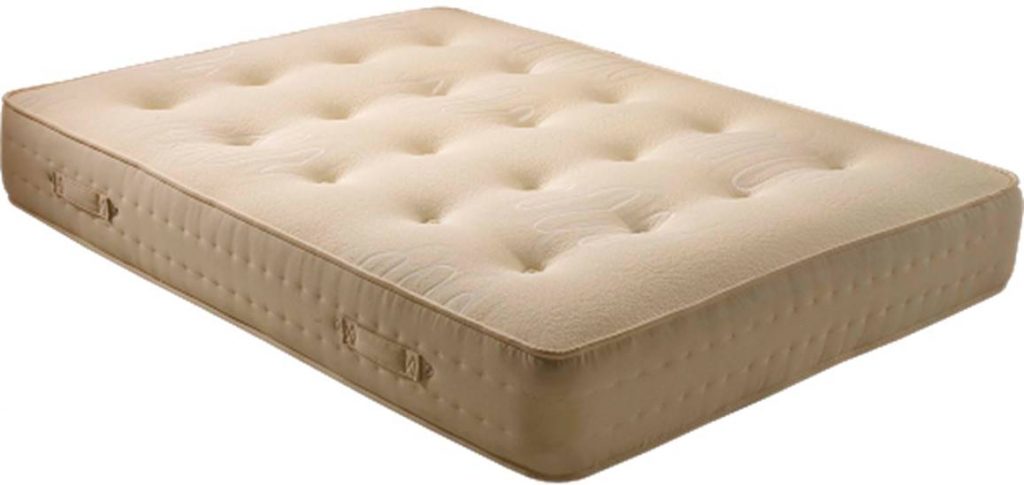
A springboard mattress would somewhat be the ideal type of mattress as it has a larger surface area to absorb sound and is loaded with high density material.
The most effective way to use your mattress is to prop it up against the back wall of your room.
This absorbs any incoming reflections and flutter echoes that may bounce back from the rear wall of the room.
For some home recording studios, you might want to consider placing one mattress at the rear and two mattresses at the side for recording and mixing.
Keep one end of the room ‘live’ (see Dead-End Live-End) so that your room can preserve some natural acoustics, otherwise your sound may feel ‘hollow’.
Up next…
2. Reflection Filters
If you are on a tight budget, one of the more effective ways to ‘treat’ your home recording studio is to use a reflection filter with your microphone.

This works by absorbing and isolating the microphone from unwanted ambient reflections, creating a closer and dryer sound that allows for more control over your vocals.
You can also use reflection filters for recording acoustic guitars or an electric guitar cabinet.
One thing I like about reflection filters is that they are cost-effective and helps you to save space.
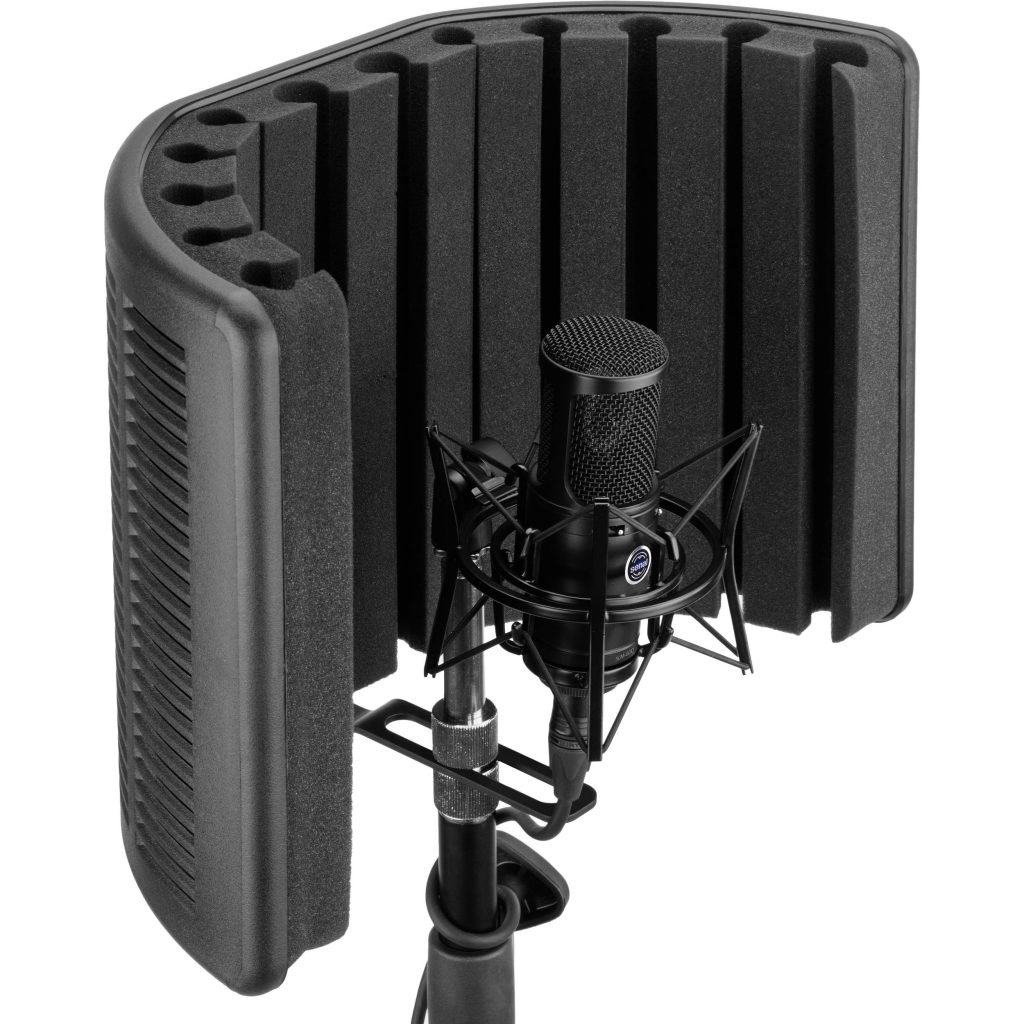
Here are some reflection filters that I recommend:
Up next…
3. Cushions, pillows, carpets
These household items are okay for absorption – not ideal, but can be useful.
If you have a thick high-density cushion, you should use them as ‘bass traps’ along the 4 corners of your room to absorb low-frequency sound. High-density materials should be applied to the corners of your room first to reduce low-frequency reflections.
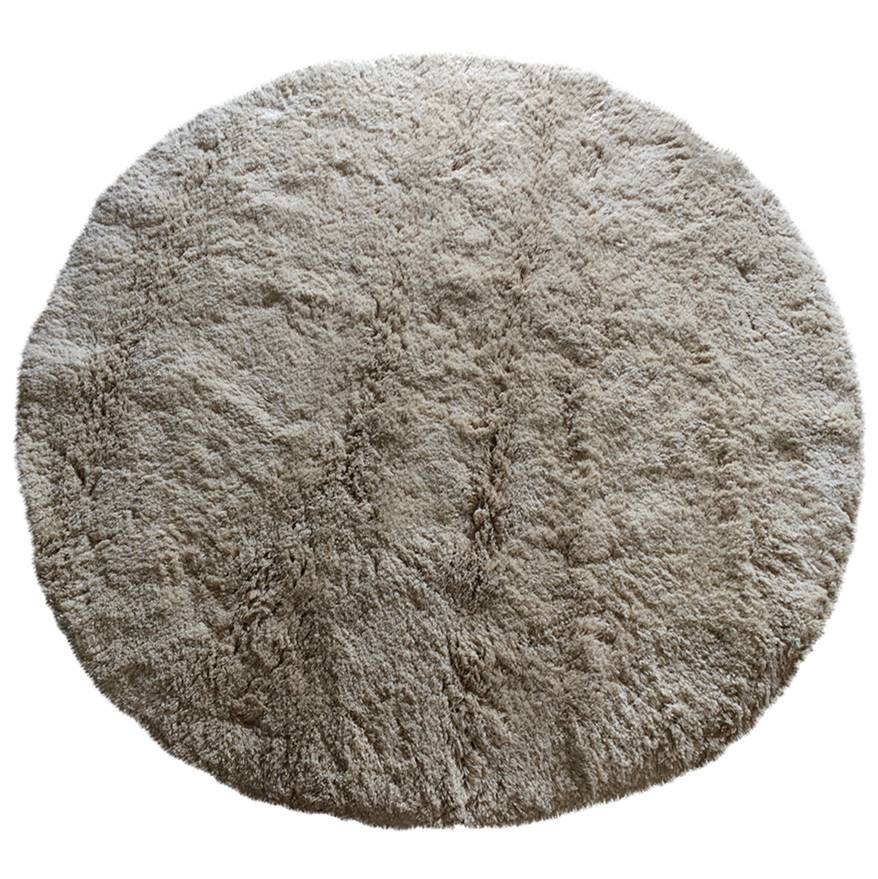
Cloth material and carpets are good mid-high frequency dampeners, but ideally only 1/3 of your room should be covered by carpets. Otherwise, you might end up with an awkward sounding room that lacks any high-mid frequencies but has low-frequencies.
So if you intend to carpet your room, don’t exceed 1/3 the size of your room.
Curtains can also be used as sound absorption material, but bear in mind these work only for upper-range frequencies.
Up next…
4. Dynamic mics
If you have a poor acoustically sounding room, one of the tricks which you can use to make your vocals sound cleaner is to use dynamic mics.
This is because dynamic mics have less pickup and sensitivity as compared to a LCD diaphragm microphone, so they won’t pick up room ambient sounds and flutter echoes.
But the downside of dynamic mics is that they lack clarity and can make your voice sound ‘warmer’ than natural.
That said, dynamic mics are good options if you really have issues with your room acoustics that you cannot immediately correct.
Some examples:
Up next…
5. Close Miking
Another technique you can use to minimise the effect of poor room acoustics is ‘close-miking’. This simply means placing the microphone very near to your mouth to capture more direct sound.
In this way, you can minimize ambient sounds and flutter echoes from other sources in your room.

Typically you’d want to combine close-miking with a pop filter so that you can filter out plosive sounds (it’s the most common issue when close miking), making your recording sound cleaner.
And that’s it!
Next Steps
Now that you have learned how to apply acoustic treatment to your room…
The next step is to layout your room, add instruments, set up the studio monitors, etc.
To learn how to do this correctly, check out this post: