In this Chapter, we will focus on how to design and layout your home recording studio room.
For most of us at home, you would be doing your recording and mixing inside a single room, rather than two separate rooms.
This means that you will have limited space to work with, and how you layout and design your room will inevitably affect your recording quality and mixes.
How to layout your home studio
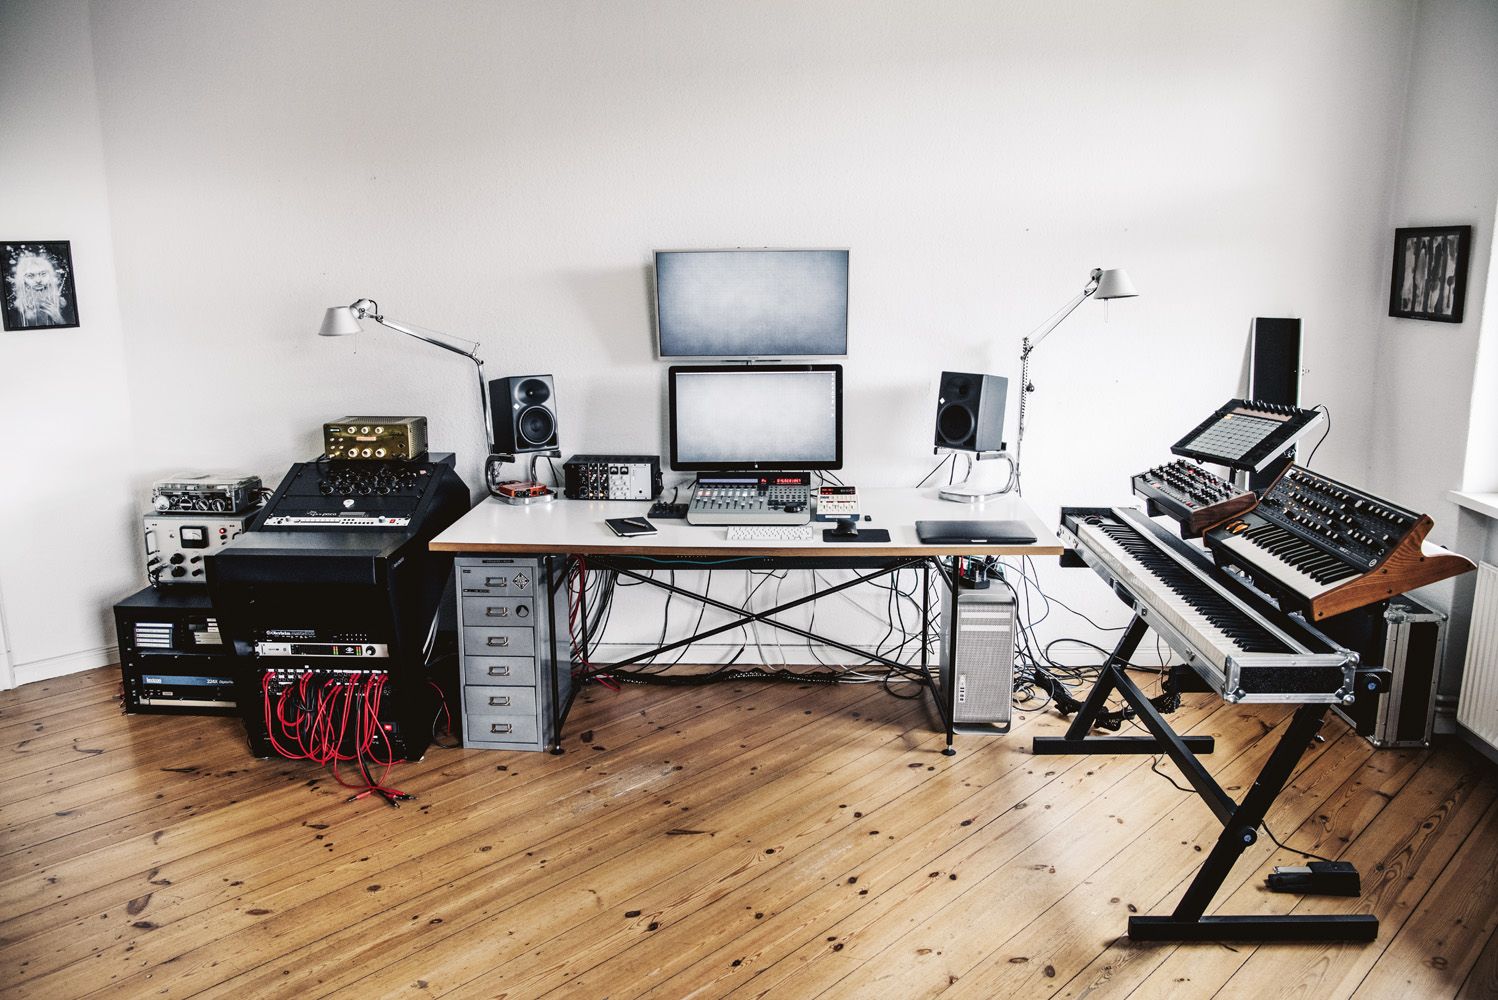
When you set up your home recording studio, you will have one or more of the following equipment:
- A computer
- Studio monitors
- Studio monitor stands
- Microphones
- Audio interface
- Studio desk & chairs
- Music instruments
- Cables & wires
- Acoustic panels, bass traps
Because these items can easily create a lot of clutter in a short period of time, I recommend starting out in a large rectangular room where you can space out your instruments and equipment.
Ideally you’d want to find a room with a dimensions of around 20 x 30 feet. Generally a large rectangular room would be more ideal than a square or cube shaped room.
The idea is that you want to create a large enough space so that you can have enough room to record, and space out your instruments so that you will encounter less reflections and flutter echoes inside your room.
First up…
Step 1: Set up your desk and chair
Where should you place your desk and chair?
In every home studio, there will be an optimal listening position.
To help you find this optimal listening position, we employ a tactic known as…
1. The “38%” (Wes Lachot) Rule
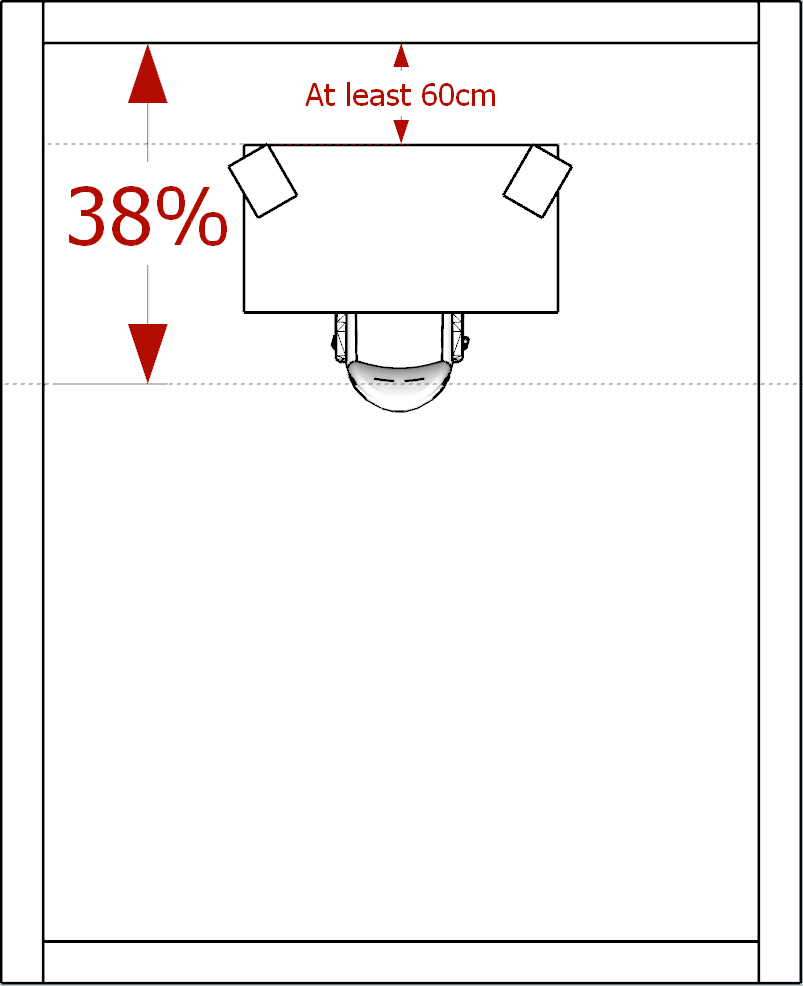
The 38% rule by Wes Lachot (a world class studio designer) suggests that the best listening position in rectangular rooms is at 38% of the length of the long walls.
In other words, if your room is 10 x 8 feet, you would want to position your chair approximately 3.8 feet from it and directly centered between the long 10 foot walls.
You should definitely avoid setting monitors against the back wall as they have stronger reflections and the worst comb filtering.
Ideally the 38% rule will give you a flat frequency response, but you should experiment around to see what works best for you.
If you can’t position your chair and desk 38% from the front of your room, you could try different positions at 36% to 44%, but not at 50% or 25% (known as the nodal points of your room).
2. Get a comfortable chair
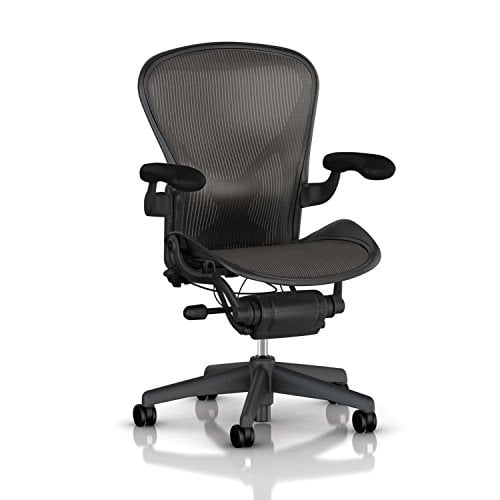
It is not an understatement to say that you’ll be spending most of your time in your own home studio seated at your desk.
Although there are plenty of options out there, I would personally recommend going with an office chair.
Why?
Because an office chair is ergonomically designed to be comfortable for long hours of work. Furthermore, they are often cheaper than dedicated professional studio chairs.
Some good options:
Next step…
Step 2: Studio Monitor placement
Once you have set up your desk and chair, the next step is to position your studio monitors at the ideal listening position.
Although there is an entire chapter dedicated to studio monitor placement, the basic rule is that the studio monitors should be several feet from the wall and set at ear height (where you are sitting) and pointing towards you.
Generally speaking, your studio monitors should be positioned:
- Symmetrical with regard to their distance along the side walls
- Form an equilateral triangle with your head
- With some room away from the wall (to avoid frequency build-up)
To illustrate:

One benefit to having space behind your desk is that it allows you to walk back there, which is convenient for adjusting cables or re-positioning your monitors.
When setting up studio monitors, you should always use studio monitor stands instead of placing them on the desk. Remember, studio monitors should be at ear height level…
I recommend these budget studio monitor stands:
Next step…
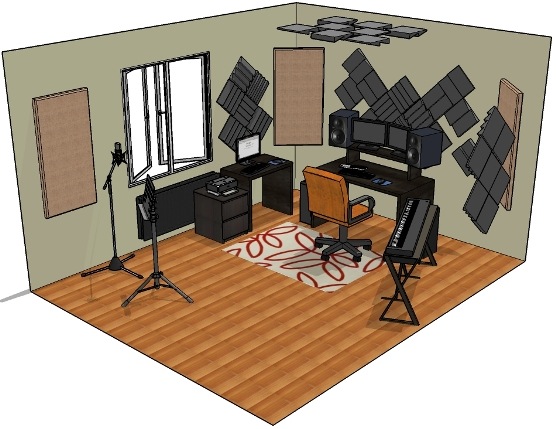
Step 3: layout your room
Now for most of us musicians, you will be doing your recording and mixing in the same room.
This means that you will need to position your instruments and studio equipment at an optimal position to get the best acoustics possible from your room.
There are basically 3 kinds of layouts that we will be looking at.
1. The Solo Layout
If you are a doing solo recording at home, the basic layout will look like this:
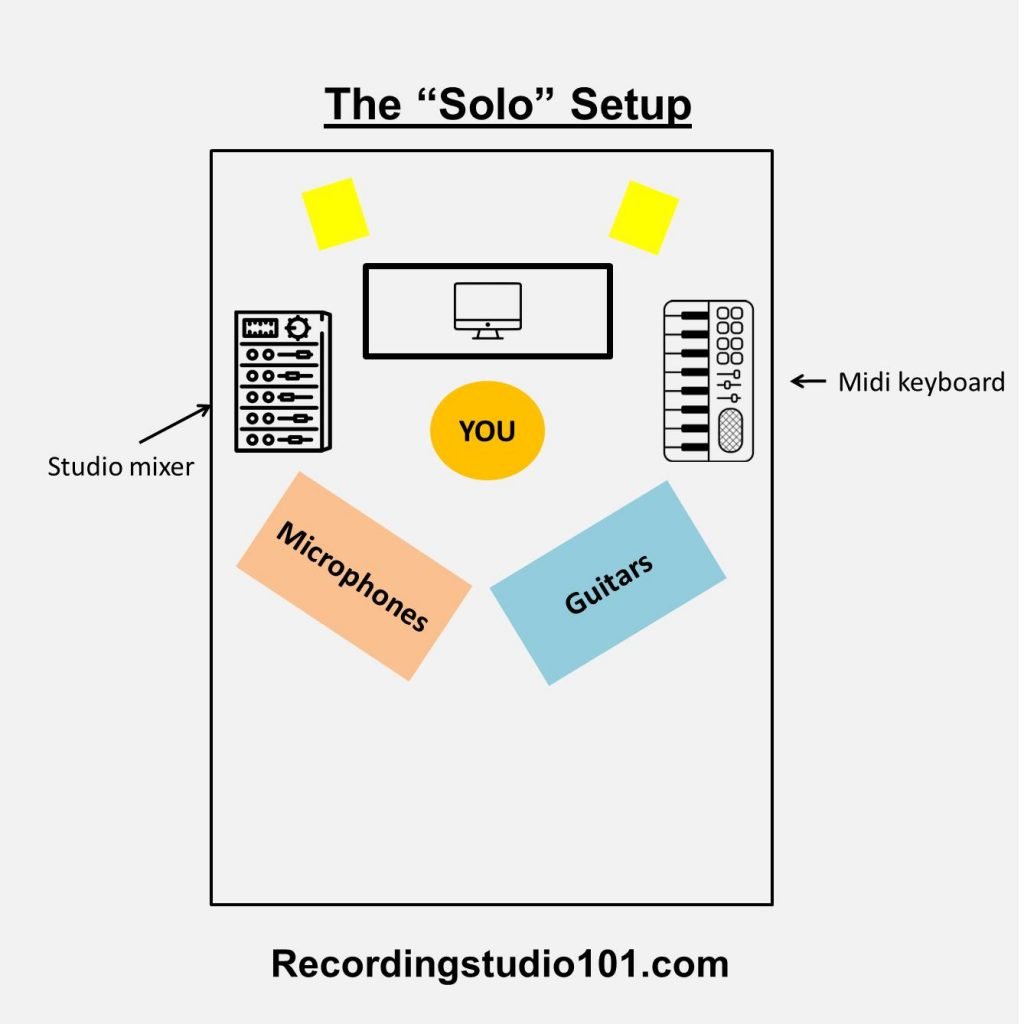
What you want to do is to arrange your instruments and gear closer to you, so that you can do BOTH recording and handling your DAW at the same time.
The problem with this layout is that you are seated closer to the “dead-end” of your home studio where you are doing most of your mixing.
This has three disadvantages:
- Your recordings can sound “dry” if you are positioned closer to the room dead-end
- You are seated around your music instruments, which can cause reflections
- This layout does not work for multiple people
There can be easily too much clutter with this type of setup, especially if you want to space things out a bit in your room.
If you want to record with multiple people, the solo layout will NOT work at all.
So your next option would be…
2. The Expanded Layout
If you have multiple people recording at the same time, the solo layout will not work at all.
Instead, you’ll need to station your instruments closer to the “live” rear end of your room. The music engineer will be seated at the front to handle the DAW.
To illustrate, you want to arrange your instruments and workstation like this:
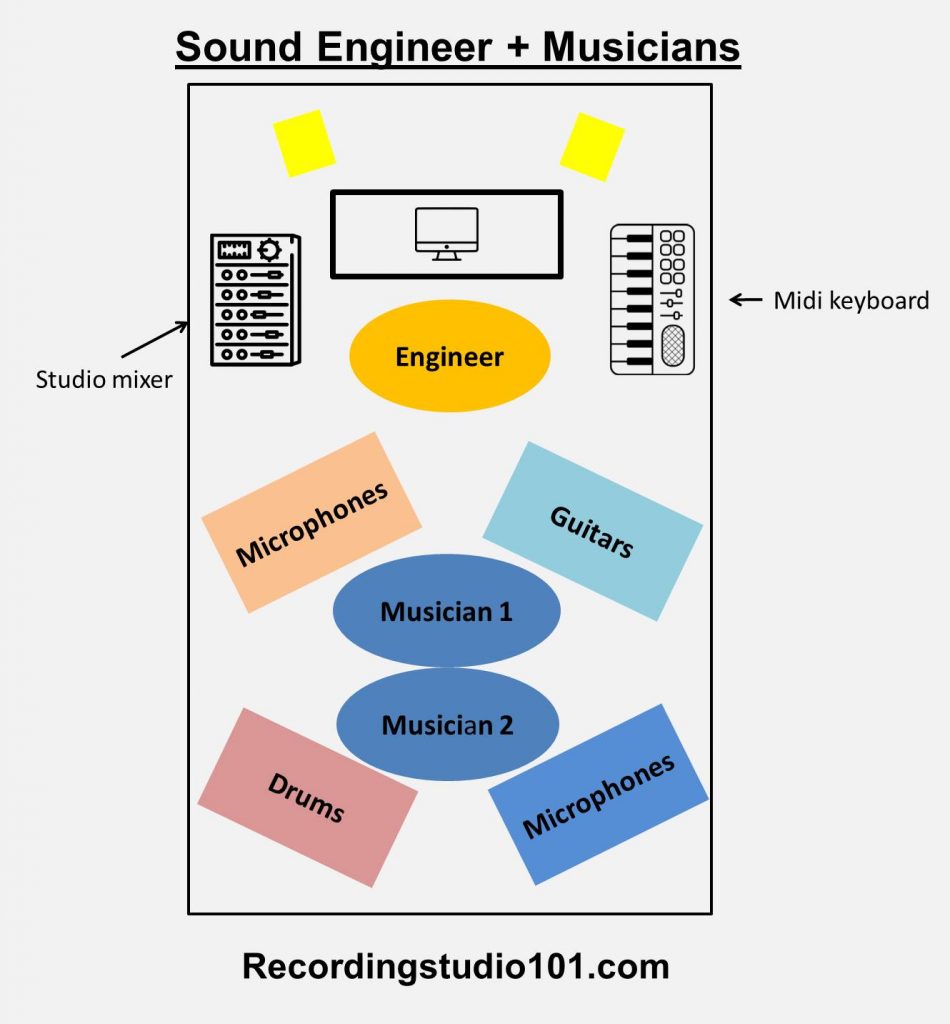
Ideally, the expanded layout only works in larger rooms that are acoustically treated using the “dead-end live-end” strategy.
The advantage to this layout is that you can have multiple people recording at the same time. You can also space out your instruments and position your instrumental acoustics.
That said, the expanded layout doesn’t work AT ALL if you are recording solo, as you would need to pause and jump in between the DAW and your recording workstation.
What if you need to record at the rear-end of your room and control the DAW at the same time?
You have two options:
Option 1: Secondary Computer Monitor
A secondary computer monitor works just like an extension of your original PC.
Instead of having to work at your desk, you can simply connect another computer monitor and wire it to the original desktop computer.
In this way, you can easily control the DAW software using a wireless mouse or keyboard.
To illustrate:
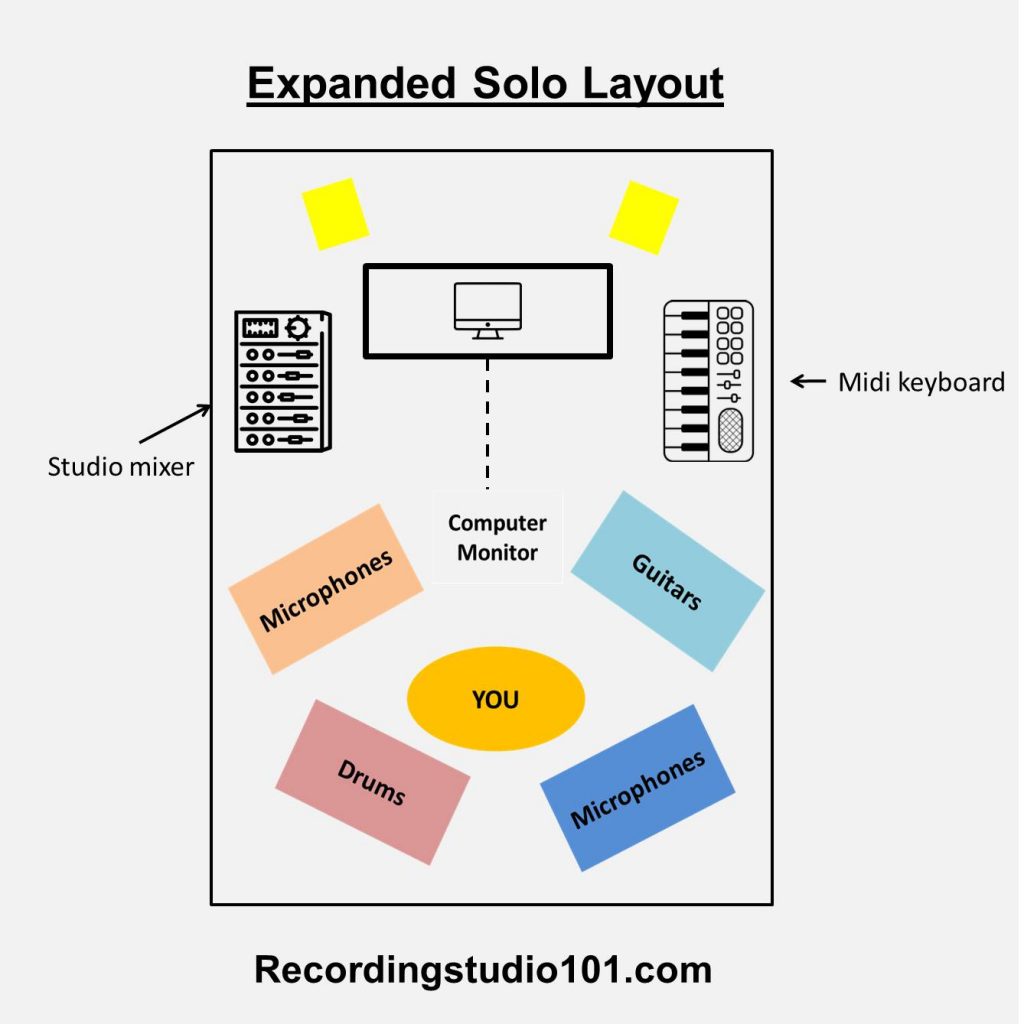
The key advantage of this setup is that you don’t need to switch between your instruments and desk constantly.
However, getting a separate computer monitor with cable extensions can be costly. You’ll need to run additional wiring through your room.
A cleaner and more cost effective option would be…
Option 2: The DAW remote…
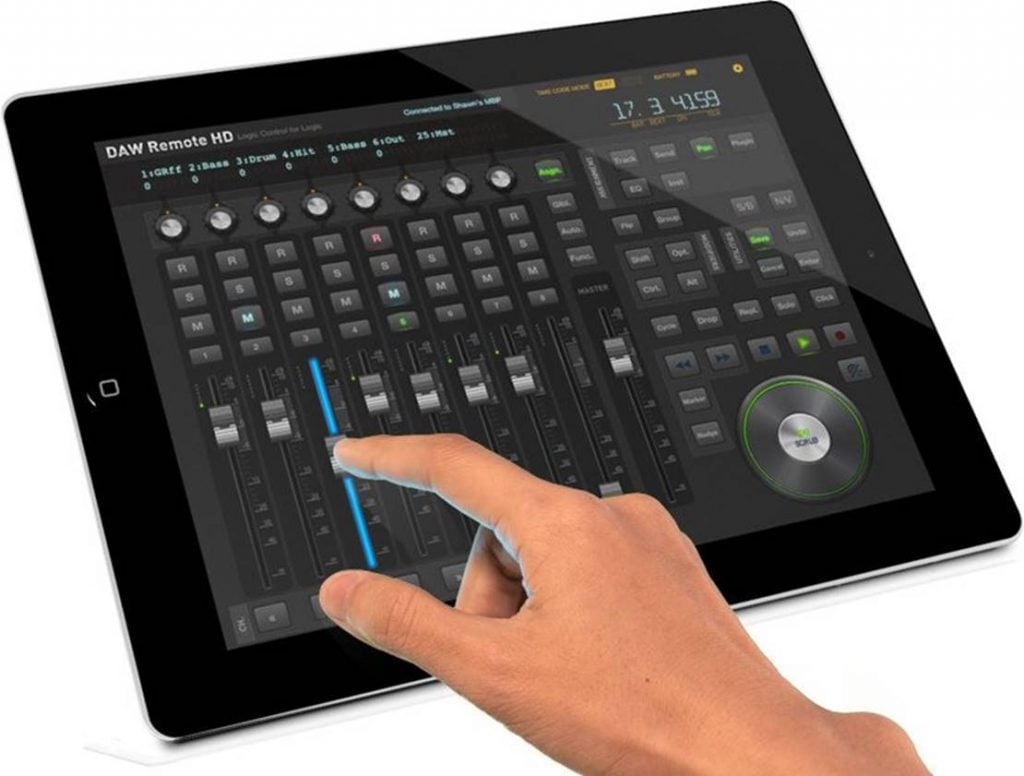
If you have a spare iPad lying around, you can convert it into a “DAW remote” by installing DAW software (check out the Apple store where there are plenty of downloadable options).
The DAW remote works by controlling your DAW software remotely by connecting to your WIFI network. In this way, you’ll be able to control your DAW workstation wirelessly while recording at the same time in the solo setup.
The DAW remote will also allow you to easily control tracks and use pretty much all the functions just like the hardware control surface.
Most DAW remote software is optimized to work with ProTools, FL Studio and Studio One, so all you have to do is to download the software on your iPad to get started.
3. Multi-room Layout
This layout is something approaching that of a professional recording studio.
For the average home studio musician, a multi-room layout isn’t an affordable option.
However, if you have the budget and resources, you can set up both your live room and recording room like this:
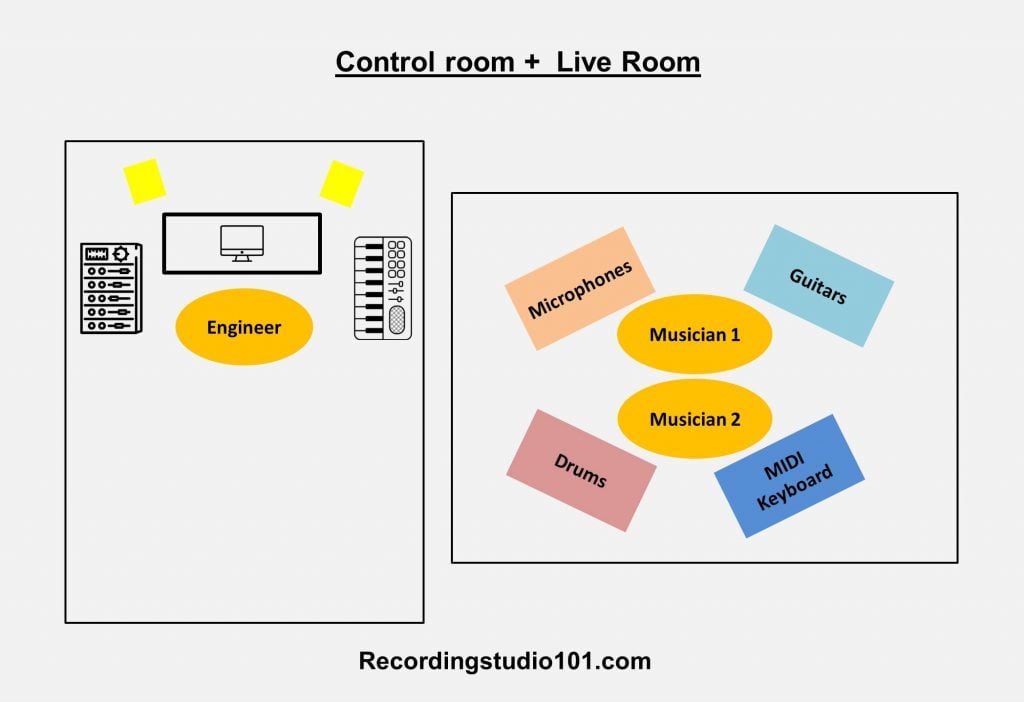
The biggest advantage about this layout is that you can apply tailored acoustic treatment methods to your live room and mixing room to optimize the sound.
You can also have multiple people recording in the live room at the same time, while the audio engineer will be handling the DAW in the mixing room.
If you are recording solo, can you also use a DAW remote (the same method as the expanded layout).
Next step…
Step 4: Connect your equipment
Now that you have a general idea of how to layout your home studio, the next step is to get everything set up.
Starting with the audio interface:
- Connect the condenser/dynamic microphones
- Connect your computer
- Connect the studio monitors and headphones
- Connect the MIDI keyboard
To illustrate:
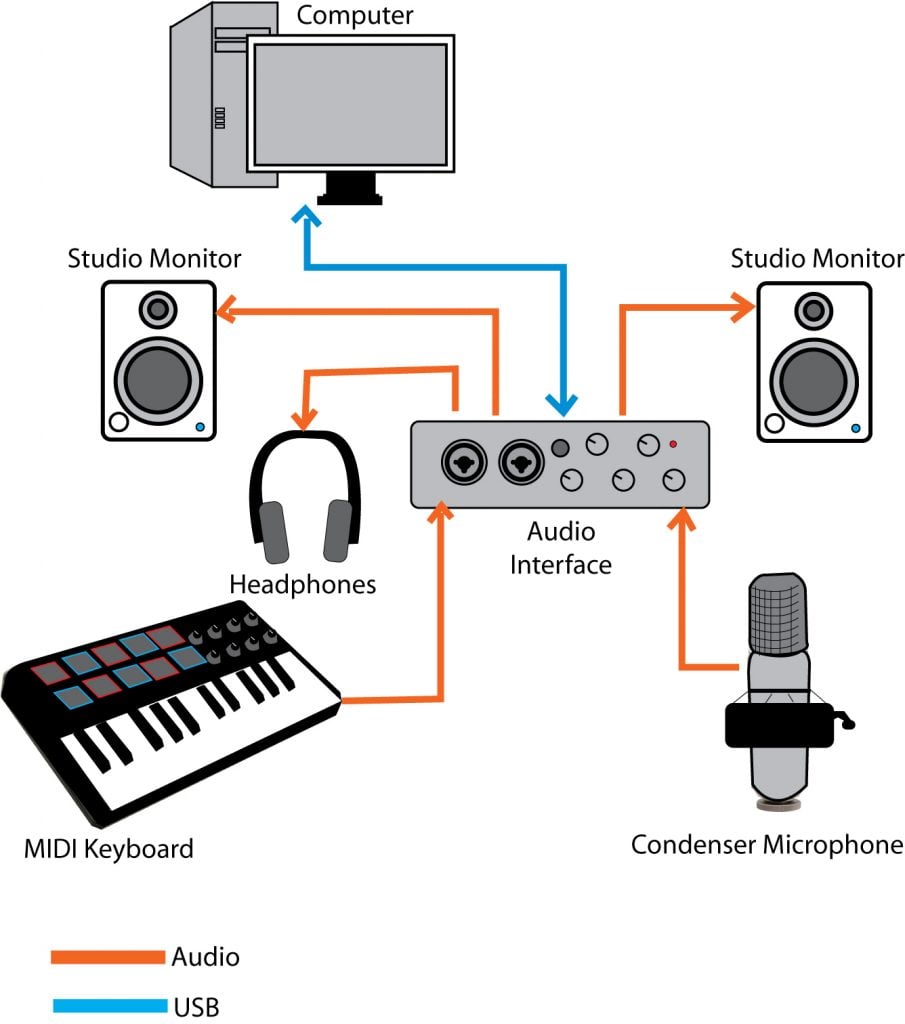
If you are recording multiple instruments, you may need to get more condenser microphones and an audio interface with more input options.
For a recap on the essential items to get started, check out this post:
Additional Accessories
1. MIDI Controllers
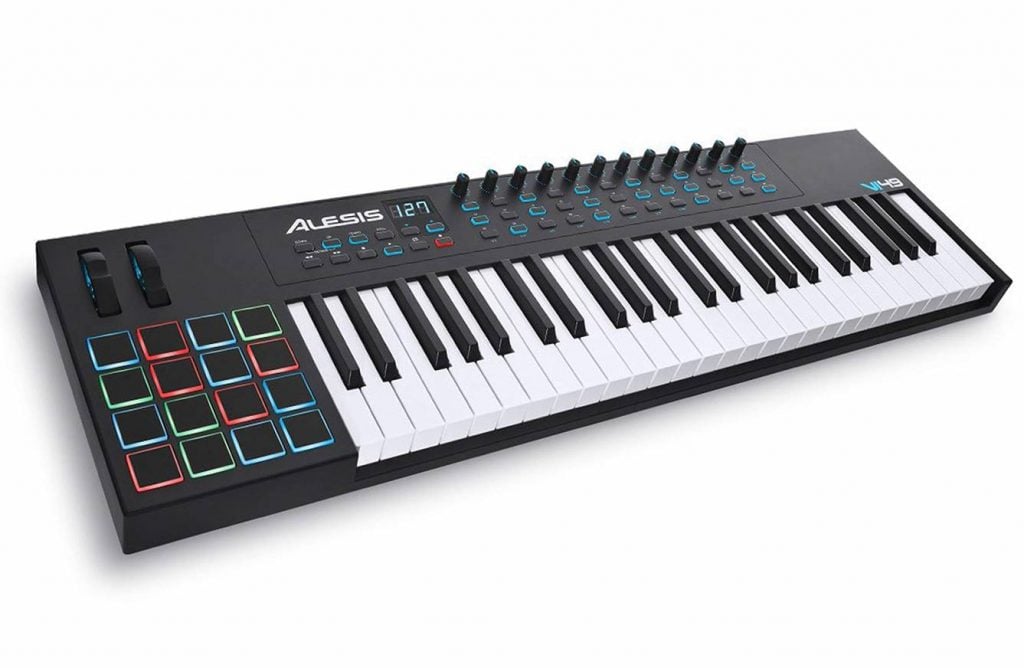
If you are doing solo recordings, you’ll need a MIDI controller / keyboard to add sound effects and instrumental notes.
This helps you to save cost on buying additional instruments when you can add the notes electronically. Fewer instruments means less cost and less clutter.
For beginner musicians doing solo recordings, learning how to use a MIDI keyboard is an absolute MUST.
Here are some good choices:
Next item…
2. Microphone extension cables
If you are recording in a fairly large room, you’ll need to get microphone extension cables.
These cables connect directly to your audio interface.
The thing about microphone cables is that they can really screw up your sound quality if you get cheap ones.
Here are some good choices:
Next item…
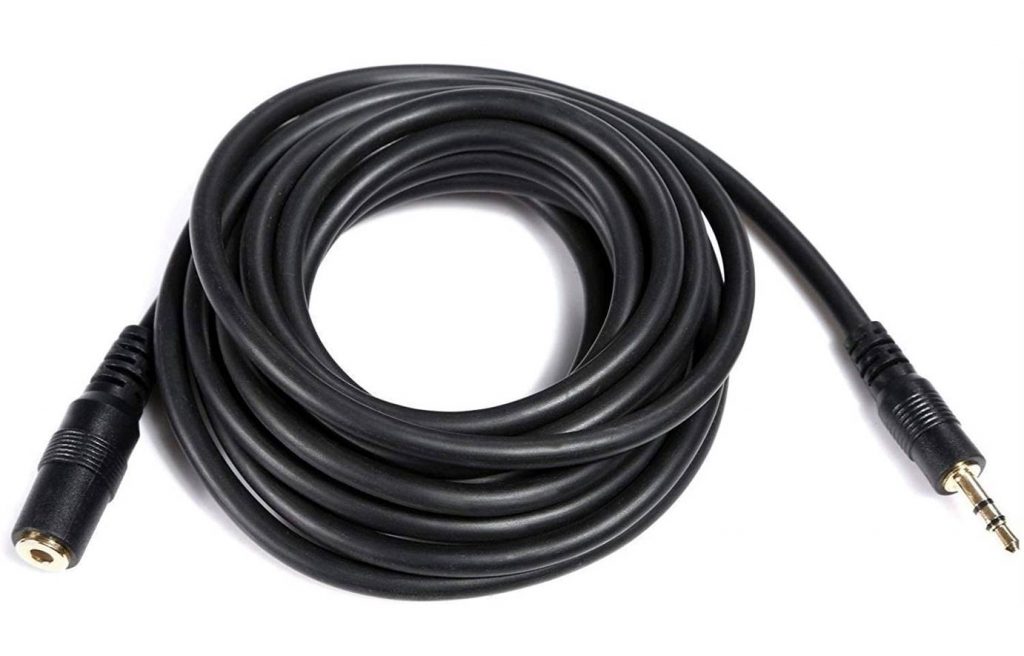
3. Headphone extension cables
One of the things that I recommend getting are headphone extension cables for your studio headphones.
Since you are going to move around your room quite often to manage different instruments, a headphone cable extender is going to come in handy. You’ll need these especially if you are recording vocals.
I recommend getting extension cables with at least 20 feet in length. Pick headphone extension cables that are made from oxygen-free copper for the best sound quality.
Otherwise your studio headphones may crack up during recording sessions.
Some good choices:
Next item…
4. Secondary computer monitor
For solo musicians, it can get frustrating to switch between your DAW workstation and instruments.
If you are not going to use a DAW remote, the next best option would be a secondary computer monitor which you connect to your main PC.
This allows you to operate your DAW software from a position away from your studio desk using a secondary keyboard or wireless mouse.
You’ll need to have extended computer monitor cables to set this up.
Personally, I have found this option more convenient than the DAW remote as you are basically operating from the same PC.
And that’s it!
Next Steps
Once you are done with your room layout and acoustic treatment, you’ll need to focus on how to record the best possible vocals…
To do this, you’ll need to learn what are the best types of microphone to use at home…