In this chapter, we are going to cover all the essential equipment you need to upgrade from a basic to a professional home recording studio.
Whether you are setting up your first recording studio or already have some experience in this area, this list contains just about every type of equipment and gear you’ll need for your home recording studio.
If you are doing solo recording at home, I just recommend starting out with the home recording studio essentials for beginners so that you can save time and budget.
For most musicians, you will usually upgrade your home recording studio in stages, starting from:
- Stage 1: Basic home recording studio
- Stage 2: Intermediate home recording studio
- Stage 3: Advanced home recording studio
- Stage 4: Professional home recording studio
Let’s take a closer look at these recording studio equipment list essentials in a bit more detail…
Stage 1: Basic Recording Studio (the bare minimum)
For beginners just starting out with your home recording studio setup, there are 10 essential items you need for a basic recording studio.
These are…
1. Computer
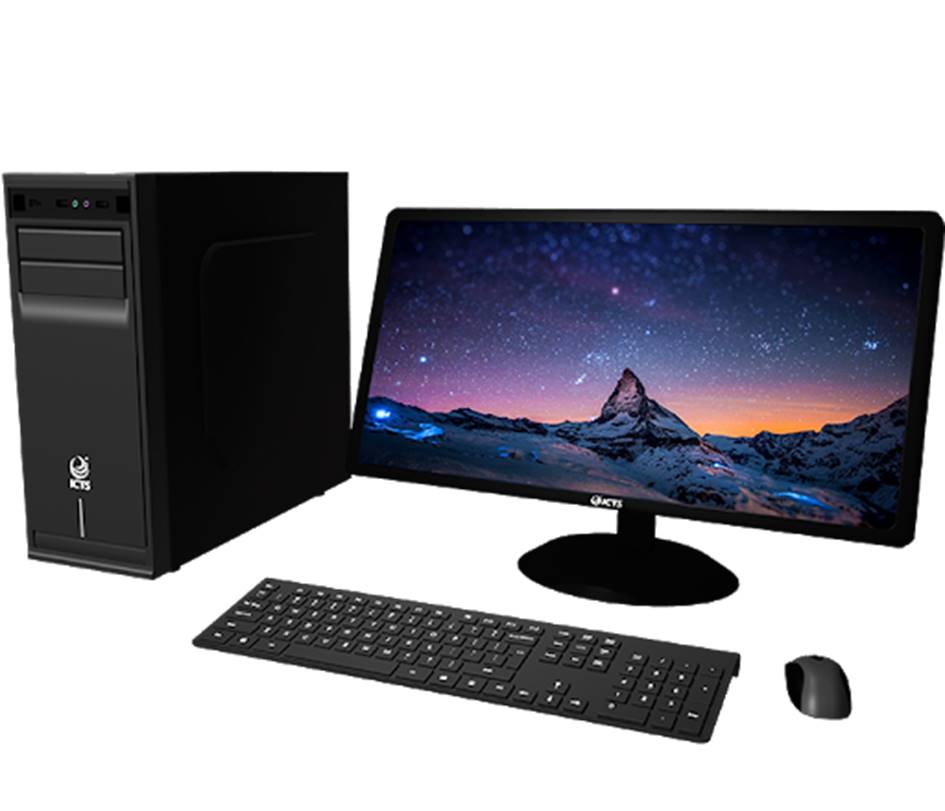
Before computers, setting up a studio involved the use of standalone recorders. With the advancement in technology, standalone recorders are now mostly outdated and have faded into history.
Most computers these days are powerful enough to run recording and editing software. If you need more processing power, go with the desktop PC as you can put in a dedicated soundcard and motherboard with more ram.
A laptop, however, is a more portable option and an affordable one if you are running on a budget.
My advice is to just use whatever laptop or PC you have at the moment so that you can save budget for setting up the rest of your home recording studio.
It doesn’t really matter whether you are running Mac or Windows OS on your computer – there are plenty of DAW recording software that are compatible with either operating system.
Classic examples:
Next item…
2. DAW Software
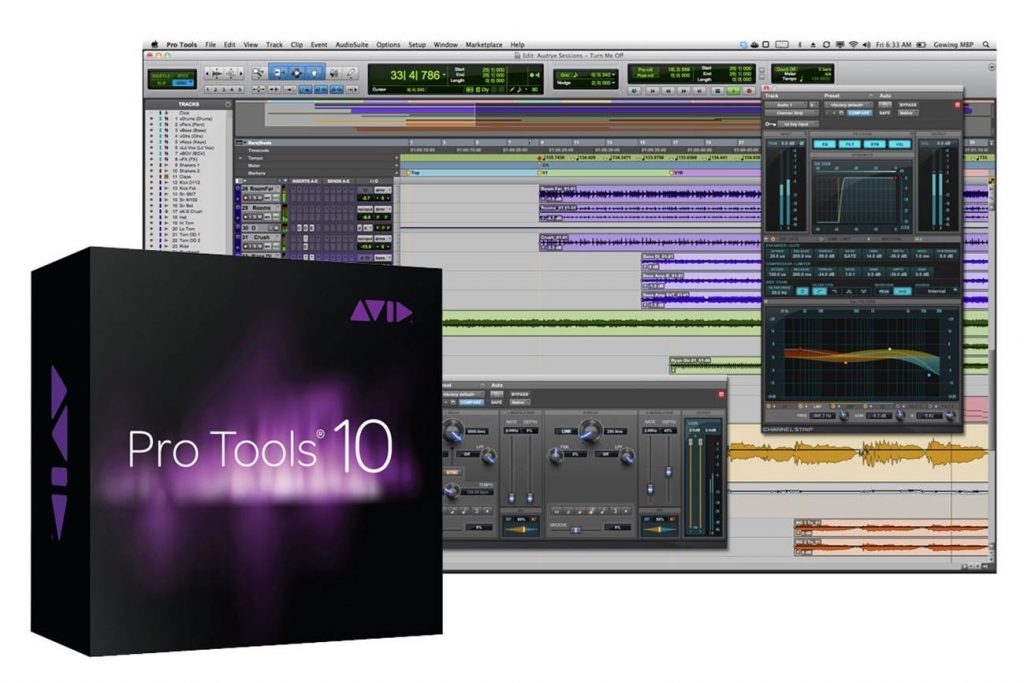
Your digital audio workstation (DAW) software is what you will use to record, edit and mix recordings.
Choosing the right DAW program will depend on your computer specifications and operating system – you can get DAW software for free or buy them. For professional DAWs, these can get really expensive very quickly – so I recommend just sticking to the tried and tested options.
Free DAWs
There are tonnes of free DAW software on the internet. Some of these include Audacity, Garageband, Pro Tools First, MU.Lab, Ardour and Tracktion 4. Some of these programs offer a free trial before asking you to upgrade to the professional version.
To get started quickly, I will usually just go for a proper paid DAW setup.
Paid DAWs
Since you are going to spend good money on your home recording equipment, you might as well get a proper DAW software.
Some good options include Pro Tools, FL Studio, Avid Pro Tools and Ableton Live 9. These DAWs have Windows and Mac OS compatible versions, so just get the one that suits your needs best.
To learn more about which DAW software to use, check out these posts:
Next item…
3. Audio Interface

The audio interface is a device that connects your instruments and microphones to your computer for recording. It works by converting analogue signals from your microphone to digital ones that your computer can read.
Although computers come with a built-in audio interface or soundcard, they are not built for studio recording. A standalone audio interface is vital when setting up your home studio.
When choosing an audio interface, pick the one with enough inputs and outputs to handle your instruments and microphones.
If you are running a larger home studio with multiple mics, consider an audio interface with more input channels.
Otherwise the all-in-one audio interfaces are also great choices for beginners.
Classic examples:
Next item…
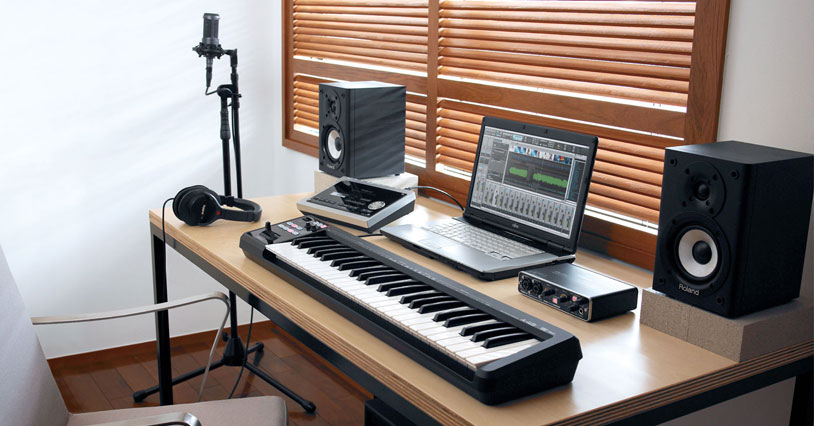
4. Studio Headphones
Studio headphones are an essential piece of recording equipment. They are used to help you listen to vocals in your mix by providing a flat and balanced frequency response.
It really helps to invest in a good pair of studio headphones that you’re comfortable with as you would be working with these for a long time.
Getting a good pair of studio headphones is vital to helping you make better mixing and recording decisions. You can use regular headphones to listen to your recording, but never for mixing and editing music.
Closed-back or open-back?
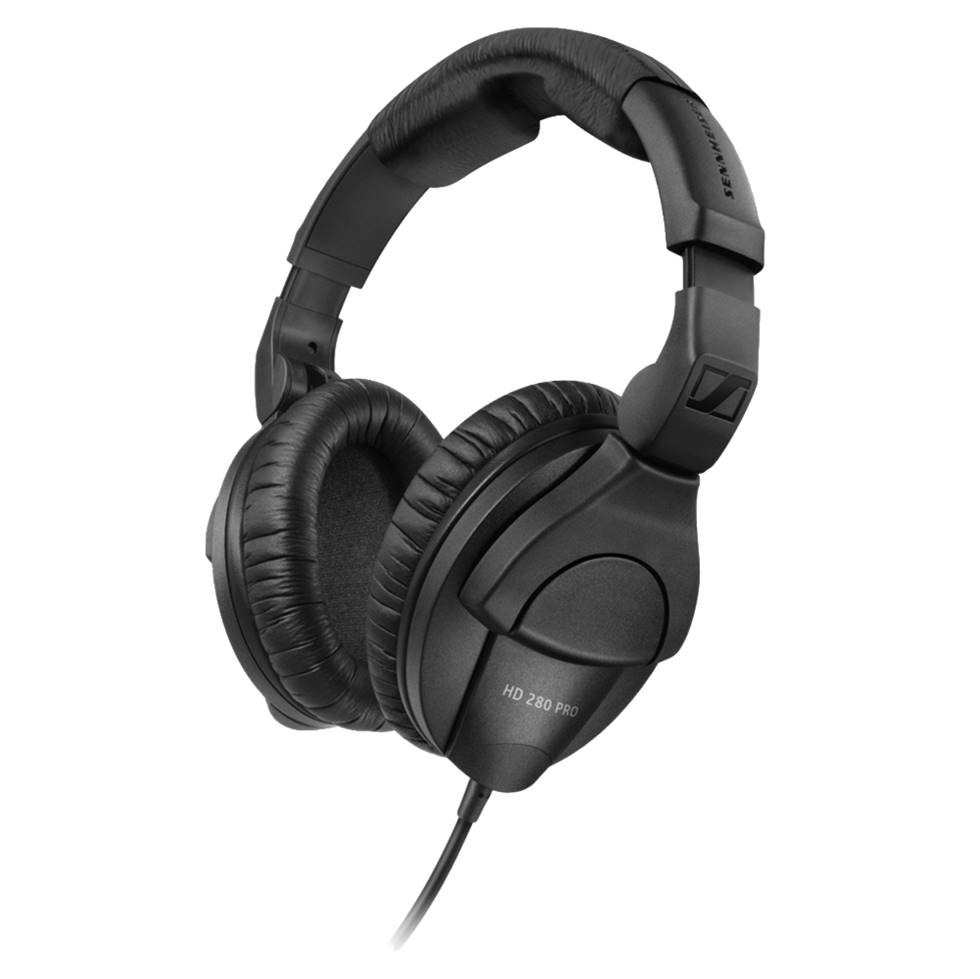
There are generally two types of studio headphones – open-back and closed-back. Open-back headphones have a more ‘open’ and airy sound signature, while closed-back headphones have better sound isolation by keeping out background noises.
For beginners, I recommend starting out with closed-back headphones as they are designed to reduce sound bleed and provide good sound isolation. The Sennheiser HD 280s are the classic example.
Unless you have a portable headphone amp, open-back headphones are generally out of the question because they have higher-impedance and cannot be powered directly from your computer’s audio port.
Classic examples:
Next item…
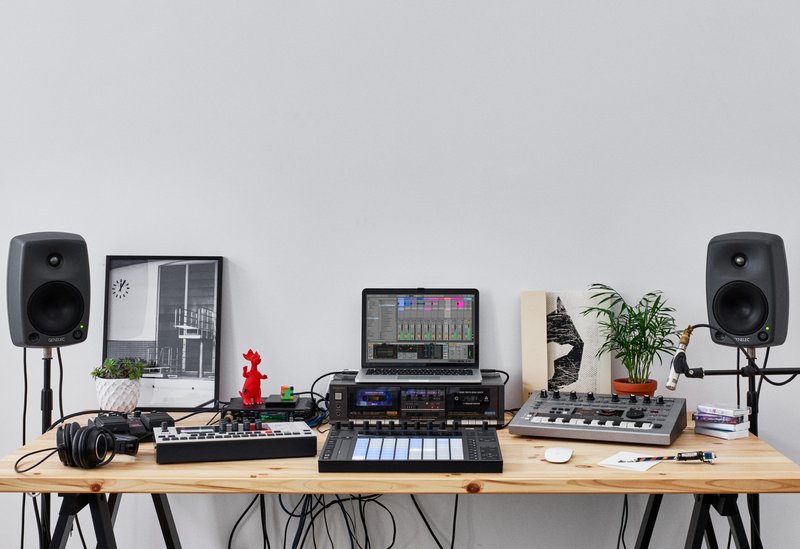
5. Studio Monitors
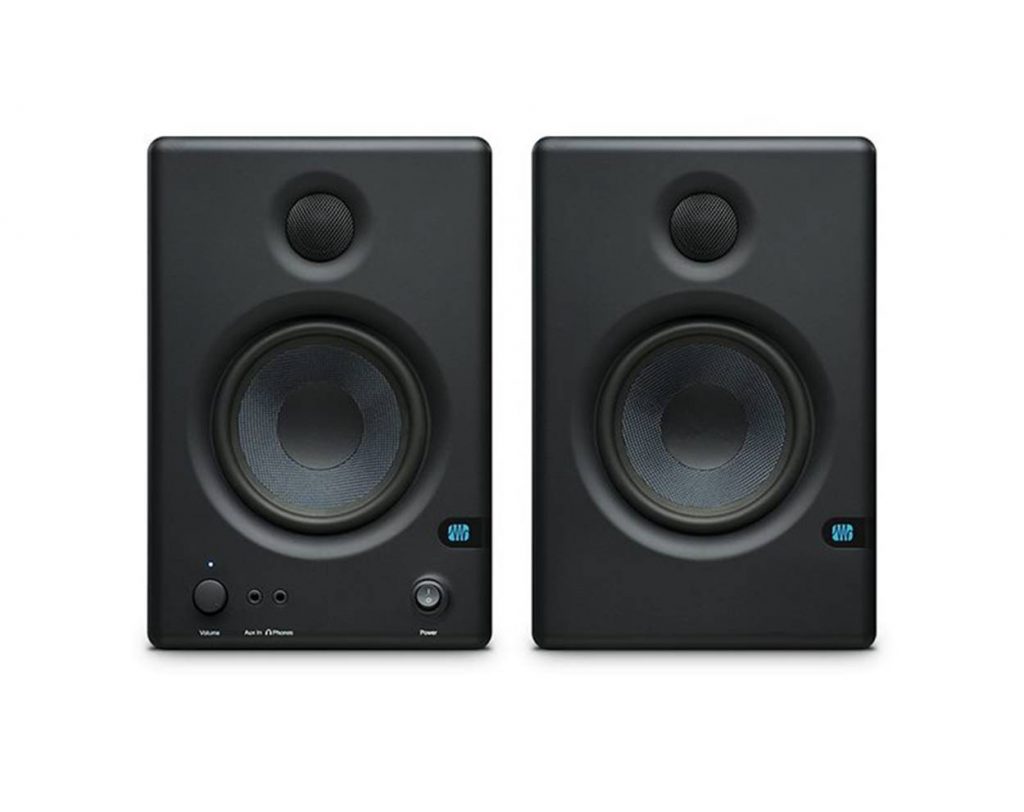
Like studio headphones, studio monitors are another essential piece of equipment that you need for home recording.
Studio monitors help you listen to your recordings by providing a flat frequency response – they are analytical in sound signature, allowing you to pick up subtle nuances in your music.
Why are studio monitors important? Because they help you to make better mixing decisions by allowing you to hear the sound accurately without any additional sound ‘boosting’.
If you decide to get cheap studio monitors or just use your computer speakers, you may end up with a mix that sounds good only on your speakers but not anywhere else.
There are many decent budget options on the market.
Classic examples:
Next item…
6. Microphones
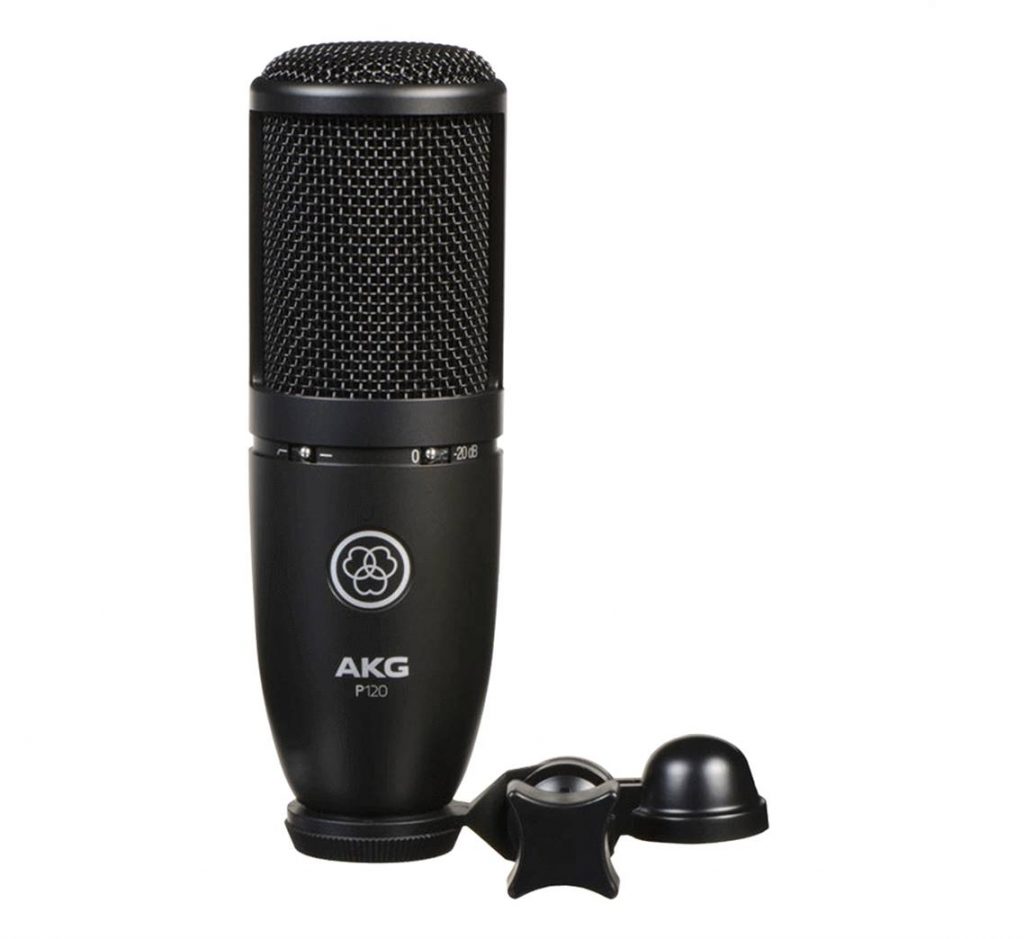
For studio recording, the two types of microphones that we will use are dynamic and condenser microphones.
When recording vocals, go with a large-diaphragm condenser microphone as these mics are designed to be more sensitive and capture more details in vocal performances. Condenser mics are generally better at recording higher frequencies with greater accuracy.
The downside with condenser mics is that they can be very sensitive – especially with louder volumes that may cause the signal to distort.
This is why for recording louder sounds such as drums, we use dynamic microphones. These are generally better at capturing low-frequencies and aren’t as sensitive as condenser mics.
If your room has poor acoustics, considering using a dynamic mic for recordings as these mics don’t usually pick up echoes and rogue sound waves.
Classic examples:
For a complete guide on which microphones you should use, check out this post:
- The Different Types of Microphones Explained
- The Best Microphones for Home Studio: Ultimate Beginner’s Guide
- Best Condenser Mics for Recording Vocals
Next item…
7. Microphone Stands
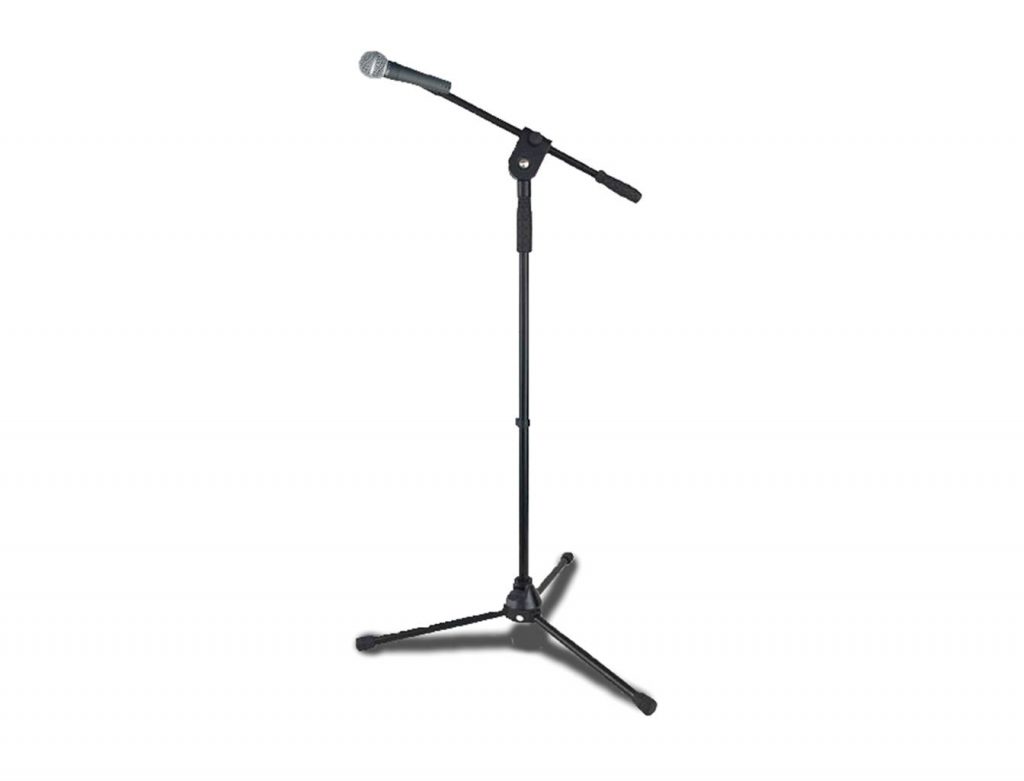
If you are planning on using a microphone, you’ll need a microphone stand. These come in all sorts of shapes and sizes so you need to pick one that suits your needs the best.
I would recommend starting out with a boom mic stand as these type of stands are more versatile and have adjustable mic positions.
This can be useful if you are recording in small spaces in your room with limited positioning options.
Classic examples:
- On-Stage MS7701B Tripod Microphone Boom Stand
- K&M Tripod Microphone Stand
- Samson MK-10 Microphone Boom Stand
Next item…
8. Audio Cables
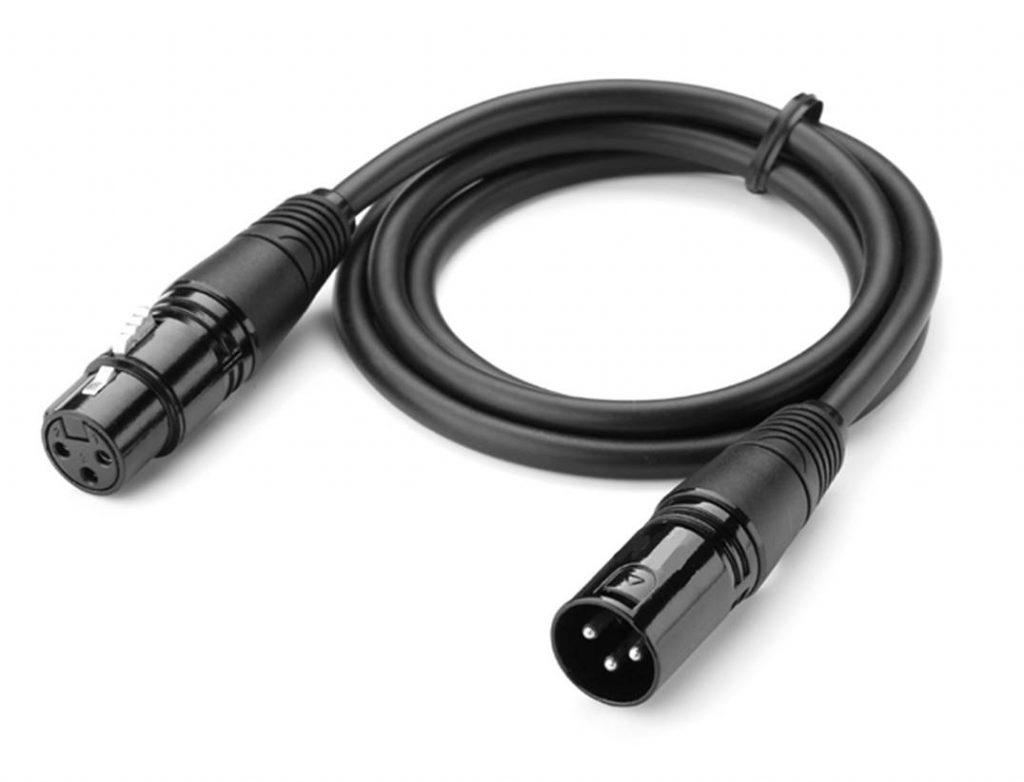
In every studio setup you will find multiple audio cables for your microphones, instruments and audio interface. They are required to connect everything together and get your studio started.
Never compromise on good audio cables. Cheap audio cables usually cause interface from external and internal sources, resulting in hissing, buzzing or popping sounds. This will utterly ruin your audio recording.
If you are running cables through a large room, consider getting headphone extension cables…since headphone cables are usually too short.
For beginner setups, you will need at LEAST one long XLR cable for your microphone, 2 cables for your studio monitors and one USB cable for your audio interface.
Classic examples:
Next item…
9. Pop Filter
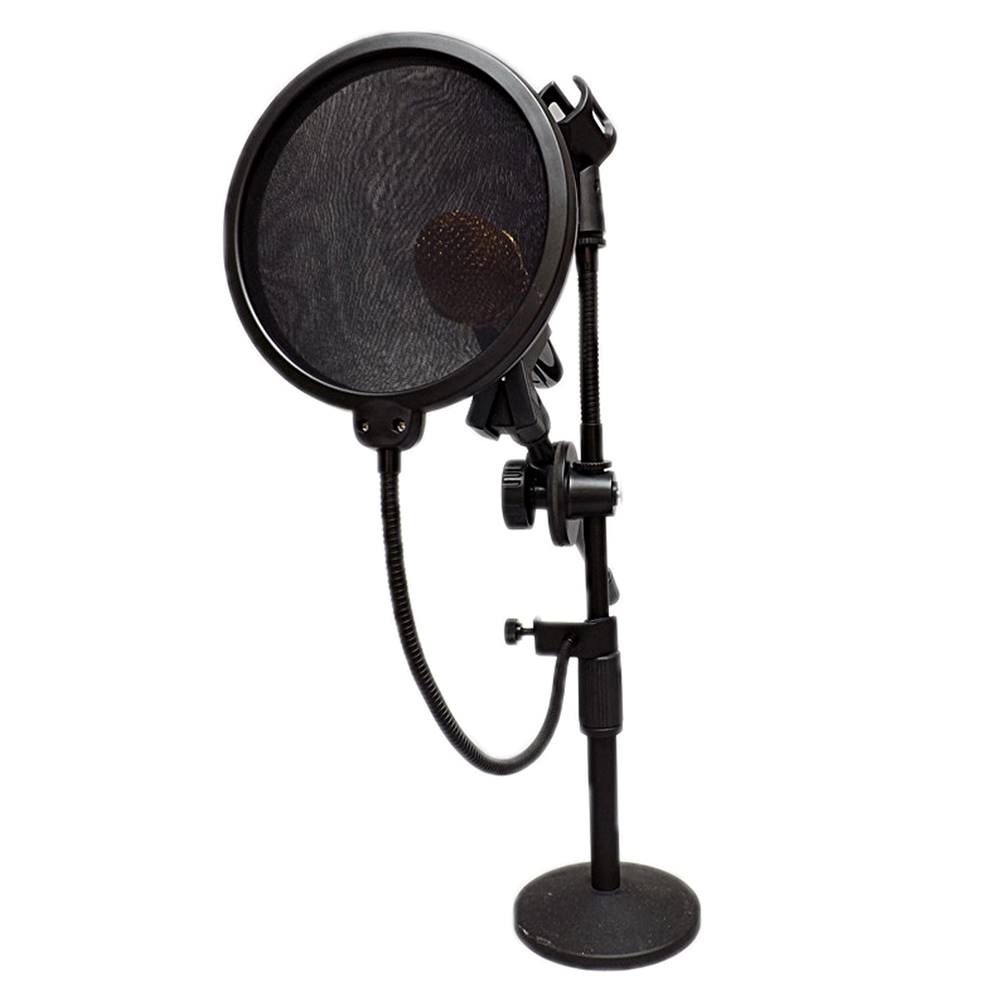
If you are using large diaphragm condenser microphones for recording, a pop filter is essentially a must.
Whenever you sing into the mic, your voice may contain plosive sounds such as “p” and “s” sounds that cause sudden spikes in the recording.
This may be particularly acute for large diaphragm condenser mics because of their sensitive recording strip.
A pop filter essentially removes these unwanted sounds, allowing your recordings to sound clean.
Classic examples:
For the list of recommended pop filters, check out this post:
Next item…
10. MIDI Controller
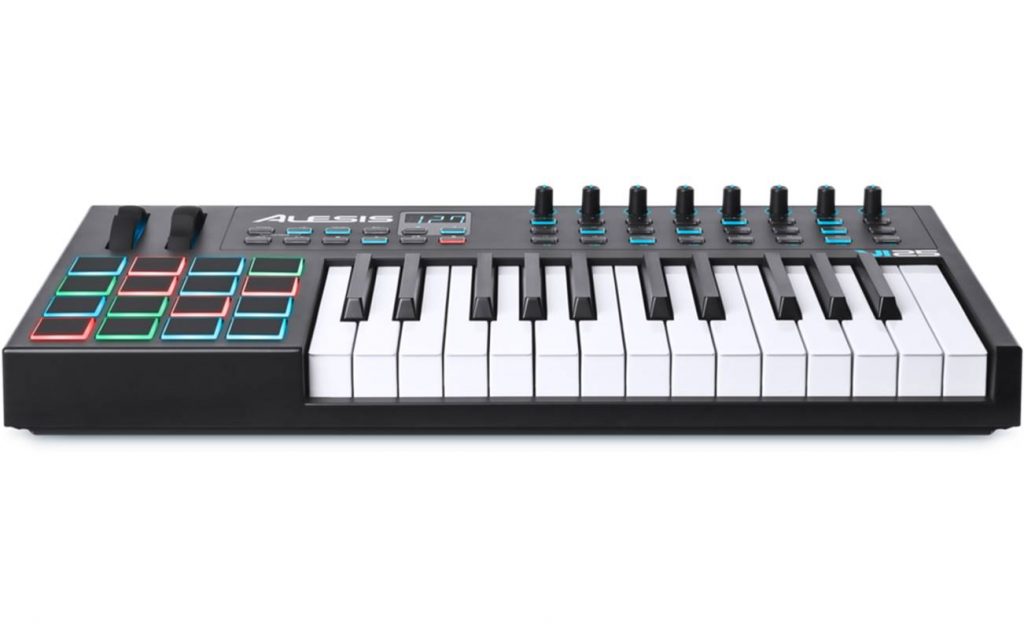
A MIDI, also known as a “Musical Instrumental Digital Interface”, is a protocol developed to allow electronic instruments and other instruments to communicate with each other.
The MIDI instrument can be an electronic keyboard, synthesizer or even part of a software environment such as Ableton, Garageland, etc. where you have a ‘virtual MIDI’.
By connecting a MIDI to your DAW system, you can edit performances note by note, add sound effects, vary the pitch or add MIDI effects, etc.
This helps you to multi-task by controlling and adding multiple sound effects in your DAW software all at once – making editing and adding soundtracks much easier!
Although you can technically use a ‘virtual’ MIDI with your recording software, it’s just more intuitive to have a physical MIDI keyboard or controller that you can use.
If you are recording solo at home, you absolutely need to learn how to use a MIDI controller.
Classic examples:
Moving on…
Stage 2: Intermediate Recording Studio
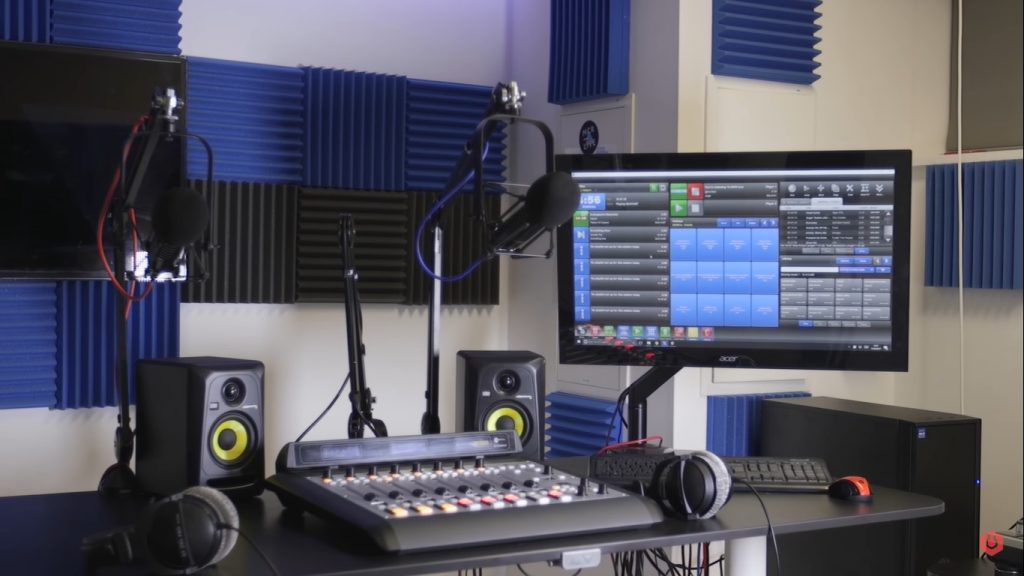
Once you have all the equipment for a basic recording studio, the next step is to apply acoustic treatment and setup your studio for sound monitoring and mixing.
Ideally, you would want to setup your recording studio in a large room so that you can fit everything together without too much congestion. You should space out your instruments and equipment to reduce acoustic reflections.
More on that here:
For an intermediate recording studio, you will need…
1. Studio Desk
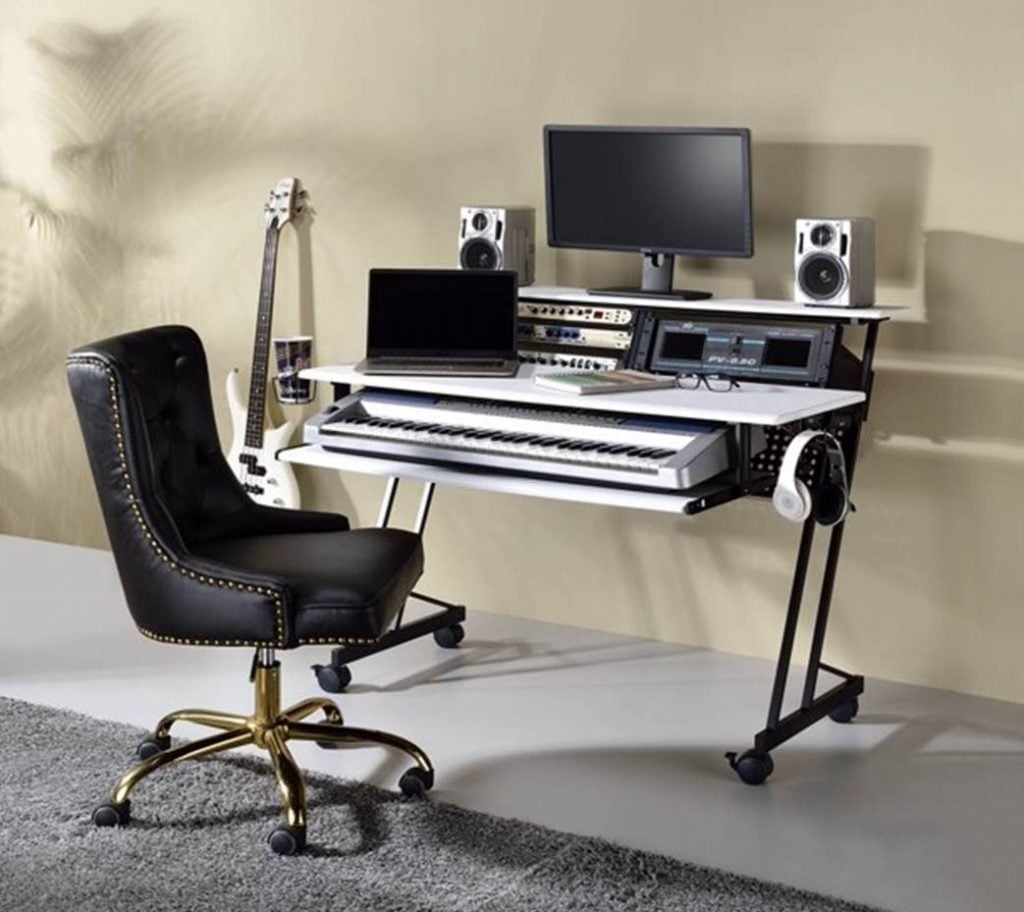
If you are planning on doing some serious mixing, it’s generally a good idea to upgrade your table desk to a dedicated studio desk.
Why?
Because a studio desk has a number of specialized features that can make your life easier, including:
- Adjustable table height
- Rack spaces for studio racks
- Adjustable keyboard tray
- Cable inlay for wire management
All of these features can make your home studio look more professional and provide storage for your studio rack equipment and MIDI keyboard.
Classic examples:
Next item…
2. Office Chair
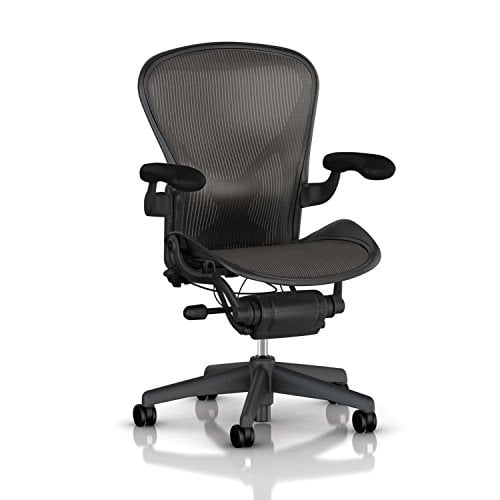
Every musician knows that a good chair can make a big difference if you are working long hours inside your home studio.
Although there are plenty of studio chairs out there, I would just recommend going with an office chair.
Why?
Because office chairs are designed to be ergonomically comfortable and allow you to work for long hours without feeling back fatigue. They are also cheaper than professional studio chairs.
A chair with adjustable height is ideal as you may need to adjust your listening position quite often.
Classic examples:
Next item…
3. Acoustic Panels
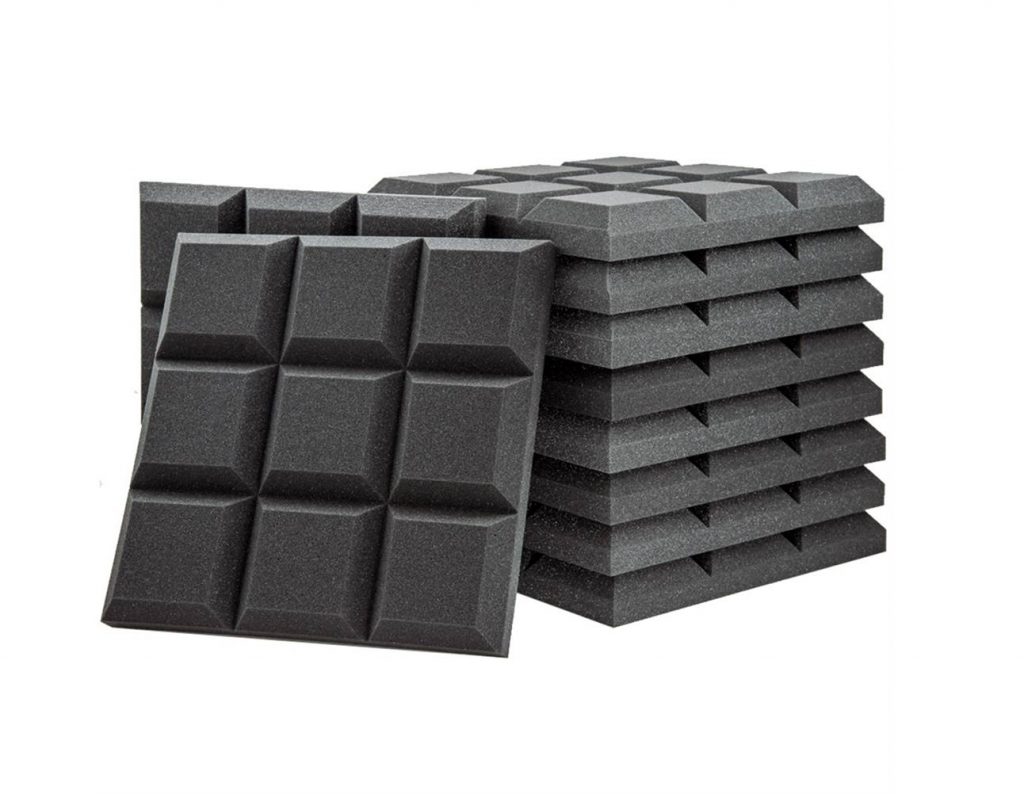
Applying acoustic treatment is one of the most important steps for any home recording studio.
If you have the budget for acoustic treatment, you should definitely treat your room with acoustic panels AND bass traps.
This is especially important for smaller rooms with poor acoustics.
More on that here:
Acoustic panels work by absorbing higher-frequencies that bounce off the walls (i.e., early reflections). This helps to keep the sound in your room neutral and reduces unwanted echoes.
However, it is always advisable to focus on treating low-end bass BEFORE treating the higher-end frequencies using bass traps.
Classic examples:
- Auralex LENPUR LENRD Bass Traps
- JBER 48 Pack Acoustic Foam Panels
- Acoustimac DMD Stagger Acoustic Panel
For a complete guide on how to apply acoustic treatment, check out this post:
Next item…
4. Bass Traps
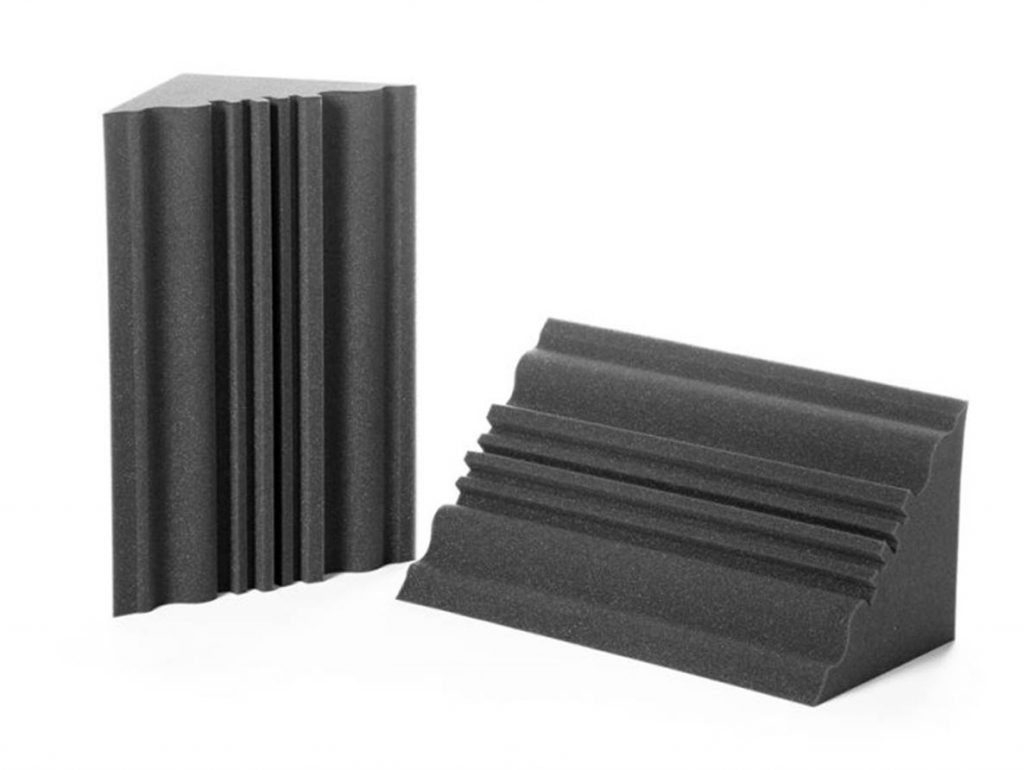
Every room will have issues with low-end frequencies (bass). This is because bass frequencies have a longer decay time and are harder to eliminate.
Acoustic panels (i.e., acoustic foam) have totally no effect on absorbing bass! You will need to use bass traps – which are made of thick acoustic material such as fiberglass and wood – to effectively absorb the low-end.
In every home recording studio, you can only reduce the low-end bass but NOT completely eliminate it. So it is vital that you treat the low-end before starting on anything else.
Bass traps should ideally be placed at the corners of your room as because tends to accumulate at corners near the walls.
Classic examples:
Next item…
5. Diffusers
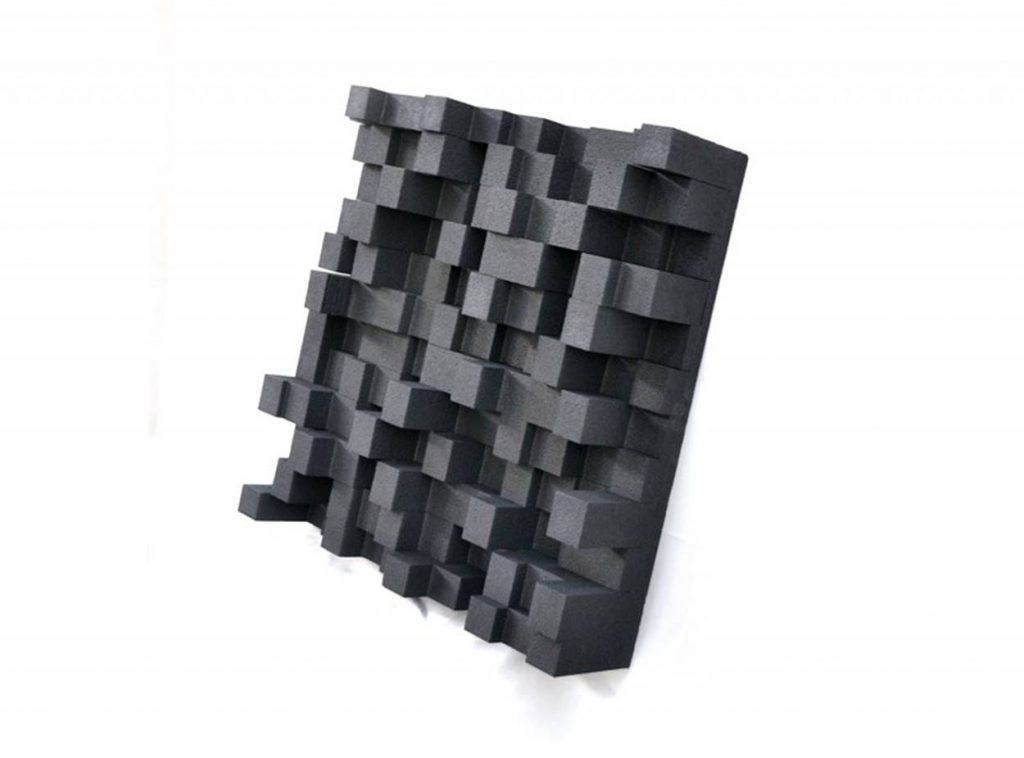
What happens if you plaster your room with acoustic panels and bass traps?
You’ll most likely end up with a dead sounding room!
To alleviate issues with too much dead-end absorption, we add diffusers to ‘disperse’ sound so as to preserve the natural acoustics of your room.
This is done by placing both diffusers and acoustic panels at the rear end wall to prevent sound waves from being ‘amplified’. This is called the “dead-end live-end” strategy.
Preserving the natural acoustics at one end of your room is also important if you intend to do both recording and mixing inside the same room – which most home musicians on a budget would be doing anyway.
Classic examples:
Next item…
6. Reflective Filters
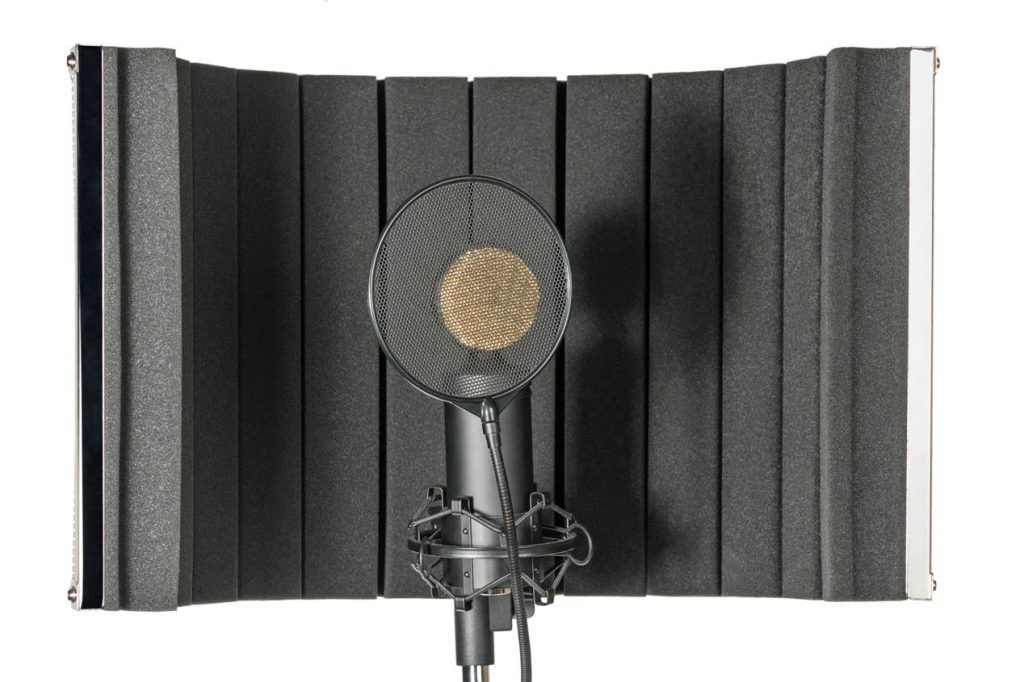
The problem with smaller rooms is that sound tends to echo a lot – especially if you are recording vocals and singing.
Apart from acoustic treatment, we use reflective filters which are designed to absorb sound coming from the singer.
This prevents sound from getting into the rest of the room, which means that you get less reflections and echoes coming from the room into the mic.
If you are short on budget for acoustic treatment, a reflective filter can be a VERY cost-effective to get a much cleaner sound.
Classic examples:
Next item…
7. Studio Monitor Stands
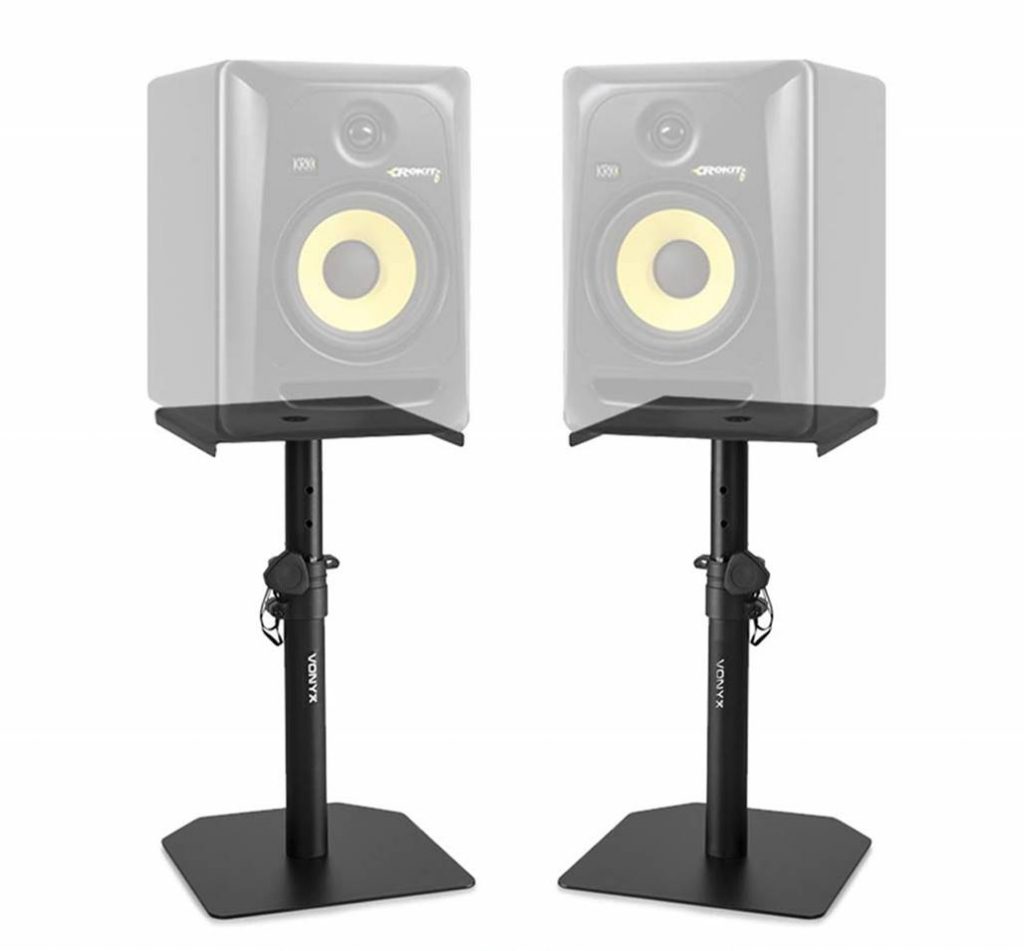
While most beginners like to place their studio monitors on the studio desk, studio monitor stands are much better for an intermediate to advanced setup.
This is because studio monitor stands allow you to change the height and position of your studio monitors, providing a more well-balanced listening experience. This is difficult to achieve if you just leave the monitors on the desk.
Bear in mind that you will need at least some space between your desk and the wall to fit these stands, so sure that your room size is suitable.
Classic examples:
Next item…
8. Monitor Isolation Pads
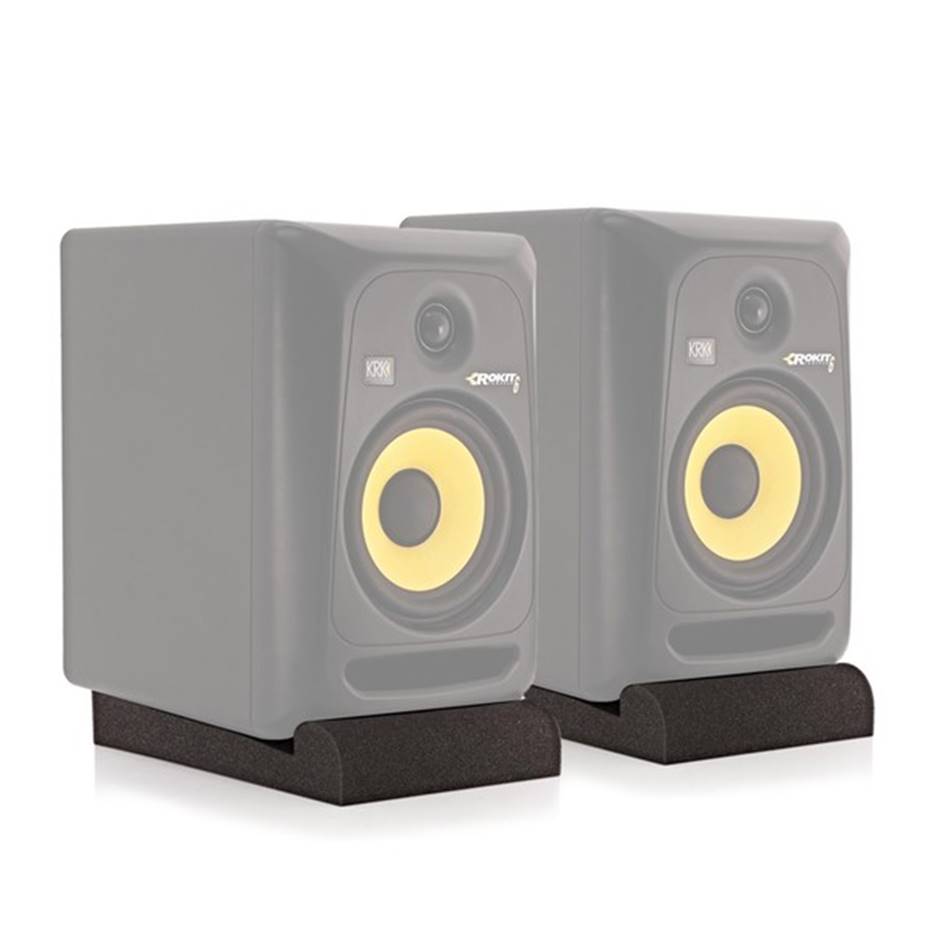
Now if you are listening to studio monitors, you’d want to eliminate any sound between your studio monitor speakers and the surface that they are resting on.
Why?
Because studio monitors may pass down unwanted vibrations from the speakers to the desk which may slightly alter the sound quality.
Monitor pads help to provide full sound isolation and stabilization for accurate monitoring. They are an easy fix if you want to hear your sound in a pure and pristine way.
Classic examples:
Next item…
9. DAW Remote
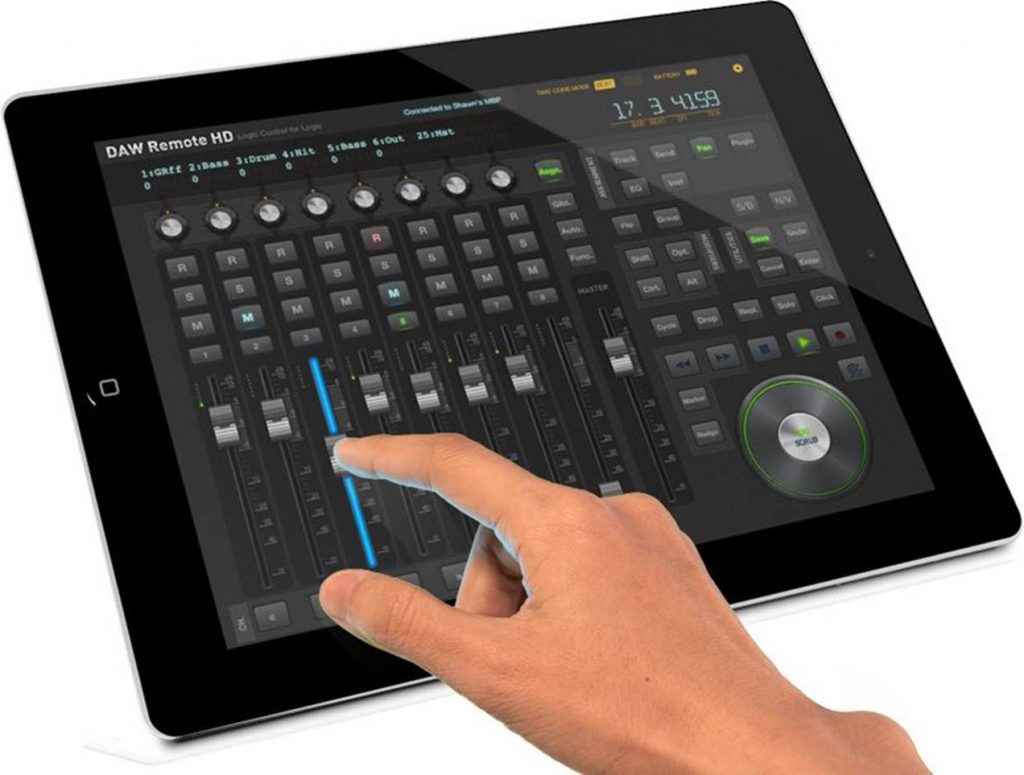
If you are recording solo, I highly recommend getting either a separate computer monitor screen or a DAW remote to control your DAW workstation.
A separate computer monitor screen works just like an extension of your computer, and you can control the software using a wireless mouse or keyboard.
A DAW remote is software that you install on your iPad which you can use to wirelessly control your mixes while recording.
All you have to do is download the software from the app store and connect your iPad to your DAW. Most DAW remote software are compatible with popular recording software including ProTools, PreSonus and Ableton.
Next item…
10. Backup External Driver
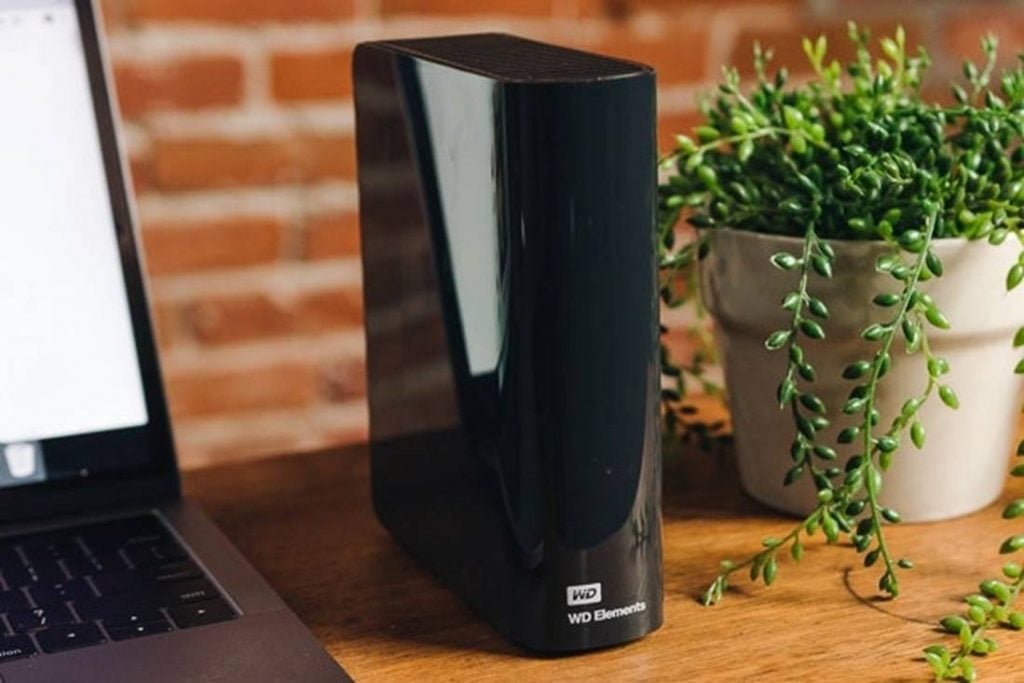
If you have ever recorded on a windows PC, you might have encountered situations where your computer suddenly restarts, hangs or crashes and wipes out hours of hard work!
Most DAW software will allow you to backup your recordings on an external driver, so you never *completely* lose all your data.
If you are recording in a group, a backup external driver is almost a MUST to save hours of recording from ever being wiped out!
Classic examples:
Up next, we have the…
Stage 3: Advanced Recording Studio
Now if you are recording with multiple musicians and need to record more instruments and vocals at the same time, you’ll need the following equipment:
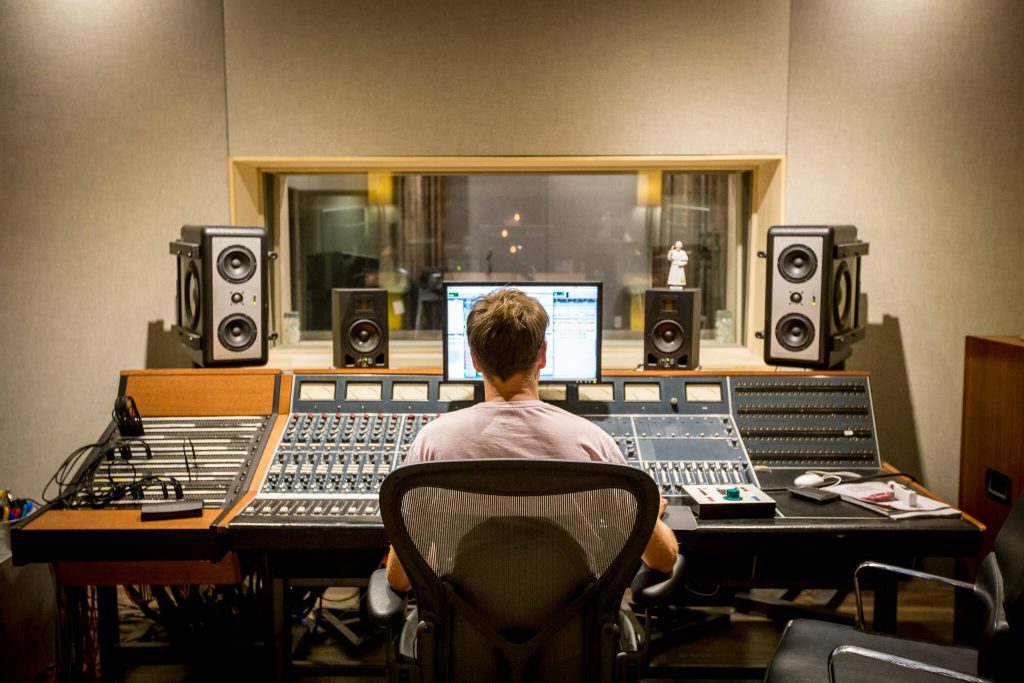
1. Sound Mixer
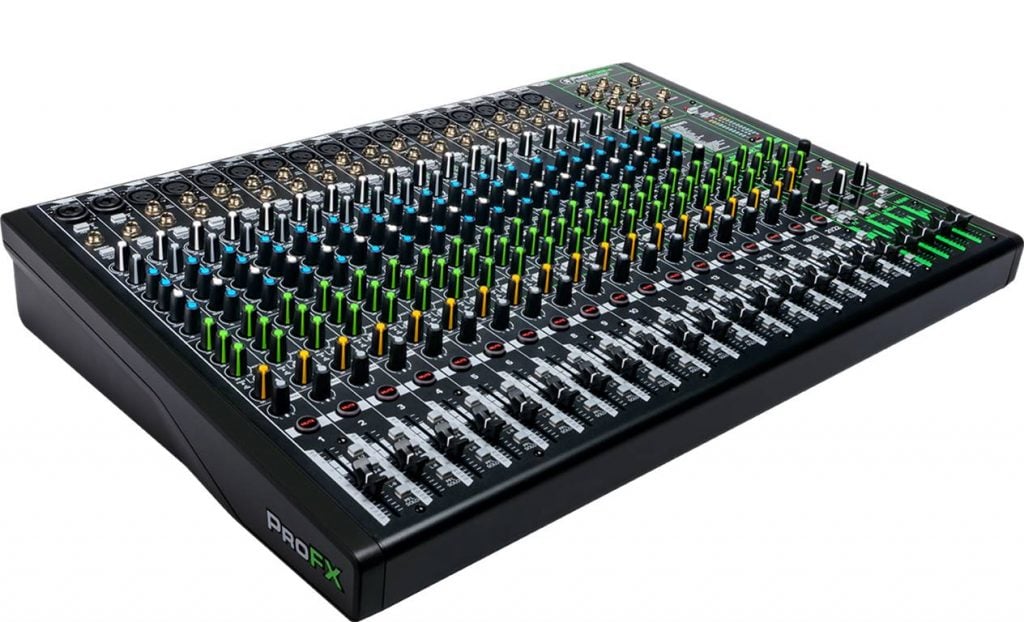
The problem with having multiple instruments or microphones is that it gets hard to control everything from a single standalone audio interface. You might also need more input channels to record your sound.
This is where a sound mixer comes in…
A sound mixer usually comes with a built-in interface which allows you to connect multiple instruments and inputs at the same time. It comes with professional XLR inputs for microphones, line-level inputs, etc.
Most mixers will have onboard signal processing capability on each channel, which allows you to adjust the sound output, balance and EQ settings.
Some mixers also have auxiliary channels which allow you to send drum and guitar signals to the studio monitor so that you can stay in tune.
Here are some recommendations:
If you don’t have the budget for a sound mixer, consider using a digital audio mixer instead. One example is the PreSonus StudioLive digital mixer.
Classic examples:
Next item…
2. Direct Box
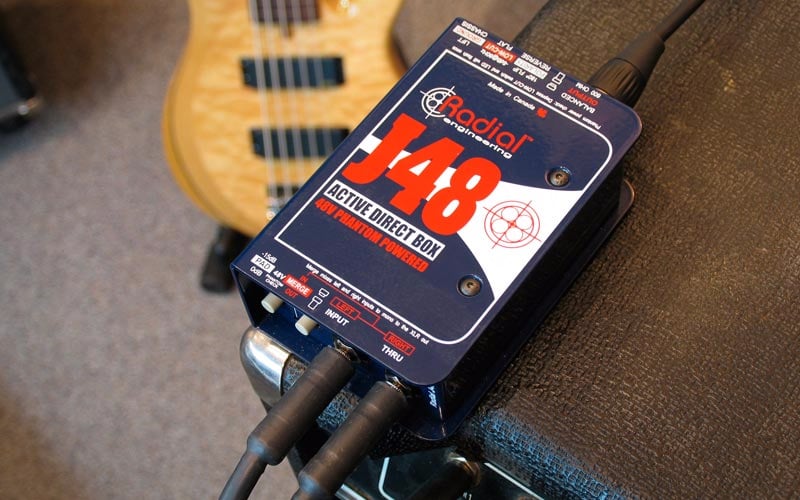
If you have ever tried connecting your instruments directly to your mixing board, you’ll know that they sound somewhat muffled and noisy.
This is because instruments tend to send unbalanced high-impedance signals which can add noise to your output system.
A direct box converts the signal from your instruments into a low-impedance signal that can be fed into your console’s microphone input via XLR.
By doing this, you dramatically improve the sound quality of your instruments and eliminate high-impedance noise by converting the unbalanced signal to a balanced low-impedance signal that is compatible with your mixing console.
Classic examples:
Next item…
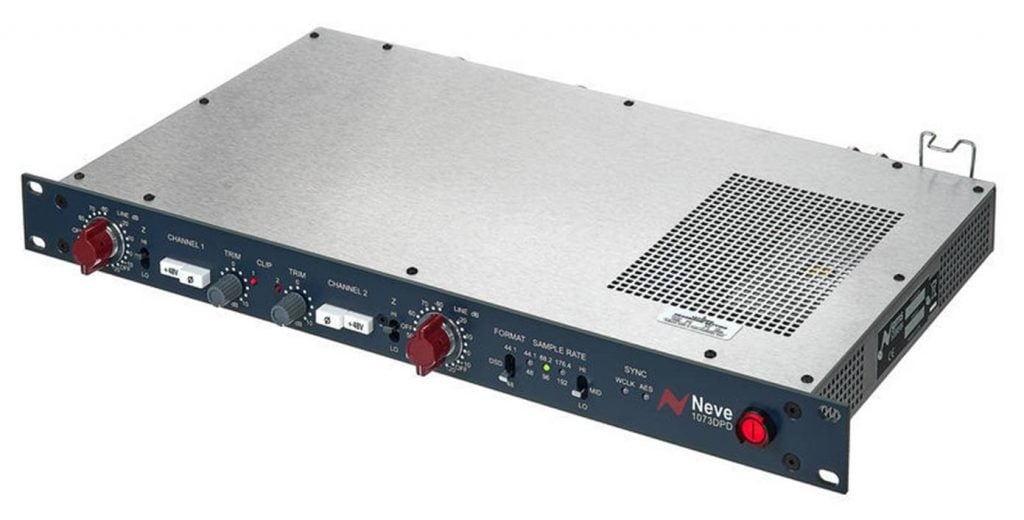
3. Microphone Preamps
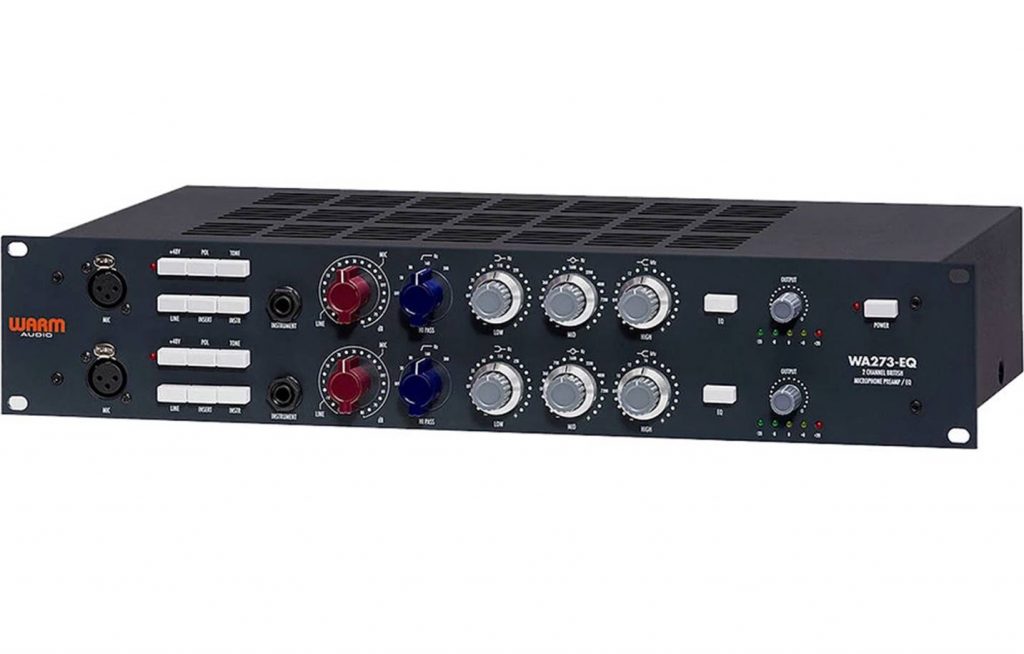
If you are running long cables through your home recording studio, you’ll start to notice some microphone noise and higher impedance.
A mic preamp works by taking the microphone signal and boosting it to a level that can be recorded by your DAW.
Although most audio interfaces will come with a built-in microphone preamp, advanced recording studios use a dedicated mic preamp for better gain control at the recording stage.
If you are looking for a dedicated outboard mic preamp for extra signal boosting, here are some options to choose from:
Classic examples:
Next item…
4. Desktop Headphone Amp
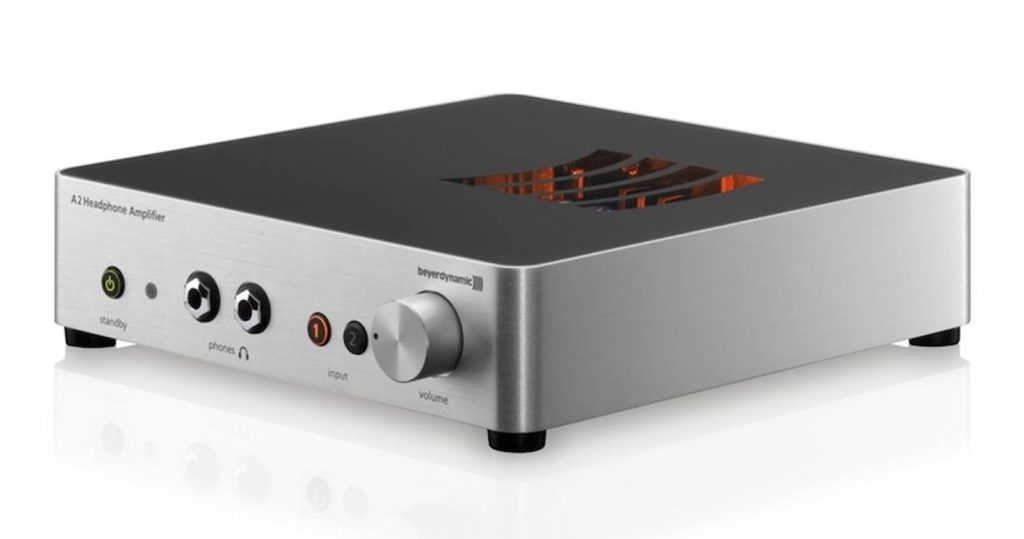
Although most audio interfaces have a headphone-out option, they usually only have ONE output channel which is suitable for only a SINGLE headphone.
This can be problematic if you are recording with multiple musicians in your studio and need to connect multiple headphones at the same time…
If you have multiple musicians recording at the same time, you will almost definitely need to split the audio signal. A dedicated headphone amp is a MUST as you can’t split one headphone signal without some sort of amplification.
Furthermore, a dedicated headphone amp will provide dedicated amplification which can reveal details in the sound quality that other smaller units can’t match.
I recommend getting a desktop amp that has at least four channels with dedicated volume control for each channel.
Classic examples:
Next item…
5. Drum Machines
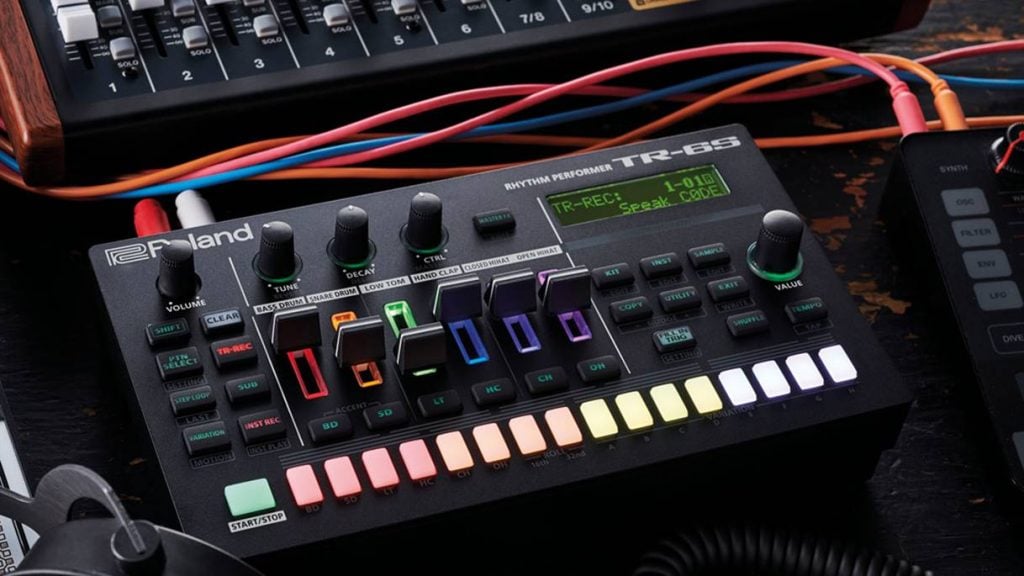
For most home recording studios, a dedicated drum kit is something that most musicians won’t have space for.
But if you are recording with multiple musicians, one GREAT way to add beats and percussion notes to your music is to use a drum machine.
This is essentially a piece of musical hardware that is used to imitate sounds of electronic drums and percussion instruments. They have a keypad similar to a MIDI but are much smaller in size.
With a drum machine, you can essentially create, mix and program drum beats for your music – which can be extremely helpful and fun to use!
Classic examples:
Next item…
6. Sequencers
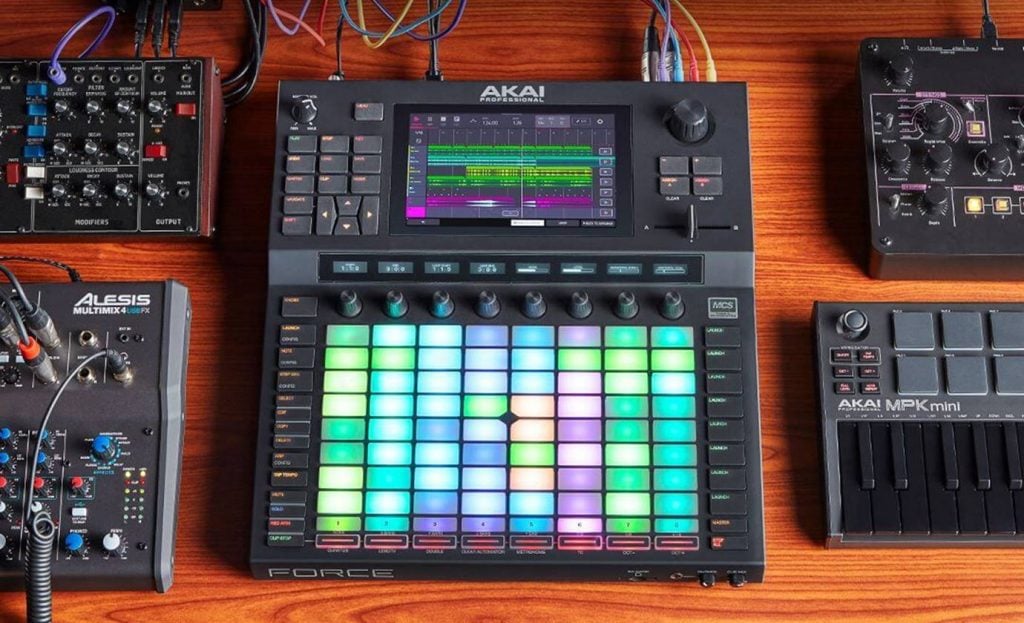
Now if you are recording with multiple instruments and musicians, a sequencer can really come in handy to combine your notes, rhythms and loops. By programming all of these in one go, you can free yourself to experiment with mixing and playing other instruments
So what can sequencers be used for?
- Drum beats – you can program drum beats and rhythms into your music on the fly
- Basslines – you can use a sequencer to essentially program basslines into your recording
- Rhythms and melodies – you can create repeating patterns and polyrhythms within your music, add revert or delay, etc.
My personal favorite is the Akai Force sequencer which you can use to combine drum beats, notes and patterns into one music production kit.
Most sequencers these days also come with MIDI, CV and USB connections to connect directly to your DAW recording software. This allows you to send signals to your DAW like pitch, tempo and sync patterns.
Classic examples:
Next item…
7. Ribbon Microphones
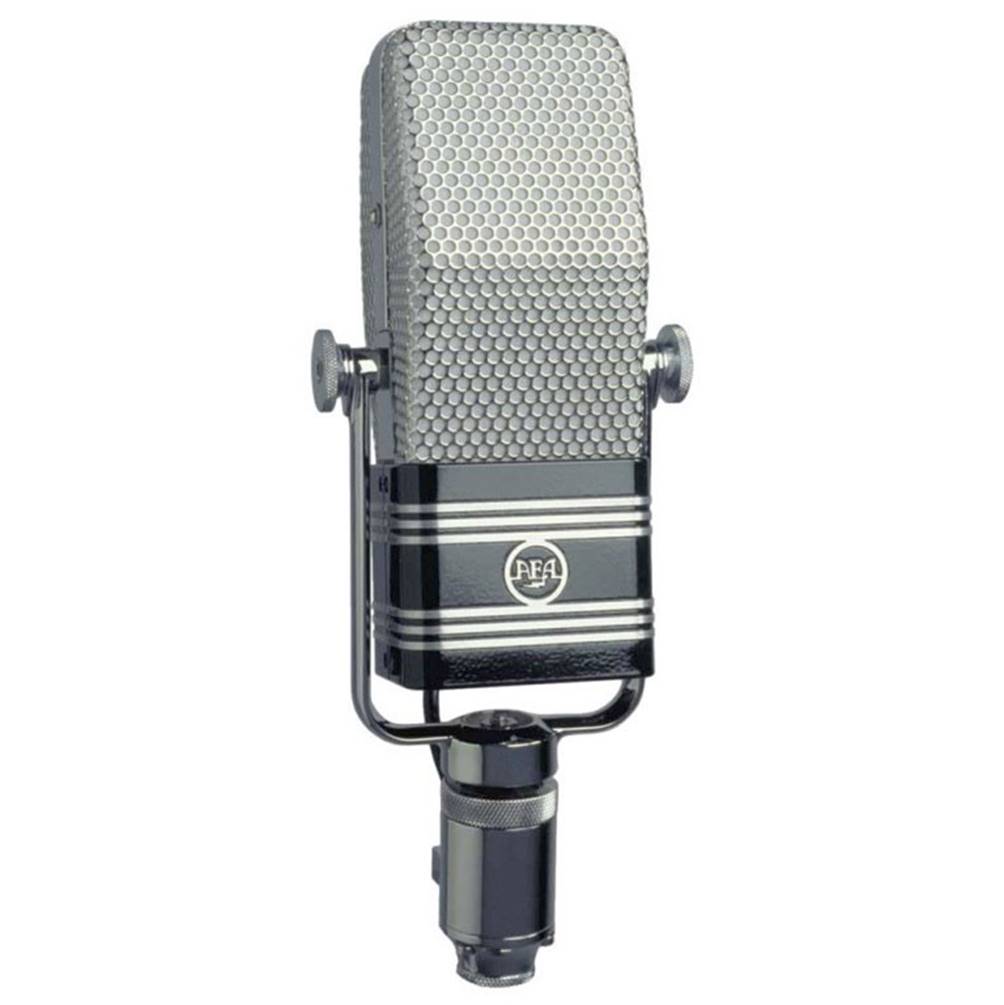
Ribbon microphones are some of the most accurate and detailed mics in the recording industry. They bring warmth to mid-range frequencies and a softness to higher-frequencies that cannot be attained by dynamic or condenser mics.
Although ribbon mics are much more expensive than large diaphragm condenser microphones, they capture much more detail in your instruments and vocals due to their 8-figure polar pattern and low-end pick-up.
In short, they sound the most natural out of all the mics that you have heard…
If you are already using a pre-amp in your studio, you can connect this with a ribbon microphone to bring out the natural tone of the microphone.
Classic examples:
Next item…
8. Snake Cables
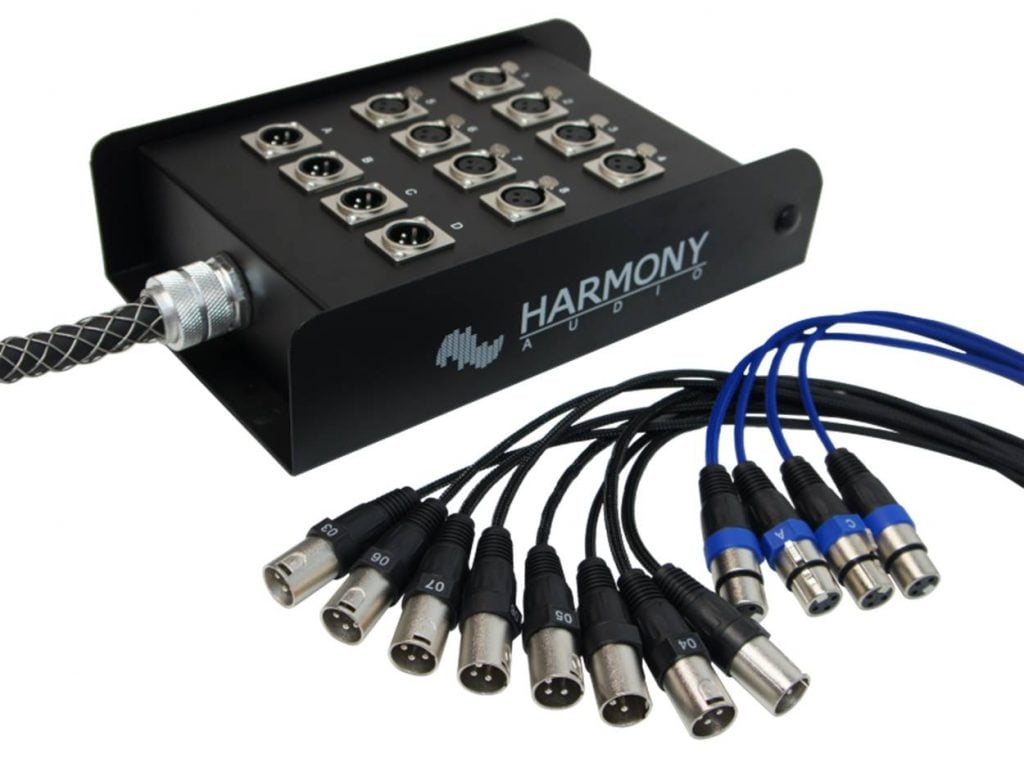
For advanced home recording studios, you are going to need a lot of cables to run your instruments and recording gear.
Over time, too many cables can create a mess in your home studio and production space. You don’t want to record inside a disorganized studio!
To make things easier, we use a snake cable which consolidates all the cables into one larger cable and allows for better management of your cables.
Most snake cables allow up to 8 XLR channels in one simple connection line to your mixer or recorder, which makes controlling everything much easier.
Classic examples:
Next item…
9. Power Conditioners
If you have many pieces of equipment plugged into the same electrical power circuit, you’ll tend to notice more NOISE and interference in your recordings.
By using a power conditioner, this works to eliminate the noise completely. Each power condition comes with built-in filters that can significantly reduce noise generated by each piece of equipment plugged into the same electrical outlet.
Another advantage of having power conditions is that they provide effective power surge protection to your instruments and gear than conventional electrical strips.
This helps not only to reduce noise, but protect your equipment from damage in the event of a power surface.
Classic examples:
Next item…
10. Studio Rack
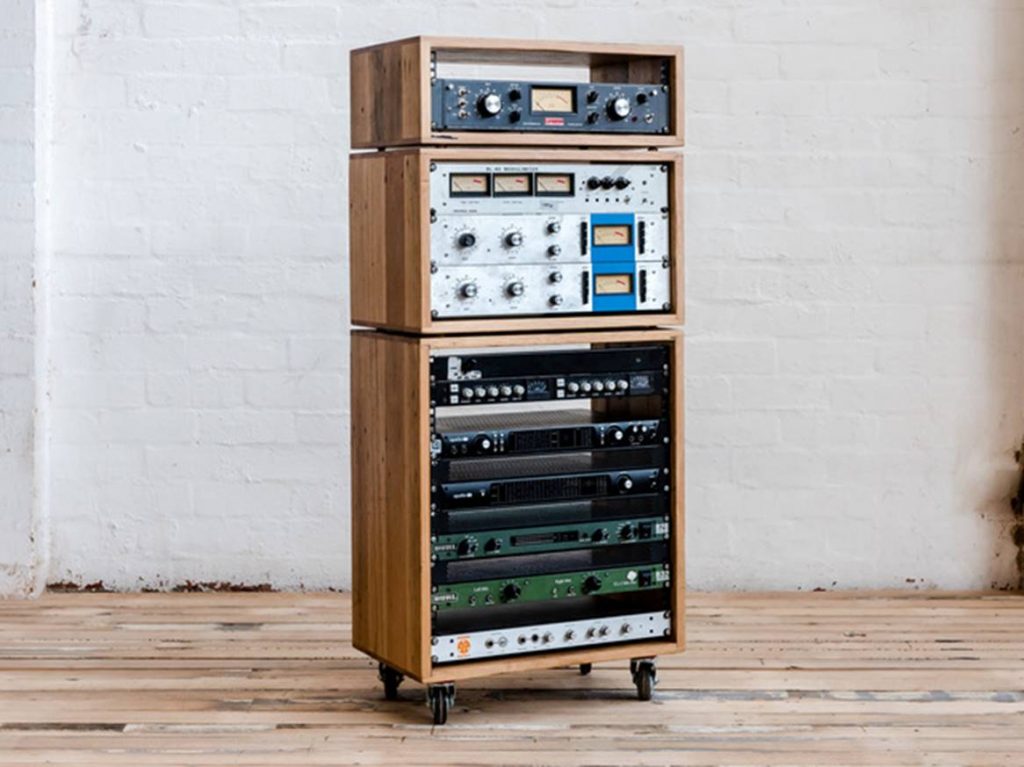
At some point in the life of your home recording studio, you’ll start to use studio racks.
These are essentially shelfs with a rack trial on each side which allow you to mount your studio gear and consoles. You’ll also need to use rack-mountable gear if you intend for them to fit inside your studio rack.
Sometimes studio gear also produces a lot of heat during the recording process, and placing them in a studio rack helps to dissipate this heat efficiently.
How should you place your gear in a studio rack? Here is the recommended order of placement:
- Power conditioner – this should usually be at the top because all the power runs through them and they generate a lot of heat
- Multi-channel preamp – the preamp tends to generate a lot of heat when boosting your microphone signal, so placing them at the top helps to dissipate the heat faster
- Headphone amp – a powered headphone amp can be placed below the multi-channel preamp; this device is used to power all your studio headphones especially if you are recording with multiple musicians
- Audio interface – this is usually placed at the bottom of the rack as it generates the least heat
Classic examples:
And finally, we have the…
Stage 4: The Professional Home Recording Studio
By design, a professional home recording studio should consist of everything in the advanced recording studio setup, with the following additions:
1. Rackmount Amps
A rackmount amp is essentially an amplifier designed to be mounted in your studio rack. They are configured to provide multiple output channels for you to connect your studio headphones.
They are particularly useful if you are recording with more than 4 headphones and need to connect them to a single amplification source. For professional recording studios with multiple musicians, a rackmount amp can be very beneficial.
Most professional rackmount amps feature a main input with level control plus stereo outs, aux inputs and EQ adjustments per channel. They can usually connect up to 4, 12 or 16 headphones at one time.
Classic examples:
2. AD / DA Converters
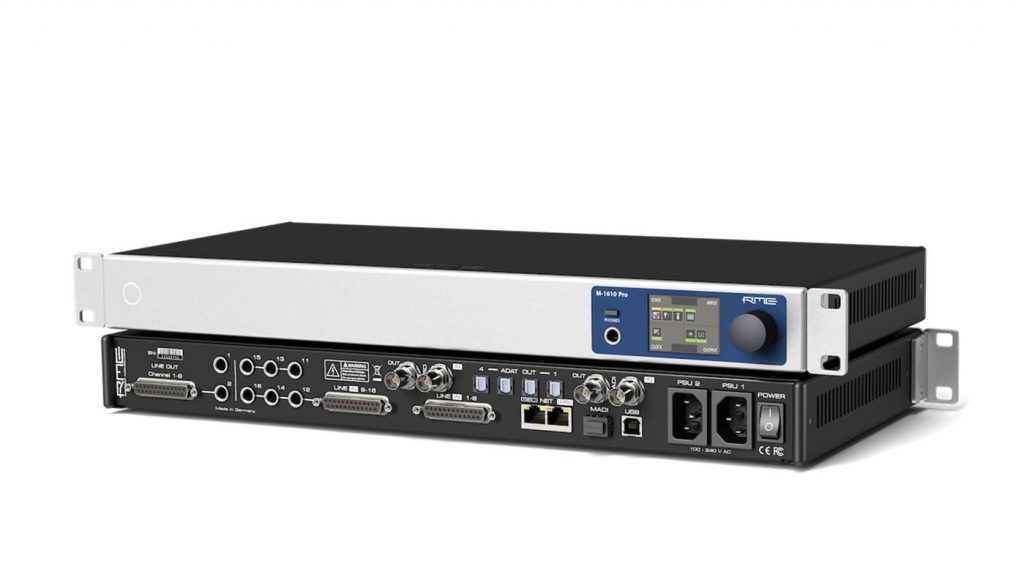
While this is overkill for most home recording studios, a dedicated AD / DA converter is used for ONE single purpose – to convert AD and DA signals while preserving the best possible sound quality.
This is because, when digital audio is converted into analogue signal and vice versa, there is some data loss which may result in a ‘blurred’ recording that cannot be improved later on.
Adding a AD / DA converter can help improve the playback sound quality in your recording chain, although a professional AD / DA converter can easily run into thousands of dollars…
Classic examples:
Next item…
3. Uninterruptible Power Supply
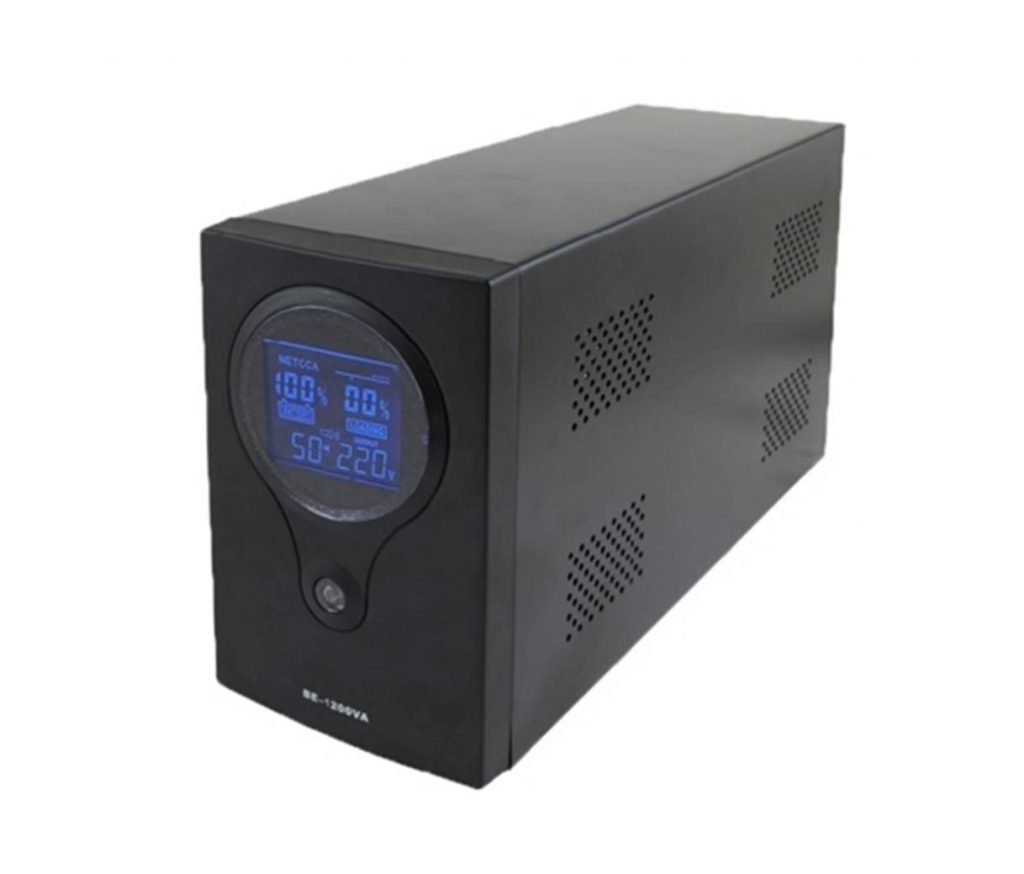
Apart from an external backup drive, an uninterruptible power supply serves the same function as a backup generator to supply your studio gear with power.
In this way, you won’t have to worry about any power outage during recording sessions.
This is most effective if you are recording for long hours and need a continuous power supply for uninterrupted recording.
This is mostly overkill for a home recording studio, but if you have the budget, it helps to invest in one.
Classic examples:
Next item…
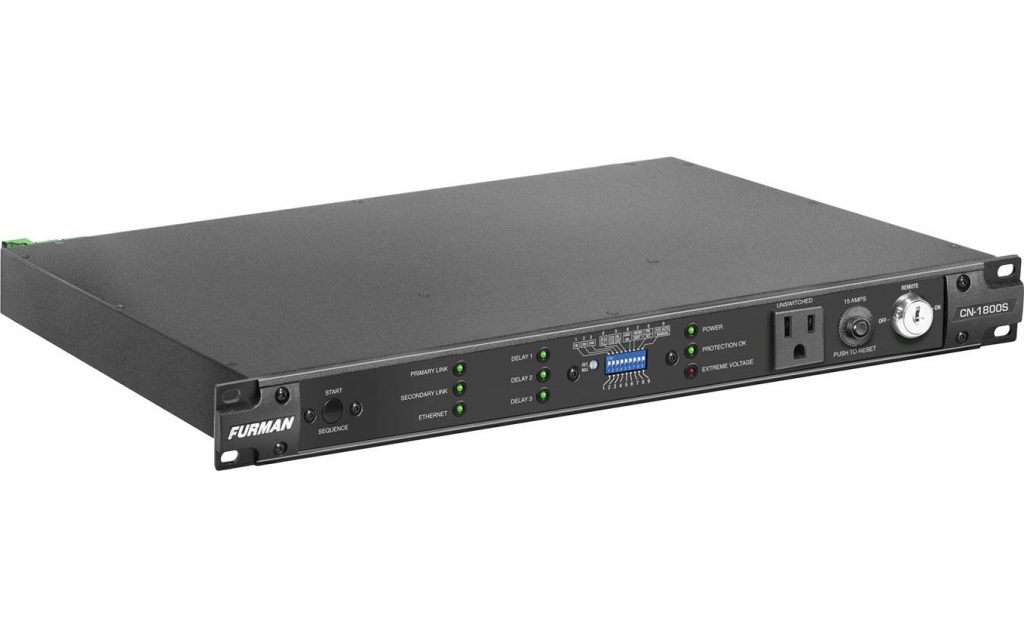
4. Power Distributors
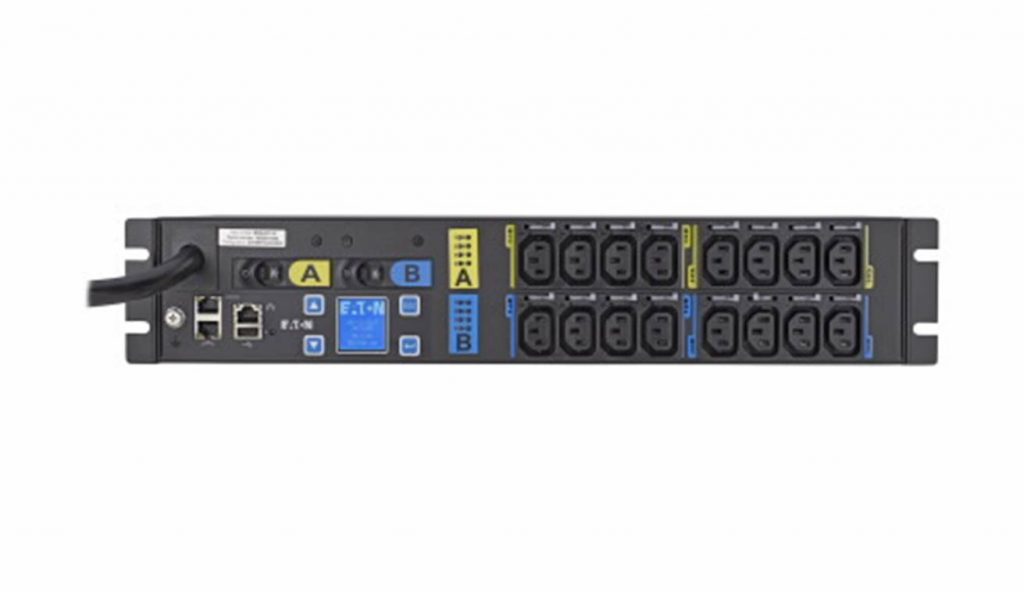
Power distributors work just like power conditioners, but come with a few advanced features including power filtering, overload protection and USB ports.
This is essentially a full scale power management system to ensure that every piece of gear in your recording studio is supplied with balanced power with any noise. A power distributor also keeps your entire rack safe from power surges and disruption.
Advanced power distributors come with multiple (up to 10 rear outlets) with power filtering, so you can even control the amount of power going through each outlet if required.
This is especially useful if you are managing ALOT of equipment from a distributed power source.
Classic examples:
And that’s it!
Next Steps
To learn more about acoustic treatment and recording vocals at home, check out these posts: