In this tutorial, we will go through step by step how to record guitar on a PC and Mac at home.
To record your guitar on a PC and Mac, you will need either an audio interface or direct box and some decent microphones.
If you are recording electric or bass guitar, you can use a direct in (DI) or record the sound of your guitar through an amp…
We’ll cover what you need in detail below…
What you will need
Here is what you will need to record acoustic, electric and bass guitar on a PC or Mac:
- Condenser mics
- Dynamic mics
- Audio Interface
- Direct Box (for DI only)
- Mic stands
- Guitar amp (electric / bass guitar only)
- Audio cables
- Reamp (optional)
- PC with DAW installed
We will go through each instrument in detail below.
First up…
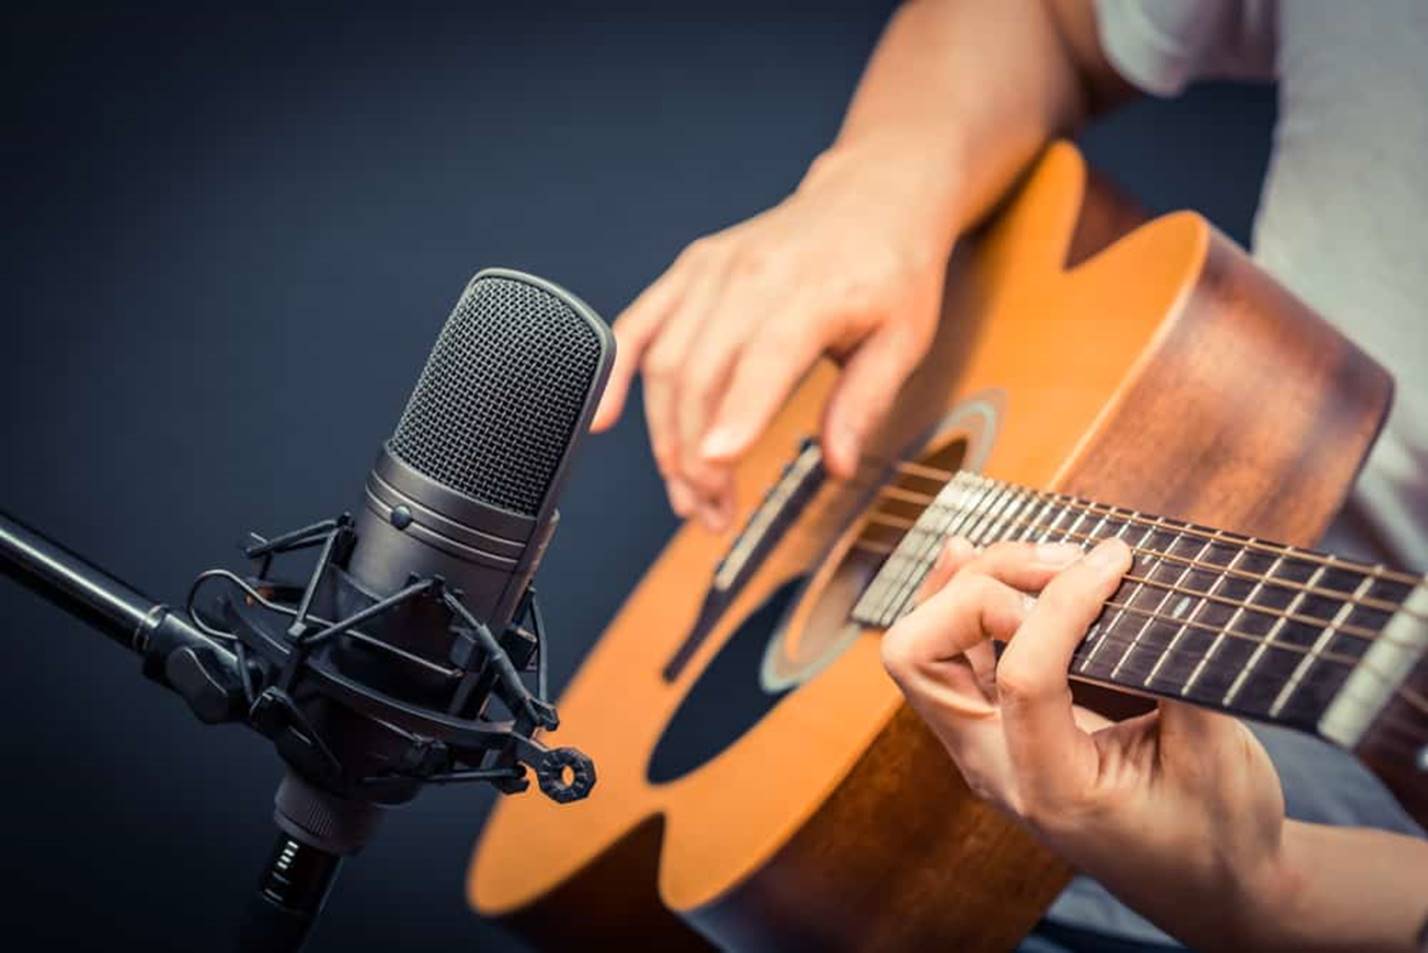
How to record acoustic guitar
Acoustic guitar is one of the most complex instruments to record…
There are many different types of sounds you can record with an acoustic, including:
- Plucking of the strings
- Tapping the soundboard
- Squeaking of the strings
- The bass from the soundhole
- The clipping of the frets
All these sounds involve detail and nuance that are best recorded by a condenser mic to capture the true sound of your acoustic guitar.
With that said…
There are generally 3 ways to record acoustic guitar:
- Recording with a single condenser mic
- Recording with two condenser mics
- Acoustic DI method
First up…
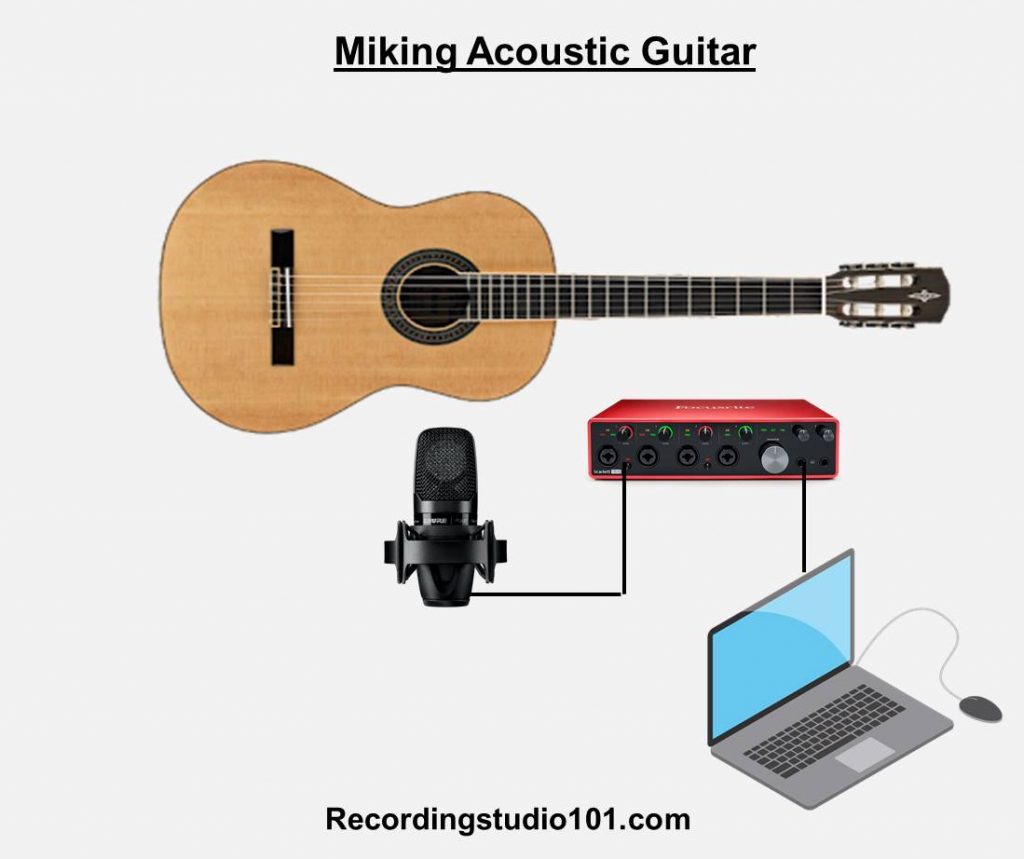
1. Recording with a single condenser mic
This method of recording acoustic guitar with a single condenser microphone is the most popular method used by home musicians.
Because acoustic guitar tends to be brighter than electrics, we use condenser mics to record those crisp high frequencies.
What you will need:
- A good large-diaphragm condenser mic
- An audio interface with XLR mic input and phantom power
- XLR cables
- A mic stand
A large-diaphragm condenser mic is the preferred way to capture acoustic guitar because they are more sensitive and capture a greater amount of detail from your guitar.
Position the mic in such a way that you can record the detail / nuance that you want from the guitar.
The general rule of thumb is to place the mic 3 feet away from the guitar and point it directly at the sound hole to capture the rich sound of the sound hole and the attack of the guitar strings.
When recording acoustic guitar:
- To get more bass from the guitar, point the microphone closer to the soundhole. This increases the proximity effect and the low-end response.
- For more brightness and treble, point the mic closer to the fretboard.
Dynamics can also be used to record acoustic guitar, but because they are less sensitive and capture less detail, you will have to bring it closer to the guitar to get a clearer sound.
Up next…
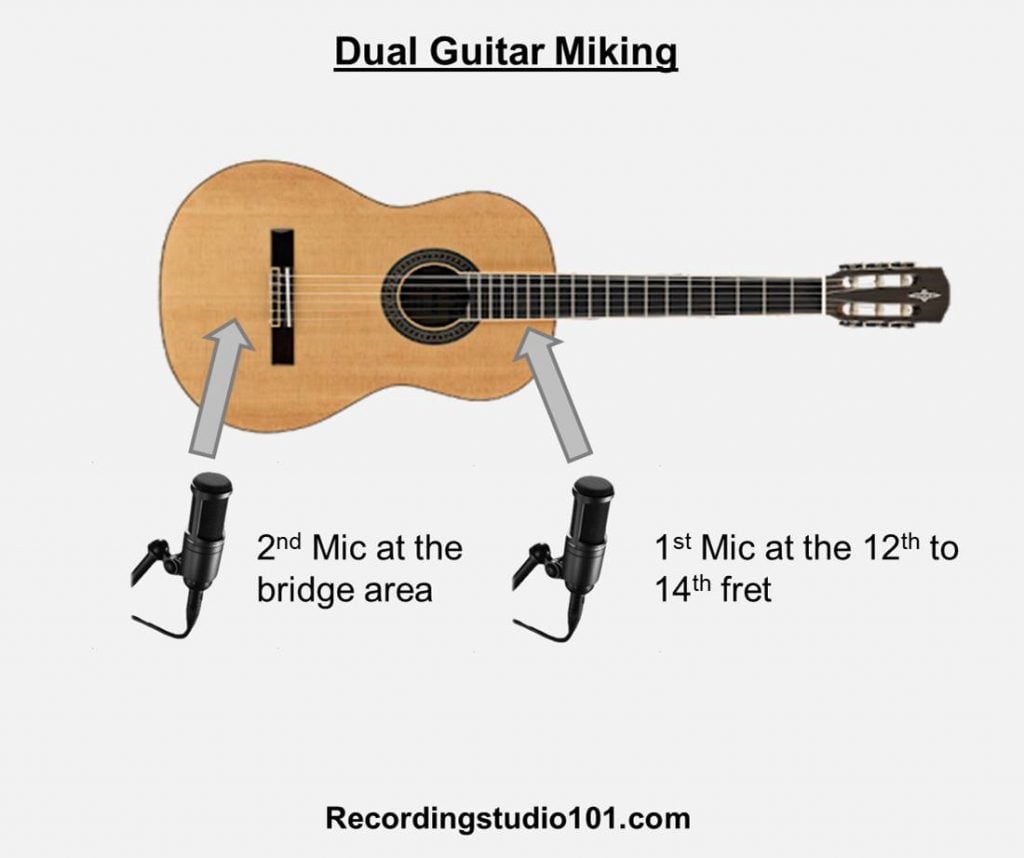
2. Two Mic / Stereo ‘XY’ Miking
A two mic setup gives you way more control over the sound quality.
One of the more popular ways to do this is the XY ‘stereo’ technique using two condenser microphones.
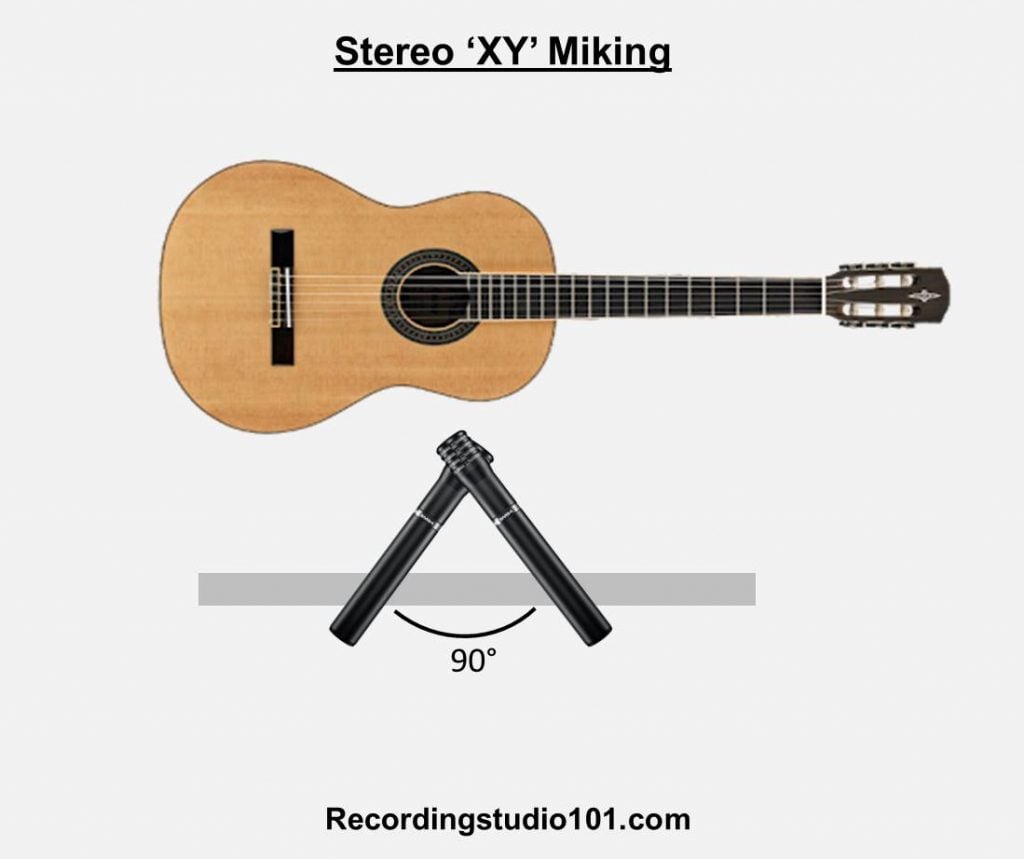
To use this method, you will need to:
- Align the microphones so that they are at a 90 degree angle to each other
- Place the tips of the mics on top of each other
- Align their axis around the twelfth fret of the guitar
This stereo recording method is effective because it provides a wide stereo image and a wider sonic spectrum for your guitar.
Alternatively, you can:
- Place the first mic at the 12th to 14th fret
- Place the second mic at the bridge for more bass
By capturing sound with two mics, you allow your guitar to sound “larger than life” and much more engaging…
What you will need:
- Two large-diaphragm condenser mics
- An audio interface with XY inputs and phantom power
- XLR cables
- Two mic stands
Up next…
3. Recording direct in (DI)
Recording with a condenser mic may not be ideal if you have a room with less than ideal acoustics…
This is because a condenser mic will pick up reflections and standing waves that could make your recording sound really bad.
Although not ideal, a simple way to avoid these issues is to record with an acoustic DI (direct insert) by plugging in your guitar directly into a DI input.
There are 2 ways to do this:
- Plug into the audio interface – since most audio interfaces come with DI inputs, you can try to plug your guitar into the audio interface and play directly
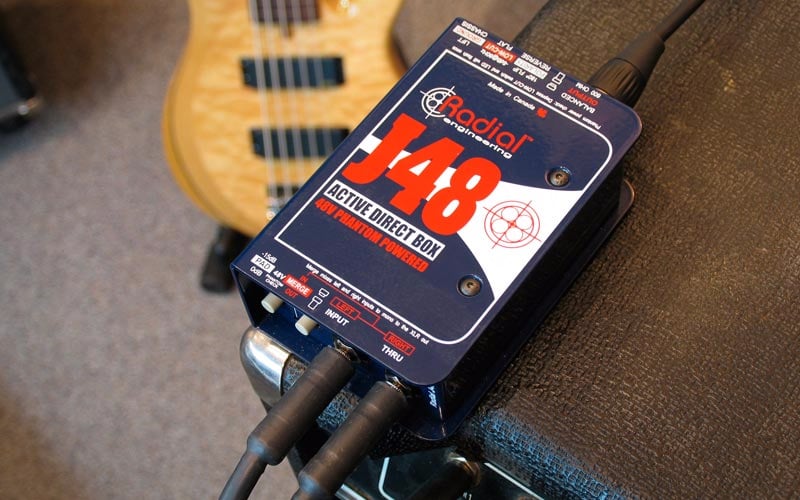
- Use a Direct Box – if the Dis in your audio interface aren’t power enough, this may create too much noise. Use a direct box instead for more power.
Specifically, an acoustic DI box is recommended because they have more power and can capture the high-end detail and frequency nuances of an acoustic guitar.
Here’s what you need:
- Audio interface with DI inputs, or
- Acoustic Direct Box
With that said, recording acoustic DI can make your recordings sound dry and stale. It’s still not a substitute for good old-fashioned miking.
Up next…
How to record bass guitar
There are generally 4 ways to record bass at home:
- Miking the bass cabinet/amp
- Recording the line-output of an amp
- Recording with a DI
- A combination of DI and miking
First up…
1. Miking the Bass Cabinet
Miking the bass cabinet / amp is the old-fashioned way of recording bass at home…
By doing this, you can record the actual sound of you amp. If you love the sound of your amp, this is one of the best ways to record guitar.
What you will need:
- Bass amp/cabinet
- DI Box (optional, but recommended)
- Dynamic / bass mic
- Audio interface
- XLR cables
- Cable Stand
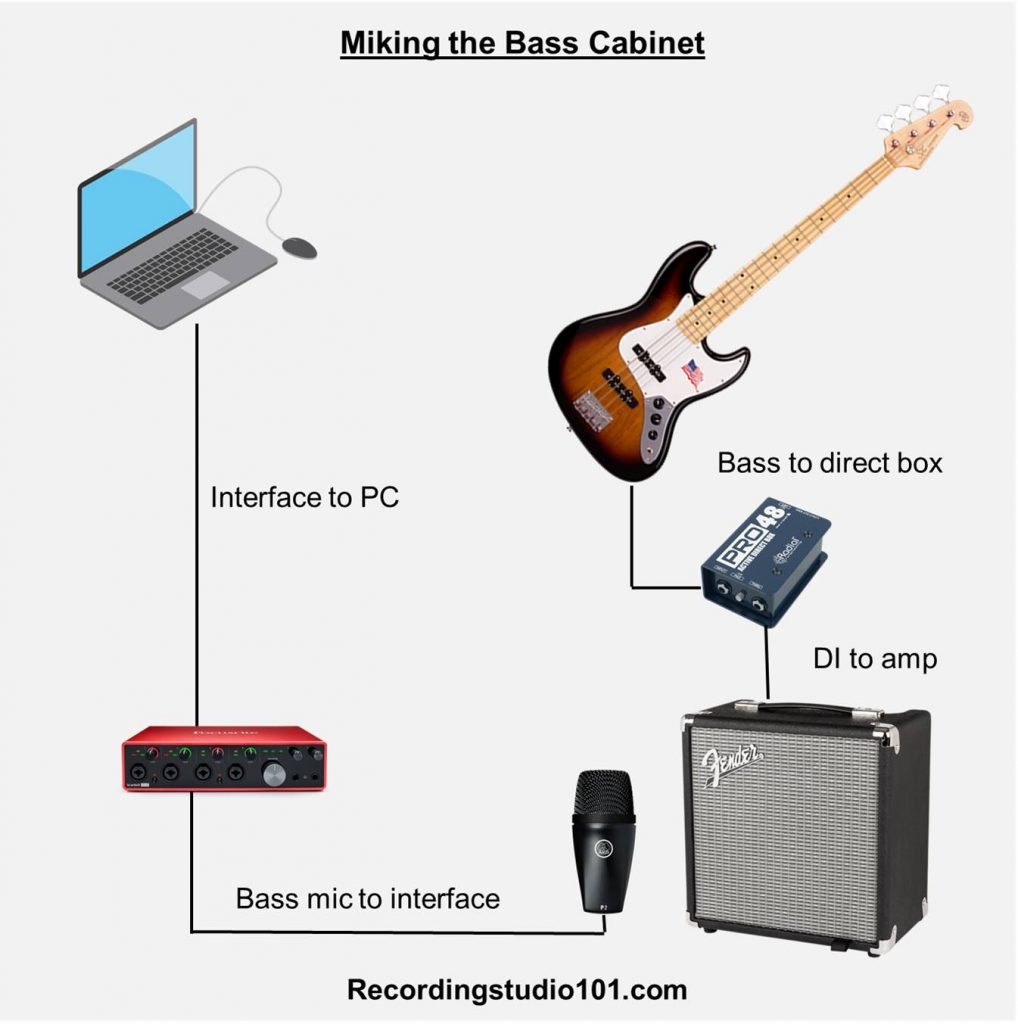
For better sound, we recommend placing the mic between 2 – 6 inches away from the cabinet with the mic pointing at the center of the amp.
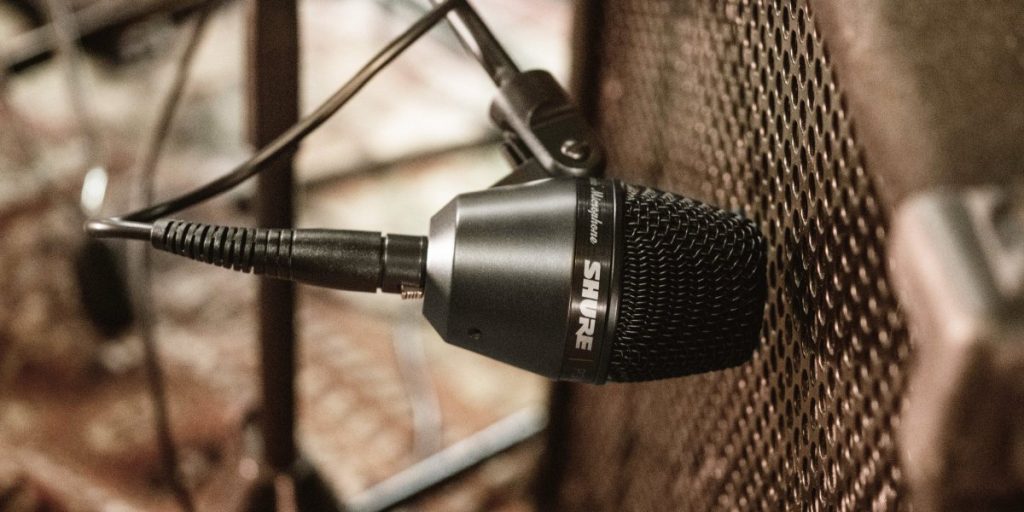
Although dynamic mics are better for recording bass amps (due to their lower sensitivity), there are some mics that are designed specifically to record bass…
These are known as bass mics.
Here are some recommended bass mics:
Up next…
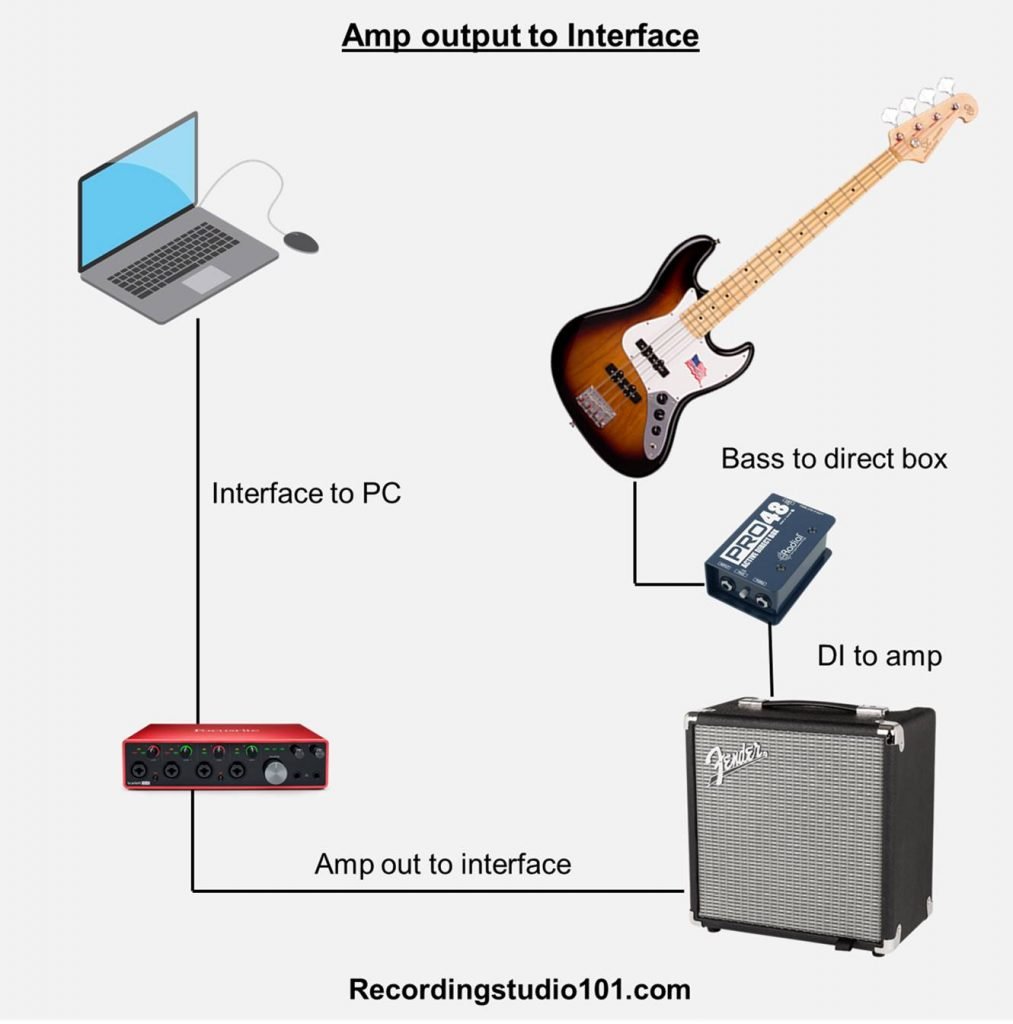
2. Record the line-output of the amp
To record the line output of the amp, you will have to:
- Connect the guitar to the amp
- Connect the amp’s line output to the line input of the audio interface
- Connect the audio interface to your PC
And that’s it!
This is a good option if you want to record the sound of your amp but don’t want to go through the trouble of miking the amp…
However, you will need to tweak the volume on your guitar, amp and audio interface to get optimal sound performance…
What you will need:
- Bass amp/cabinet
- Audio interface
- XLR cables
- Cable Stand
The greatest benefit of recording line-out is that it will add the amp’s color to the sound before recording it.
If you are using a DI, you can also compare the amp line out with a miked amp by recording both at the same time.
Up next…
3. DI only
The simplest method of all…
Recording your bass via direct in simply involves plugging it into a direct box or audio interface with DI inputs. This allows your bass to be recorded directly into your DAW as a dry track.
What you will need:
- DI Box
- Audio interface
- Guitar cables
When choosing a DI Box, you will need to consider:
- For passive bass, use an active DI
- For active bass, use a passive DI
Why this difference? Because:
- On a regular passive bass, the electrical current from the pickup passes through a single tone/volume control and out through the lead to the DI box.
- On an active bass, the electrical signal comes out from the pickup and runs into a powered pre-amplifier, so you don’t need an active DI
Since most audio interfaces nowadays come with DI inputs, you can also plug in your guitar into the audio interface directly if it is DI input supported…
Reamping the DI
Alot of musicians like to record the performance DI and then reamp it. In this way, you can send the recorded bass signal back to the amp and record that through line-out or using a mic…
This allows you to get a clean performance and change the tone or volume with the knobs on the amp.
Up next…
4. Combination of condenser mic and DI
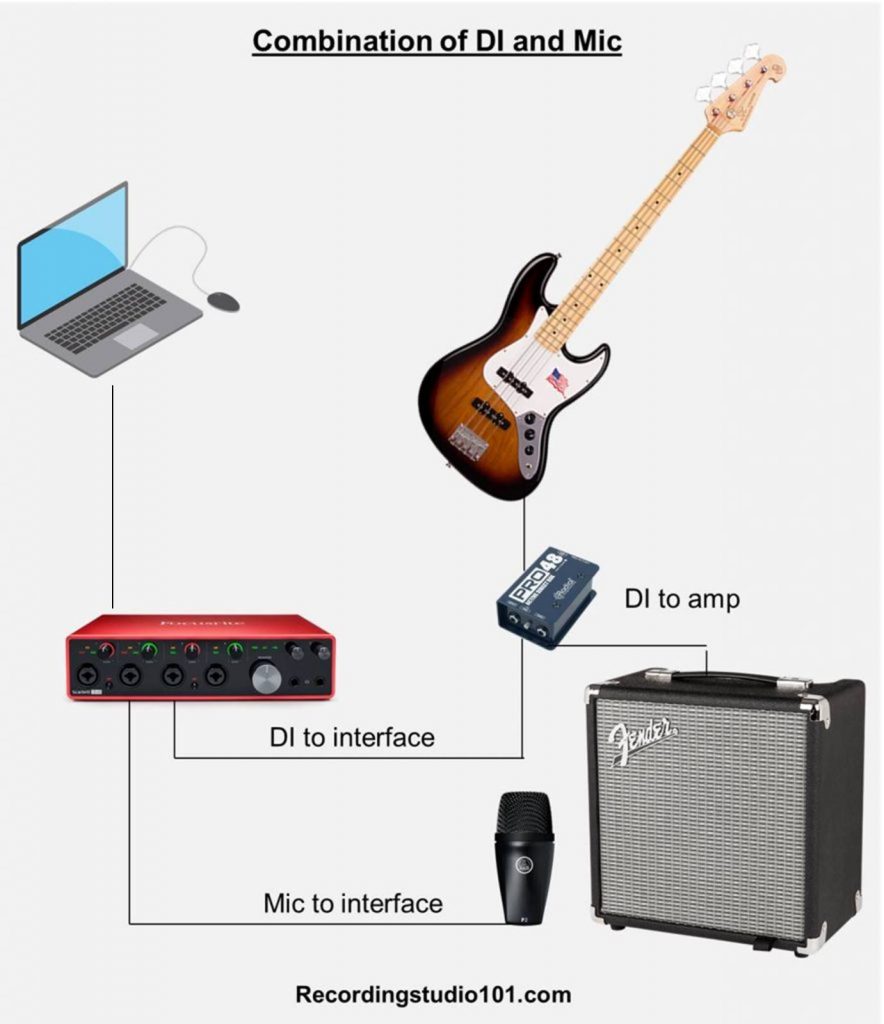
Because the sound of a DI can sound rather dry and uninteresting, some musicians like to record guitar using both DI and condenser mic signals to add flare to the overall recording.
The beauty of this method is that you can capture BOTH the clean signal from your guitar while capturing the tone coming from the sound hole via the mic.
Up next…
How to record electric guitar
Recording electric guitar essentially follows the same techniques as recording bass.
We will briefly summarize the most common 3 techniques…
- Recording DI
- Miking the guitar amp
- Reamping
First up…
1. Recording DI
By plugging your electric guitar into a DI, you can record the sound of your guitar either through an audio interface or amp.
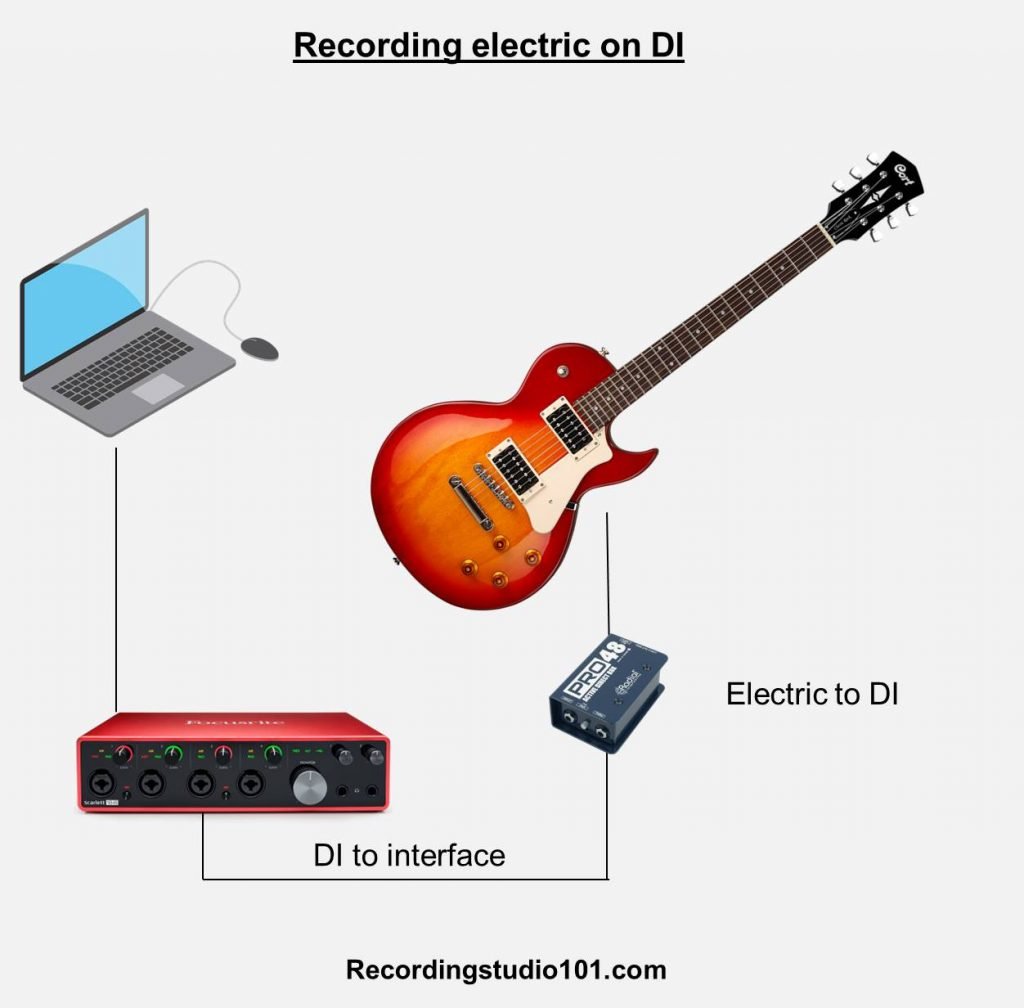
Having said that…
Since the DI box allows you to split the signal into two separate outputs…
You can actually record two tracks with a single take.
To do this, you can:
- Plug the guitar into a DI and connect it to an audio interface to record the ‘dry’ sound, and
- Plug the guitar into a DI and connect it to an amp for direct miking
This method is particularly useful if you want to re-amp your guitar tracks later on…
Because recording DI via an audio interface can cause your tracks to sound ‘dry’, consider using an amp simulator to add sound effects.
Here are some good options worth checking out:
Despite using an amp simulator, some musicians still prefer to hear the ‘real thing’, which is why some musicians insist on…
2. Miking the guitar amp
This is essentially the same technique as recording a bass amp.
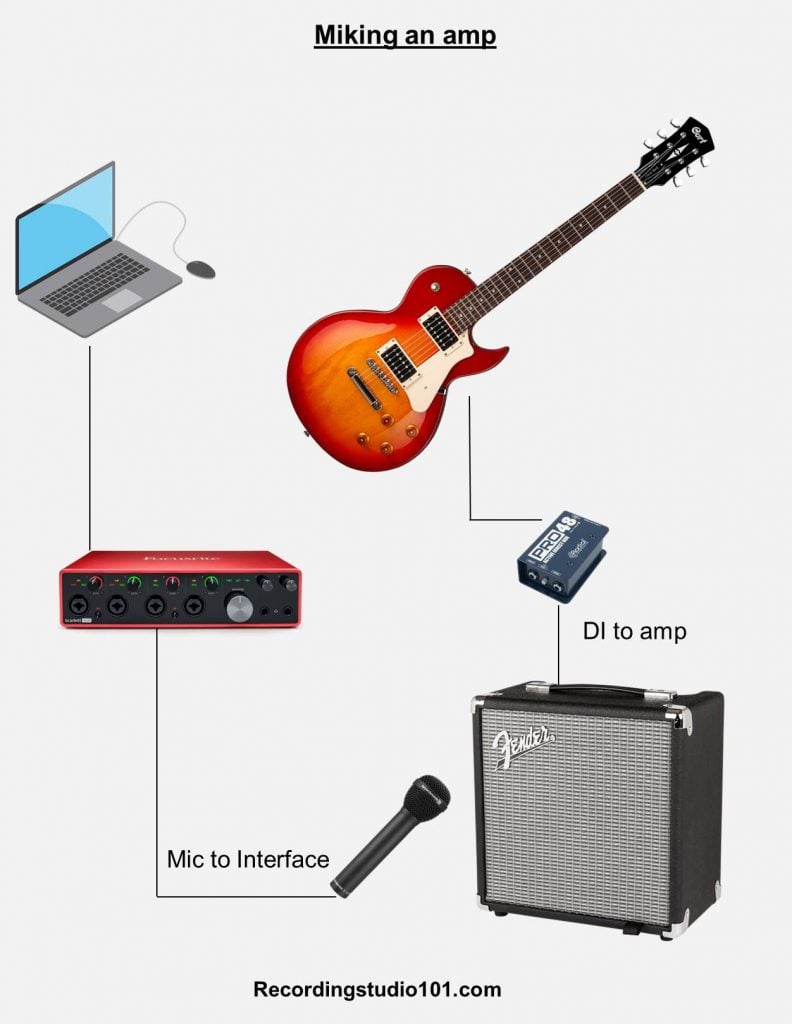
The main difference is that you should use a dynamic instead of bass mic for recording electric guitar…
Dynamic mics are the recommended option for miking cabinets because they are not as sensitive as condensers and won’t likely cause any noise during recording. They are great for a getting a punchy rock sound.
Condensers can also work if your room is sufficiently treated enough. A small diaphragm condenser such as the AKG1000s will record a clean and full-bodied sound from the amp.
If you are using the classic Shure SM57s, you will need an XLR lead to connect the mic to the audio interface input.
How to position the mic/amp?
Start by pointing the mic towards the amp speaker in the center with around 2 – 6 inches distance.
From there, you may want to do the following:
- Adjust the angle and position of your mic to get the desired sound
- Reposition the amp away from reflective walls or corners to minimize bass/reflections
- Tilt the amp at an angle to adjust the tone and change the way you hear the sound
You may be surprised at the different sound combinations you can come up with just by repositioning your mic/amp in your room!
Up next…
3. Re-amping
What is reamping?
Reamping is basically the process of taking an existing signal from your instrument and sending that signal out through a device that changes the line level signal into an instrument signal.
This allows you to take an existing signal and re-record it through an amp so that you can get the right sound for the song.
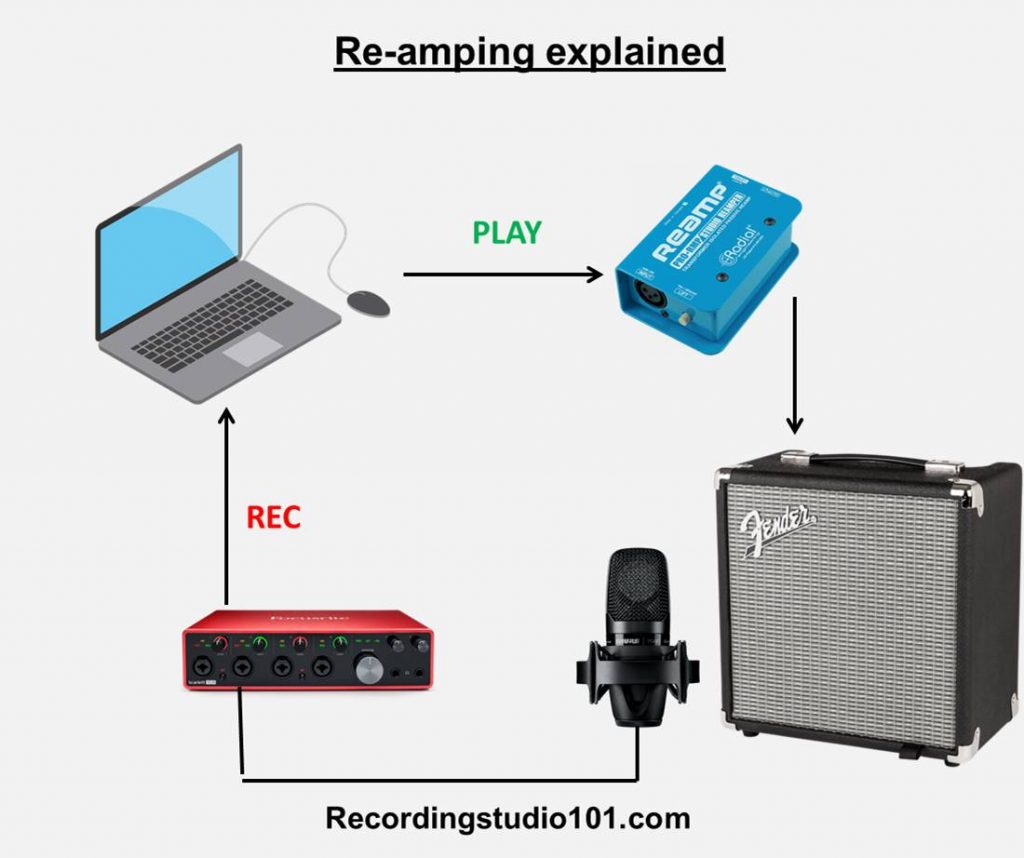
The process of reamping is a 2-stage process:
- Step 1: Record the guitar to your PC
- Step 2: Reamp by sending the guitar signal output back to the amp
By doing this, you can move the mics around, add sound effects and change amps until you get the desired sound that you are looking for.
To do this, you will need a reamping box.
A reamping box converts low-impedance line signals (from your PC) to high-impedance, unbalanced instrument level signals to the amp. This allows the guitar amp to sound the same way as a live guitar would when recorded.
Here are some recommended reamping boxes:
And that’s it!
Next Steps
Now that you can effectively record guitar, check out this post on how to record better vocals:
To learn how to upgrade your home recording studio, check out this post: